Skip to content


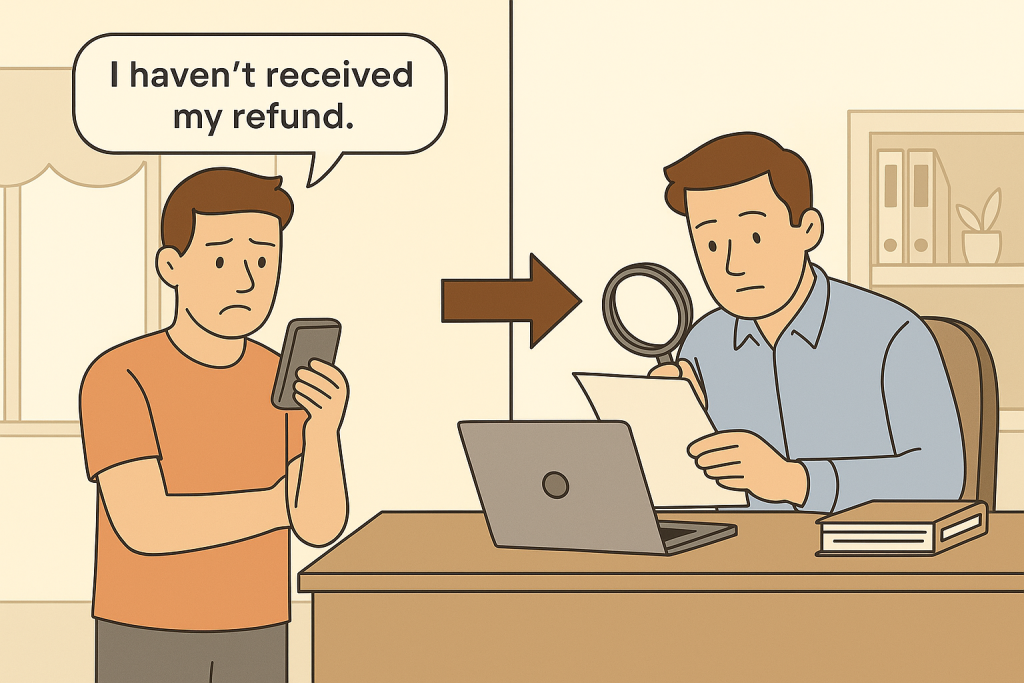
“Hey, can you show me how you usually handle this?”
That’s how most customer service workflows begin. It was not in a Notion doc nor during onboarding, but it was a quick favor between teammates.
You walk someone through a refund or a tricky escalation. A few weeks later, someone else asks. Before long, you’ve become the unofficial playbook.
This works until your team grows or you’re sick.
That’s when you realize: it’s not enough just for you to know how to handle things. Everyone should.
A good workflow helps your team act with clarity, so customers don’t wait and agents don’t hesitate.
In this guide, I’ll explain what a customer service workflow is and suggest some workflows you can set up for your team.
Let’s get started.
Table of Contents
- What is a customer service workflow?
- Benefits of creating customer service workflows
- 5 customer service workflows your team needs
- 1. Customer Support Workflow
- 2. Product Feedback Workflow
- 3. Customer Order Workflow
- 4. Customer Onboarding Workflow
- 5. Cart Abandonment Workflow
- 6. Complaint Resolution Workflow
- 7. Account Update Workflow
- 8. Proactive Customer Outreach Workflow
- 9. Loyalty and Retention Workflow
- 10. Escalation Workflow
- 11. Chatbot Workflow
- Designing an effective customer service workflow (Step-by-Step Guide)
- Step 1: Start by finding what’s slowing your team down
- Step 2: Map the path every ticket should follow
- Step 3: Bring other teams into the design early on.
- Step 4: Automate the steps agents shouldn’t do manually
- Step 5: Test the workflow with real tickets before launch
- Step 6: Measure what’s working and fix what isn’t
- Challenges in implementing customer service workflows
- Why do customer service workflows decide how good your support really is?
- Frequently Asked Questions
What is a customer service workflow?
A customer service workflow is a step-by-step process designed by the company to ensure that all customer support functions are performed efficiently, without error. Think of it as a blueprint that makes the lives of the employees easier by giving them a standard, repeatable sequence to adhere to.
Benefits of creating customer service workflows
There are several benefits to creating customer service workflows for your organization:
- Workflows can help you identify and fix the pain points and inefficiencies that may be frustrating your customers.
- The process of onboarding new team members becomes smoother because there’s a system they can fall into. They already know the course of action and what’s expected of them in each instance. This allows them to hit the ground running quickly.
- When you create a workflow, you scrutinize the process closely, which helps you learn about any steps that can be automated partially or completely. This frees up your team’s time and allows them to focus on more complex and impactful tasks.
- Lastly, by having a documented system in place, you’re able to create a consistent experience for your customer each and every time.
5 customer service workflows your team needs
Here are five important customer service workflows you’ll need in order to enhance your team’s productivity and boost customer experience:
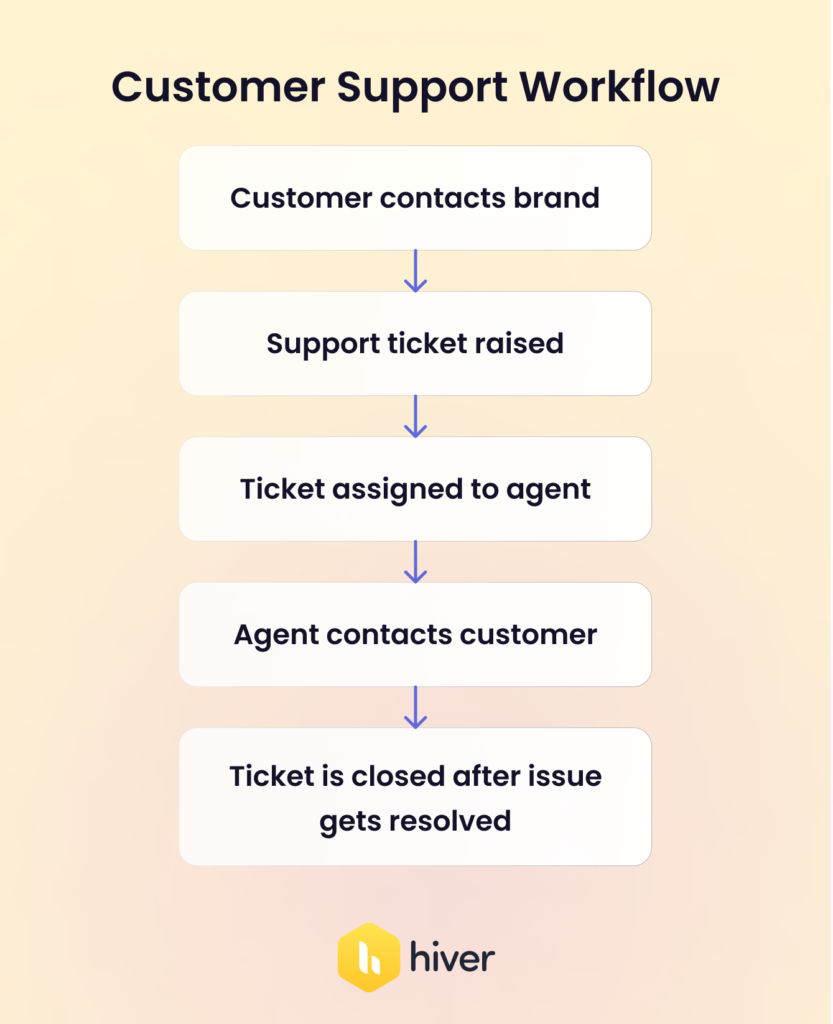
1. Customer Support Workflow
When you think of customer service, the first thing that comes to mind is complaint handling – a customer reaching out to find a solution for any issue that they may have faced. No matter what kind of product or service your company provides, there’s one non-negotiable – a timely and satisfactory solution.
An example of a customer support workflow would look something like this:
- The customer gets in touch with the problem they’re facing.
- A support ticket is raised, and a level of severity is assigned to it. This step can be fully automated.
- The ticket is assigned to a support agent.
- The agent contacts the customer and tries to understand the issue.
- If possible, the agent will try to solve the issue on the first interaction itself. If not, they explain the next steps and/or redirect the customer to another department within the company.
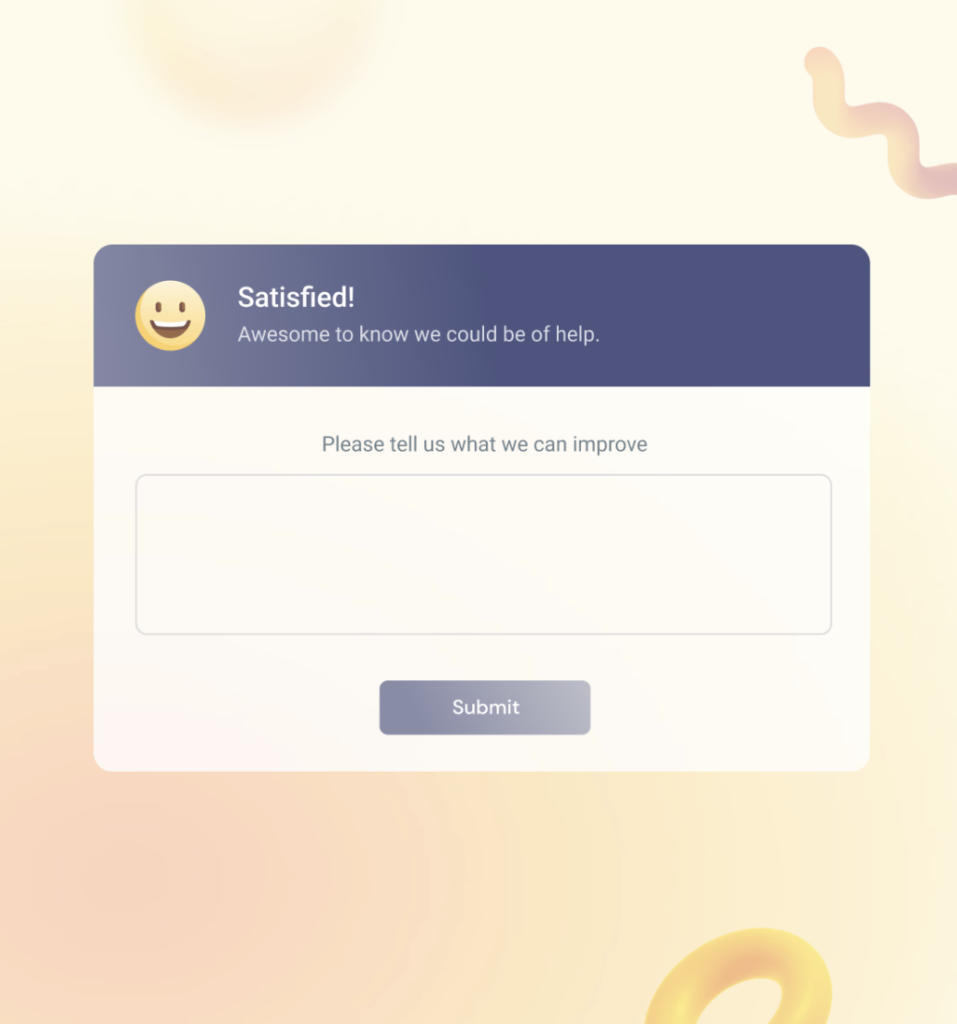
- Once the problem is resolved and the customer is satisfied, the ticket is closed and a feedback form is sent to the customer.
2. Product Feedback Workflow
The product feedback workflow essentially collects and documents feedback from your customers while also letting them know that their feedback is valued.
The workflow here is simple and looks like this:
- The customer receives the product or service.
- Send an email requesting their feedback/review of the product/service.
- Thank the customer for the feedback and document it, so that it can be used to fine-tune the product/service.

3. Customer Order Workflow
The customer order workflow is important as it dictates the buying experience. Not wanting your customers to have a tough time when they’re already trying to buy your product or service is a no-brainer.
Consider the example of an e-commerce business. A customer order workflow, in this case, helps you fine-tune the process of shipping, returns, billing, or any mistakes made during delivery.
An example of a customer order workflow for an e-commerce company would look like this:
- The customer places an order, which is received by an order management system.
- Send an email/SMS confirming the order to the customer.
- The order is then sent to the accounting software and the warehouse.
- Dispatch the product to the customer.
- Create a tracking number and share it with the customer.
- The customer receives the product, and the order is closed.

Upon receiving the product, the customer may have complaints or may be facing an issue with it, in which case the customer support workflow comes in for issue resolution. A workflow for digital products/services would look similar, with steps such as shipping removed from it.
4. Customer Onboarding Workflow
A customer onboarding workflow involves nurturing new customers to ensure that they are set up correctly and comfortable using your product. You consider the customers’ goals and deliver instructions on how to best use your product to achieve them.
A customer onboarding workflow for a SaaS company would look like this:
- Send a welcome email containing useful resources like how-to guides and product FAQs.
- Customer logs in to your product for the first time.
- Offer a product walkthrough to the customer to help them get started.
- Reach out 2-3 weeks after the customer begins using the product to discuss how they’re finding the product.
- Send follow-up emails with additional tips and pointers or any feature updates.

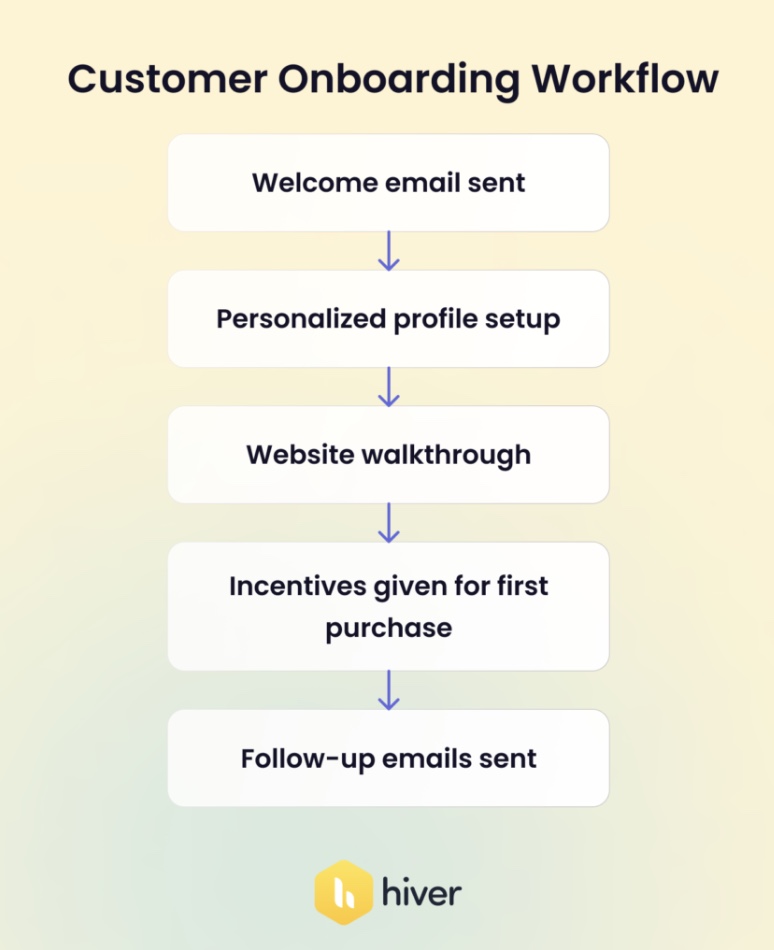
Now, you might think this only applies to a B2B company, but that’s not how we see it. For any business, how you onboard a customer sets the tone and the foundation for the relationship. Be it an e-commerce site, a gift shop, or a tech company. Here’s how the workflow would look for an apparel brand:
- Send out a welcome email when the user signs up on your website
- Set up a personalized profile for your customer after collecting information such as address, contact details, communication preferences, and what kind of product categories they’re interested in.
- Do a quick walkthrough of your website, showing the user how to navigate it seamlessly. For instance, show them where they can wish-list items and where they can check their shopping cart.
- Provide attractive incentives like discount coupons or free shipping to encourage the user to make their first purchase.
- Send follow-up emails to collect feedback and send personalised recommendations or special offers.
In both cases, you’ll need to determine whether or not the customers are responding or engaging with your communication. If not, it would make sense to change the frequency of your emails or optimize the content of those emails.
5. Cart Abandonment Workflow
We’re all customers ourselves, and sometimes we add items to our shopping cart online and for whatever reason, decide to either delay the purchase or abandon it altogether.
Shopping cart abandonment is a huge problem for businesses online. You’ve got the customer on your website, and they’ve reached the point of making a purchase. But then, at the very last stage, they drop off.
Having a high cart abandonment rate could be indicative of a problem with your buying process or high shipping/delivery costs or even something like refund policies.
Having a workflow for when a customer abandons the cart at the final stage is a great way of recovering lost sales:
- The customer browses your website and adds a product to the cart.
- The customer gets to the final stage i.e., the checkout page, and abandons the cart.
- Send an email and/or SMS informing the customer that their purchase was incomplete or that they’ve left items in their cart.
- Provide alternative, cheaper options or special offers.
- If the customer completes the purchase, collect feedback on their buying process to understand areas for improvement.

By having a shopping cart abandonment workflow as shown above, you might be able to reduce the number of potential customers who are dropping off. Additionally, by collecting feedback after the purchase is complete, you gain valuable insights on how you can iron out the buying process to make it easier for your customers.
6. Complaint Resolution Workflow
When a customer takes the time to share what went wrong, how you respond makes all the difference. Some complaints get resolved quickly, others drag on, and no one’s sure what “done” looks like.
It’s a simple, repeatable process your team follows to handle customer complaints. This makes sure customers feel heard and things don’t slip through the cracks.
This workflow is important because:
- Customers feel heard and respected, even when things go wrong
- Your team knows exactly how to respond.
- You spot repeat issues early and fix them at the source.
Let’s say a customer writes in:
“I paid for express shipping but my package is still stuck in transit. No update. No response. This is unacceptable.”
Here’s how a solid workflow turns that situation around:
- The message comes in via email.
- A support ticket is automatically created and tagged as a “shipping delay.”
- Within seconds, the customer gets a reply: “Thanks for flagging this—we’re looking into it right away and will keep you posted.”
- The ticket gets routed to the logistics specialist on your team.
- The agent checks tracking info, spots a delay at the warehouse, and reaches out to the shipping provider.
- Within 30 minutes, they respond to the customer with a full update, “Your package was held up at our warehouse due to a stock issue. It’s now been prioritized for dispatch. You’ll receive an updated tracking link shortly—and we’ve refunded your shipping fee.”
- The agent adds a personal note, “Really sorry about the trouble—thanks for your patience while we fixed this.”
- Once the customer confirms everything’s sorted, a quick feedback request is sent.
- The agent also flags the delay internally, so ops can review if this is a one-off or part of a larger pattern.

With a clear workflow, your team is clear on what needs to be done and isn’t on damage control.
7. Account Update Workflow
These kinds of requests show up in your queue all the time:
- “Can you change the email on my account?”
- “I need to update my billing info.”
- “Please remove my old phone number.”
They seem straightforward, but even simple updates can go wrong without a clear process; an incorrect edit, missed verification, or a security gap can create problems later.
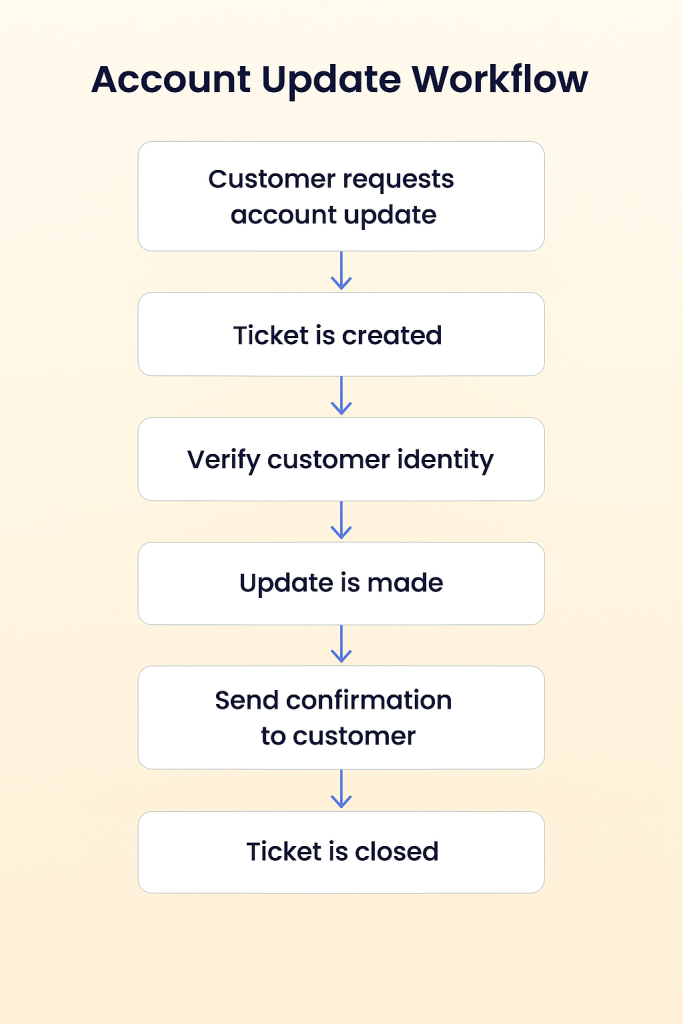
An account update workflow is a defined process for handling any customer request to modify their account information. It ensures that every change. Whether it’s an email address, billing detail, or phone number, it’s verified, logged, and confirmed before it’s applied.
It’s helpful to have, because it:
- Avoids making mistakes or delays in updating sensitive information.
- Gives customers a sense of control over their dates.
- Makes your team’s job easier.
- Keeps your systems clean and consistent
For example, a customer emails support asking to change the email linked to their account. Here’s how that workflow would go:
- A ticket is created and tagged “Account Update – Email.”
- The agent verifies the customer’s identity, maybe by asking for their last invoice or confirming account details.
- Once verified, the agent updates the email in your system or triggers an automated change.
- The customer gets a confirmation message, “We’ve updated your email to jane.doe@example.com. If this wasn’t you, let us know immediately.”
- For sensitive updates (like billing info), a second layer of confirmation may be required. This can be either through OTP, a secure link, or confirmation from the new email.
- The change is logged, and the ticket is marked complete.
8. Proactive Customer Outreach Workflow
In most cases, support conversations start when something goes wrong. However, the best ones happen before the customer even thinks about asking.
This can be a quick check-in, a reminder about a feature, or a heads-up before a renewal. It shows customers that you’re paying attention to them.
It’s a structured way to regularly engage with your customers without waiting for them to raise a hand. This proactiveness helps you build stronger relationships, reduce churn, and spot issues before they escalate.
How’s it useful? It:
- Keeps customers engaged even when they don’t reach out
- Helps reduce support volume by addressing common questions early
- Builds trust and loyalty through consistent, helpful communication.
- Makes your brand feel more human.
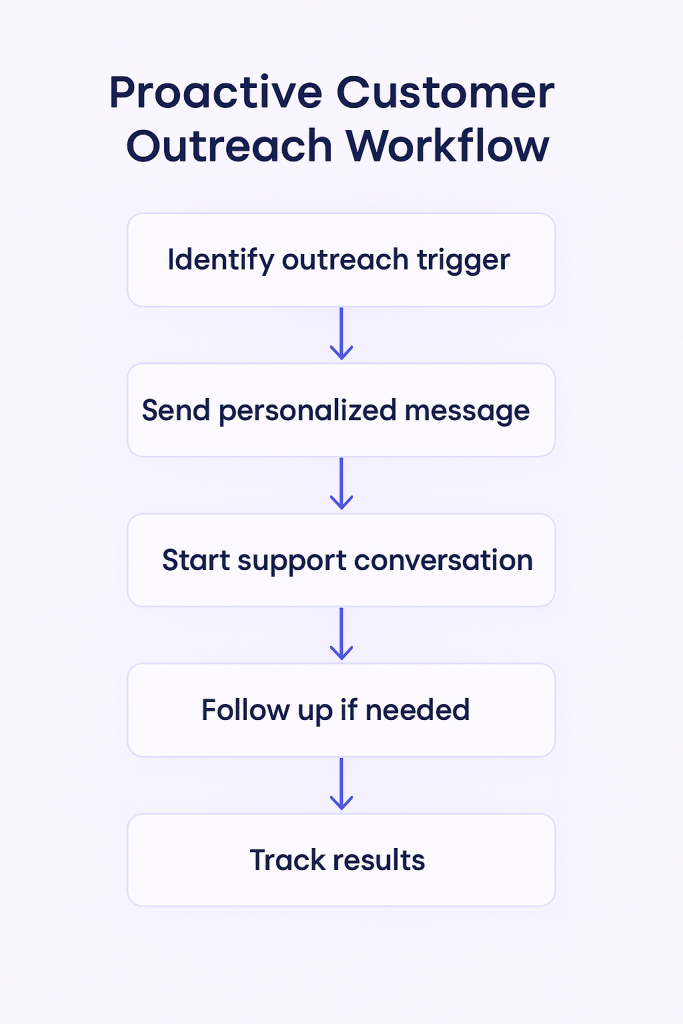
Let’s say a customer signed up two weeks ago but hasn’t used one of your key features. Your workflow would look like this:
- You’ve set up an automated check for inactivity during the first 14 days.
- The system flags this customer and creates a task for the support or success team or sends an automated message.
- The message says, “Hi Alex, noticed you haven’t tried out [Feature]. Want a quick walkthrough or tips to get started?”
- If Alex replies, the conversation flows like any support ticket, from answering questions to booking a call.
- If there’s no reply, you follow up once more after a few days, or move them to a nurture sequence with helpful content.
- You track open rates, replies, and outcomes, and tweak the message timing or content to improve engagement over time.
This kind of outreach doesn’t have to be complicated. Even a few thoughtful touchpoints can make your customers feel like you’re in it with them.
9. Loyalty and Retention Workflow
Keeping a customer is easier and way more cost-effective. But this loyalty is something you earn with consistent actions.
Retention workflow is a repeatable process your team uses to identify long-term or high-value customers and stay connected before they drift away. Whether it’s a thank-you note, a check-in, or a nudge to re-engage
Why is it important?
- Helps reduce churn by catching at-risk customers early.
- Strengthens relationships with your most loyal users.
- Gives your team visibility into customer health signals.
For example, let’s say, you spot a customer who’s been with you for over a year but hasn’t logged in for the past month.
Here’s how the workflow might look:
- Your CRM flags this customer as both loyal and potentially at-risk (12+ months active, but 30 days of inactivity).
- The customer is segmented automatically into a “Re-engagement – High Value” list.
- The system sends a message or assigns a task to your team, “Hey Jamie, we noticed you haven’t been around lately. Anything we can help with?”
- If the customer responds, support or success picks it up, offering assistance, sharing updates, or even jumping on a quick call if needed.
- If there’s no response, they get a follow-up a few days later, with a small gesture like a discount or feature tip based on their past usage.
- For higher-risk signs (like late payments or critical feedback), your success or sales team is looped in for a more hands-on recovery effort.
- All actions and responses are tracked, so you will know what worked and what didn’t next time.

You don’t need a big loyalty program to retain customers. Just a simple, thoughtful workflow that reminds them why they chose you in the first place.
10. Escalation Workflow
Some issues can’t be solved with a quick reply or a help doc link. They need someone with deeper expertise or higher access. And when that moment comes, your team shouldn’t be scrambling.
That’s where an escalation workflow comes in. It’s a clear handoff process your team follows when an issue needs to be passed to someone else like tech support, billing, or a team lead. It makes sure the right people step in at the right time, and customers don’t get stuck waiting.
Why this matters:
- Keeps high-stakes issues from falling through the cracks
- Speeds up resolution time for complex or urgent cases
- Supports your team by giving them a clear path when they’re stuck
- Helps maintain SLAs and customer trust during tough situations
A customer reaches out:
“We upgraded our plan two days ago, but half our team still can’t access key features. This is affecting a live project, we need a fix now.”
Here’s how your workflow would look like:
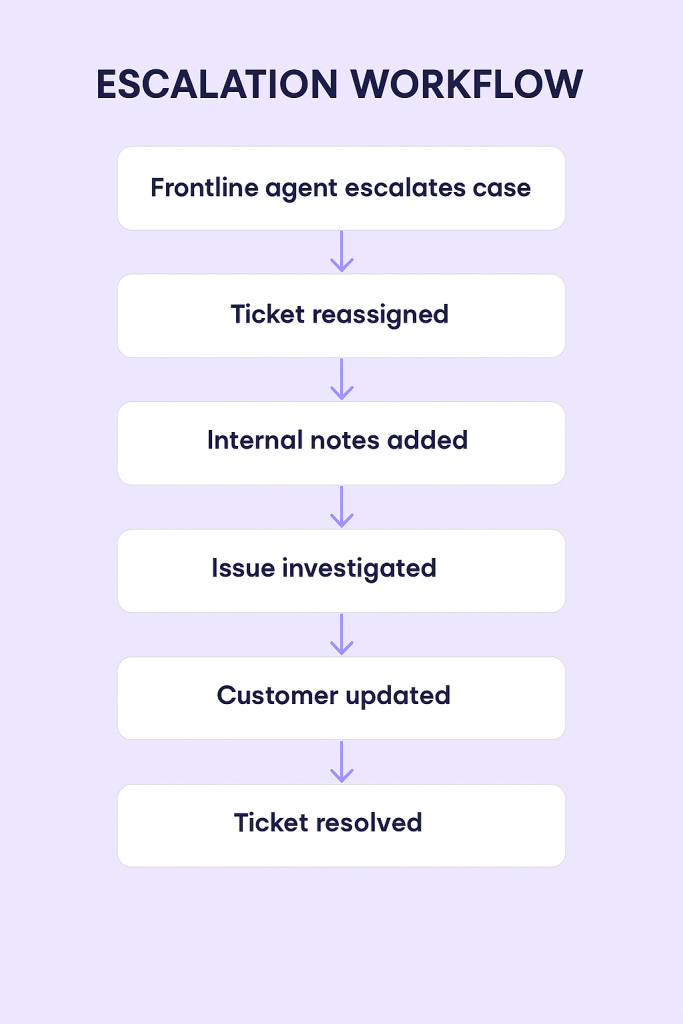
- The frontline agent recognizes it’s urgent, blocking work, and could cost the customer money.
- They tag the ticket as “High Priority – Escalation” and route it directly to the technical team.
- Internal notes are added, “Customer upgraded to Pro on June 10. Users are still locked out of the advanced dashboard. Blocking their client work, need to fix ASAP.”
- The tech team picks it up within the SLA window, investigates permissions, and pushes a backend fix within the hour.
- Meanwhile, the customer gets a quick update, “We’ve escalated this to our engineering team. They’re on it and we’ll update you within 30 minutes.”
- Once fixed, the original agent loops back with a summary: “This was caused by a sync error during your upgrade. It’s fixed now. All users should have access. Let me know if anything looks off.”
- The resolution is logged, and the issue is flagged for internal review to avoid repeat errors.
When should you escalate (and when not to)?
Escalation should be used when it’s truly needed, here’s a simple guide:
Escalate when:
- The issue is blocking critical work or tied to a top-tier customer.
- It’s outside an agent’s permissions or expertise.
- The customer explicitly requests a manager or expresses serious dissatisfaction.
Don’t escalate when: - The issue can be solved with better internal tools or guidance.
- The agent hasn’t attempted basic troubleshooting.
- It’s a standard question that’s already been documented.
Clear workflows show customers you’re serious about solving problems, not passing them around.
11. Chatbot Workflow
Support teams often get buried under repetitive queries like “Where’s my order?”, “How do I reset my password?”, “Can I update my address?”.
These questions don’t need an agent’s time, yet they clog queues and delay responses for customers who genuinely need help. Customers, meanwhile, expect instant answers, especially on channels like live chat or WhatsApp. This can lead to longer queues, frustrated customers, and burnt-out agents.
That’s where a chatbot workflow steps in. It automates routine interactions so customers get quick, accurate responses, and agents can focus on the issues that need their expertise.
Research shows that chatbots can handle up to 79–80% of repetitive queries, speeding up response times by nearly 3x while cutting support costs by 30% or more
Here’s how your chatbot workflow would look:
- Audit your ticket history: Tag questions that appear frequently, such as delivery updates, account issues, payment status, and refunds. These “low-hanging” candidate topics are prime for automation.
- Choose one channel to start: Start with the channel where your team receives the most volume, like website chat, WhatsApp, or Facebook Messenger.
- Map the conversation path: Keep the flow short and logical, like
What do you need help with?” → “Order status” → “Enter your order ID” → “Your order is out for delivery.”
- Integrate with backend systems: Connect your chatbot to order management systems, CRMs, or ticketing tools (like Hiver). Let the bot fetch live data or create tickets automatically.
- Set handoff rules early: Design triggers like “agent,” “complex,” or “refund request” to route conversations to human agents. Always pass full context (chat log + metadata) so the handoff is seamless.
- Define KPIs and monitor them closely: Track metrics such as the “containment rate” (the percentage of conversations the bot resolves), time to resolution, and fall-off points where users drop out. Use weekly reviews to refine intents, responses, and flow structure.

For example, Rio was preparing for a Kickstarter launch and faced a surge of pre-sales and post-sales queries. They didn’t have the bandwidth to scale a full support team immediately. They deployed a chatbot (via Crescendo.ai) to automate common queries.
The result was dramatic. The chatbot successfully managed 90% of pre-sale queries and approx. 60% of post-sale issues without requiring human intervention, resulting in a monthly savings of nearly $10,000 in support costs for the team. Agents could then focus solely on complex customer issues, improving both morale and response quality.
Designing an effective customer service workflow (Step-by-Step Guide)
Most customer service teams work hard but still struggle with slow responses, duplicate work, and missed follow-ups because of their poor structure.
A good workflow is built from how your customers actually move through your support process. Here’s a clear, step-by-step guide to designing a customer service workflow that works in the real world.
Step 1: Start by finding what’s slowing your team down
Before building anything, know what’s actually broken. Most teams design workflows from guesswork instead of data.
- Pull the last 60–90 days of tickets. Look for patterns: What types of issues keep recurring? Which ones take the longest to resolve?
- Group them into categories, e.g., order delays, refunds, account access, product bugs.
- Sit with your agents. Ask what slows them down: missing details, unclear ownership, repeated manual work.
For example, when reviewing tickets, you notice refund-related queries make up 25% of total volume. Many take over three days because agents wait for Finance confirmation or lack access to refund tools.
Once you’ve done this, pick the top 2–3 high-volume issues. That’s where a new workflow will create the most impact.
Step 2: Map the path every ticket should follow
Now that you know which issue to solve, turn that into a sequence of steps that anyone on your team could follow, even on day one.
Here’s how to do it:
- Write down what happens from the moment a customer raises an issue to when it’s marked resolved.
- For each step, define:
- Who owns it (agent, finance, product, etc.)
- What happens next (the exact action, not a vague label like “process refund”)
- When it moves forward (the condition that marks completion)
- Add rules for movement between stages — e.g., a ticket can’t move to “resolved” until the customer confirms or an SLA is met
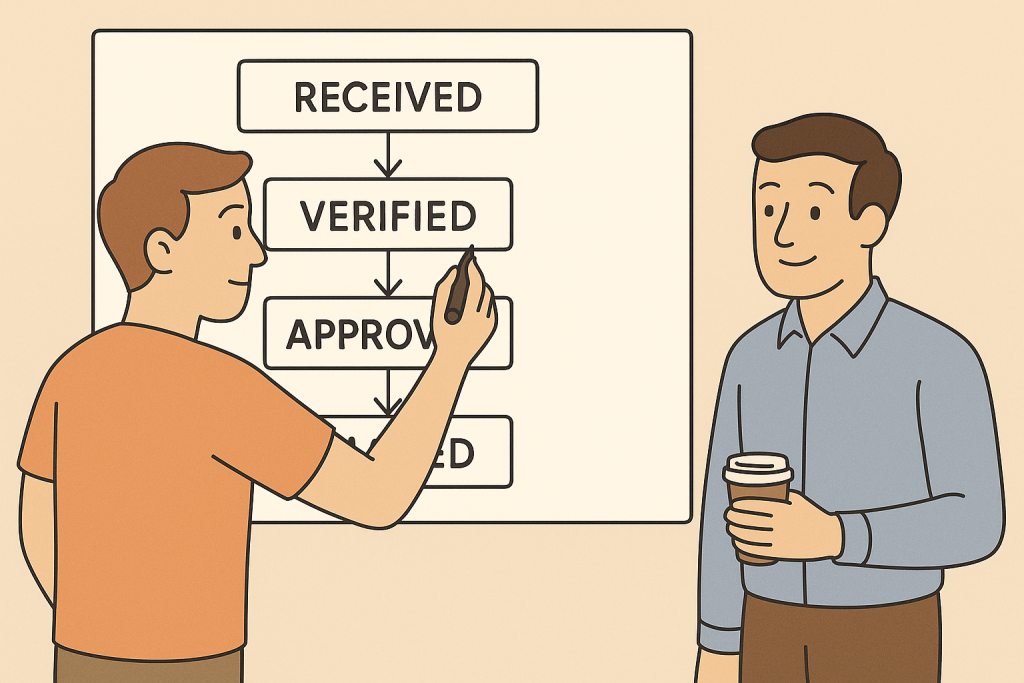
For example, this would be the refund workflow:
- Ticket tagged “refund”, assigned to Billing.
- Agent verifies order details.
- Refund initiated in the payment portal.
- Confirmation sent to customer.
- Ticket closed and logged.
Documenting every step prevents skipped actions, missed updates, and “I thought someone else was handling it” moments. Everyone should know what happens next and who’s responsible for it.
Step 3: Bring other teams into the design early on.
Support rarely works in isolation, but most workflows are designed as if it does. You need Finance to approve refunds, Logistics to confirm shipments or returns, Product to resolve technical bugs, and Customer Success to follow up on onboarding or renewal issues.
Here’s how to do it:
- Bring in anyone whose work touches the customer, including support, finance, logistics, success, or product teams.
- Walk through the process together and mark dependencies (e.g., refund approval before confirmation email).
- Assign a “workflow owner” in each department to manage updates.
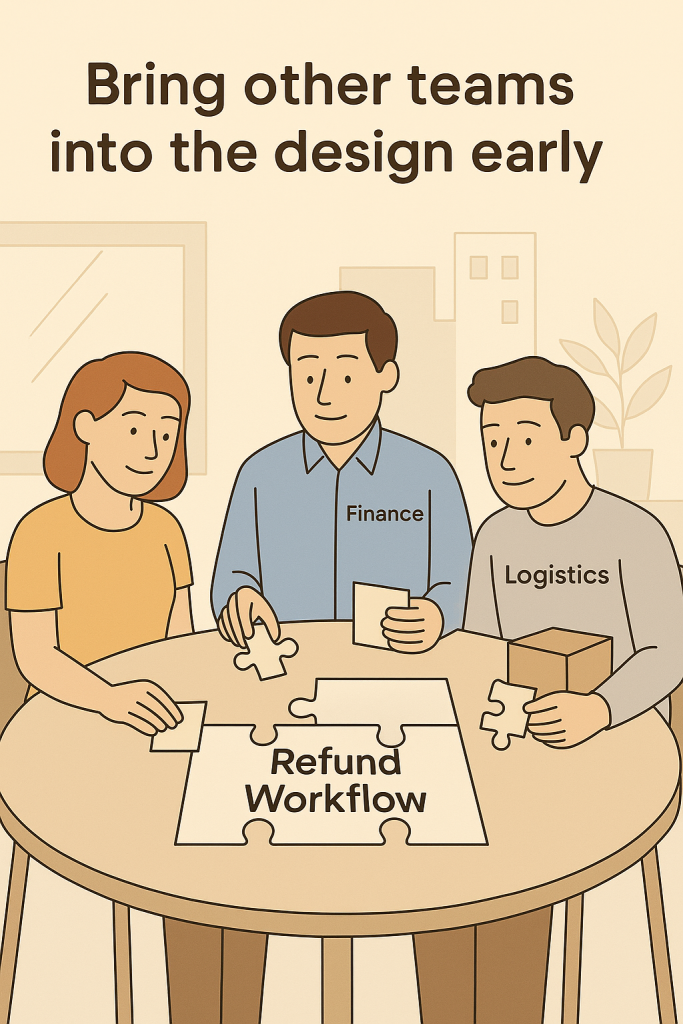
For example, you find that Finance needs proof of transaction before processing, and Logistics must confirm item return. The final workflow now includes a step for attaching proof documents before escalation, preventing Finance from rejecting incomplete requests.
Everyone understands their part, so tickets move smoothly between teams without back-and-forth emails.
Step 4: Automate the steps agents shouldn’t do manually
Once the flow is stable, let the system handle the predictable steps. Here’s how to do it:
- Create automation rules in your help desk:
- Auto-assign tickets based on tags or keywords.
- Send status updates when a ticket changes stage.
- Escalate unresolved cases after a set time.
- Leave complex, judgment-based tasks (like complaints or product feedback) to agents.

For example, when a customer writes, “I’d like a refund,” the system auto-tags it as “Refund Request,” routes it to Finance, and sends an acknowledgment:
“We’ve received your refund request and are verifying the details. You’ll hear from us soon.”
This automation means agents no longer spend time triaging or manually forwarding tickets; the workflow does it for them.
Step 5: Test the workflow with real tickets before launch
Even the best workflows will break in the first week if they aren’t tested with real tickets.
Here’s how to do it:
- Pick 20–30 tickets from live traffic and process them through the new workflow.
- Watch how agents move through it. Do they know which step comes next? Are any fields missing?
- Adjust automation triggers and notifications based on what you learn.
For example, during testing, agents report that Finance keeps sending tickets back because the “reason for refund” isn’t captured properly. You update the workflow by adding a required field for “refund reason” before escalation.
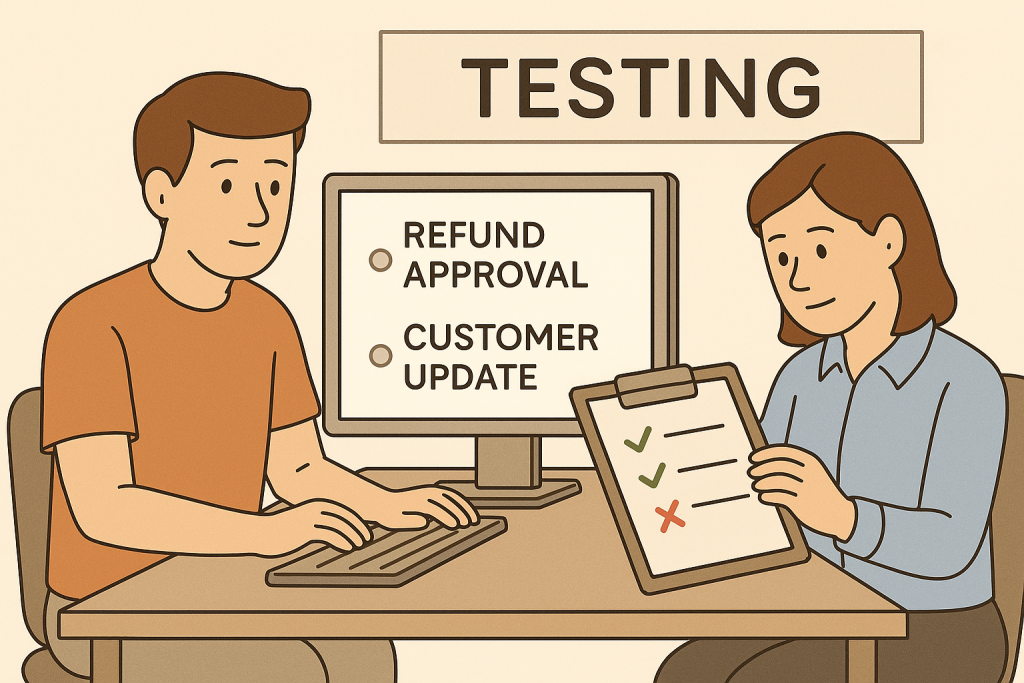
Testing on a small scale helps you catch real-world gaps before the workflow affects hundreds of customers.
Step 6: Measure what’s working and fix what isn’t
Workflows aren’t “set and forget.” They need constant refinement. Here’s how to do it:
- Track a few key metrics for each workflow:
- First response time (FRT)
- Resolution time
- Escalation rate
- CSAT or customer effort score
- Review these numbers every two weeks.
- When you spot delays or repeated escalations, go back to your workflow and simplify that step or add automation.
For example, after two weeks, you see the refund resolution time drop from 72 hours to 36, but CSAT dipped slightly because customers weren’t notified once the refund cleared. You add an automated “refund complete” message, and CSAT rises the next month.
Consistent review keeps workflows aligned with changing customer behavior and business goals.
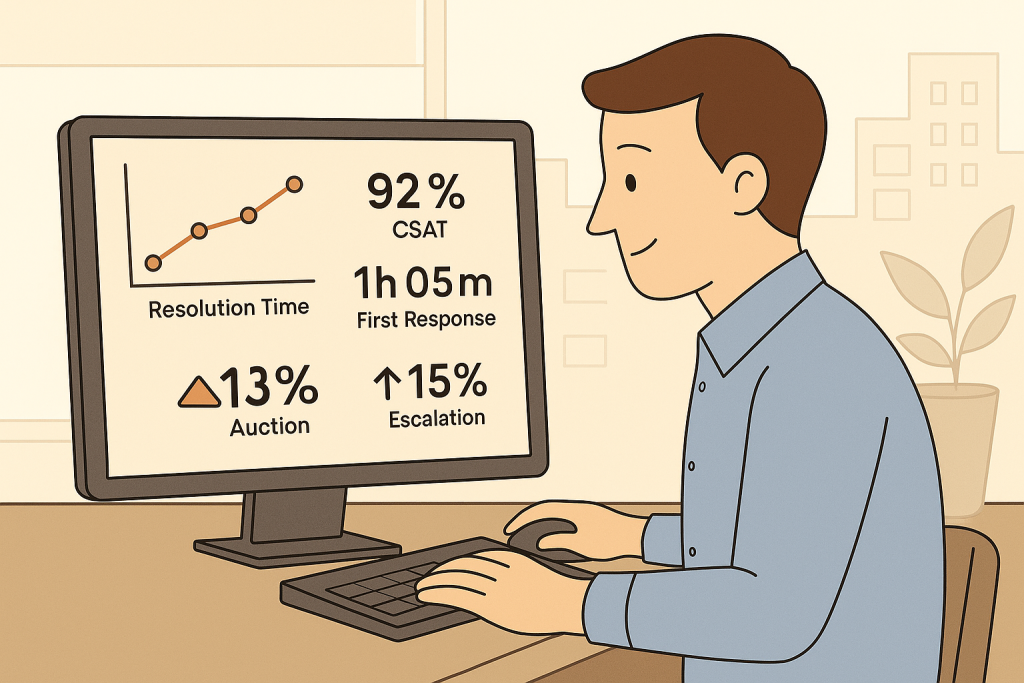
Pro Tip: Build a dashboard that clearly shows where support is smooth and where it’s slowing down.
Challenges in implementing customer service workflows
Designing a workflow is easy on paper. Getting people, tools, and data to work together in real life is where most teams stumble.
Here are the most common challenges and how to fix them.
1. Resistance to change: Agents default to old habits because new workflows feel complicated or unnecessary.
↪️ Involve them early in design. Test the process with a small group, gather feedback, and show metrics that prove it saves time.
2. Overcomplicating the process: Too many stages, approvals, and conditions turn a simple flow into a maze.
↪️ Strip it down to the essentials. If a step doesn’t change the outcome or accountability, remove it. Aim for clarity over completeness.
3. Tool limitations: Your help desk or CRM can’t automate what the workflow requires, like manual tagging, routing, or follow-ups, which slow everything down.
↪️ Start simple within current tools. Automate high-impact steps first (like ticket assignment or SLA alerts). Upgrade tools only when automation bottlenecks consistently show up.
4. Lack of visibility across teams: Support, finance, or logistics teams each manage their part in isolation, updates are missed, and ownership gets lost.
↪️ Use shared dashboards or workflow views. Everyone should be able to see the ticket status, next step, and the responsible owner in real-time.
5. Scaling problems as volume grows: A workflow that works for 50 tickets a day collapses at 500, bottlenecks multiply, and SLAs break.
↪️ Build scalability in early. Add load-balancing rules (e.g., auto-routing based on availability), periodic workflow reviews, and automation layers that expand with ticket volume.
6. Missing ownership: Nobody maintains the workflow, so over time, steps break, automations fail, and outdated rules persist.
↪️ Assign a workflow owner for each major process — responsible for updates, audits, and reporting performance metrics monthly.
Most workflow problems come from neglect. When teams regularly own, review, and simplify their workflows, structure becomes a strength.
Why do customer service workflows decide how good your support really is?
You can hire great agents, train endlessly, and buy the best tools, but without strong customer service workflows, none of it holds together.
A good workflow defines ownership, eliminates wait time between steps, and prevents tickets from getting stuck or lost. It keeps operations predictable, even when volumes spike.
With the right customer service software, you can design workflows that reduce manual effort, automate escalations, and provide everyone with visibility into what’s happening.
If your support feels chaotic, start here. Fix the workflow, and you fix the experience for both your team and your customers.
Frequently Asked Questions
1. What are the 7 C’s of customer service?
Clarity, Consistency, Communication, Credibility, Courtesy, Competence, and Commitment. These are the basics every support interaction should follow.
2. What are the 5 steps of a workflow?
Trigger the workflow (e.g. a customer sends a request)
Assign the task
Take action
Review or follow up
Close the loop
3. What are the 5 main elements of customer service?
Speed
Accuracy
Empathy
Accessibility
Follow-through
4. What are the 7 steps of customer service?
Greet the customer
Understand the issue
Acknowledge and show empathy
Offer a solution
Take action
Confirm resolution
Ask for feedback
5. Why do customer service workflows matter?
Because they take the guesswork out of support. Workflows help your team respond faster, stay consistent, and avoid costly mistakes, so every customer gets the help they need without the wait.
6. What’s the difference between a workflow and a process?
A workflow shows the step-by-step tasks. A process is the bigger picture, including goals, policies, and outcomes.
7. How do I start building customer service workflows?
Start with your most common requests. Map out the steps, assign roles, and look for things you can automate.
Start using Hiver today
- Collaborate with ease
- Manage high email volume
- Leverage AI for stellar service