 Skip to content


Meetings are an unavoidable part of anyone’s work day.
But the most frustrating part about meetings is having to schedule them. What’s even worse is having to schedule meetings with two or more people because then you have to painstakingly message each person, find out their availability, match it with the slots available for other members, and then hit schedule.
Just thinking about it makes you sweat. Doesn’t it?
This is probably why Microsoft Outlook came up with a nifty little feature called the ‘Scheduling Assistant’ to simplify the whole process of scheduling meetings.
In this guide, we discuss how you can use the Scheduling Assistant to coordinate and book meetings without any back and forth.
Table of Contents
- What is the Scheduling Assistant in Outlook?
- How to Use the Scheduling Assistant in Outlook?
- What to Do If I Can’t Find the Scheduling Assistant in Outlook
- Additional Tips While Using the Outlook Scheduling Assistant
- Wrapping Up
What is the Scheduling Assistant in Outlook?
Microsoft’s Scheduling Assistant is a useful Outlook feature that simplifies the process of booking meetings by showing you the availability of your intended participants at a single glance. Not only does it show the availability of attendees, but the Scheduling Assistant can even suggest time slots that work for everyone. This means you don’t have to manually message people or go through their calendars one by one to find a schedule that works for team meetings.
This reduces the endless back and forth between attendees and saves you plenty of time.
You Might Also Like: How to Set Up Microsoft Outlook Filters
How to Use the Scheduling Assistant in Outlook?
If you are new to the Scheduling Assistant feature, here’s a quick guide to help you get started with using it in no time.
- Open outlook.com/calendar
- In the window, click ‘New Meeting’ and you will be taken to the meeting invitation window.
- Add the email IDs of your intended attendees in the ‘Add required attendees’ field.
- Navigate to the ‘Scheduling Assistant’ located at the top of the meeting invitation window.
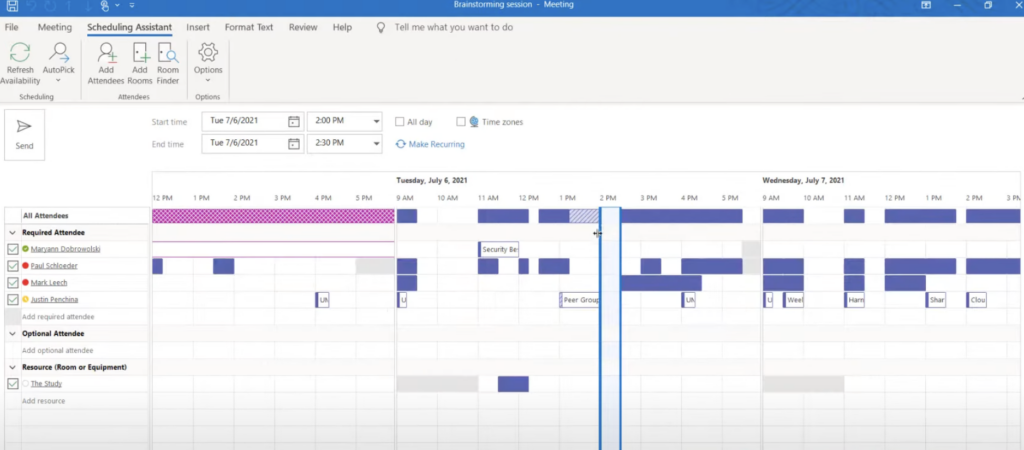
- The calendars of all your attendees will open up side-by-side to each other.

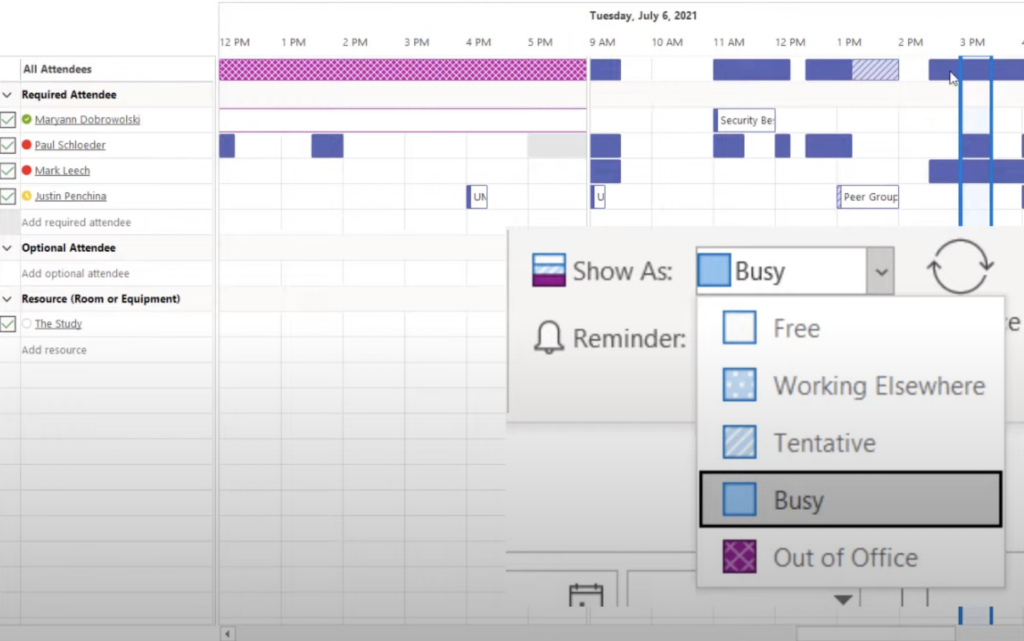
- Outlook uses five different types of color coding to indicate the availability of attendees. They are:
- Blank: Attendees are available
- Light gray with dots: Attendees are working elsewhere
- Light blue hashed: Attendees may be tentatively available
- Dark blue: Attendees are busy
- Dark pink with crosses: Attendees are out of office
- Clearly, the best time to book a meeting is when there is a blank row available across everyone’s calendar.
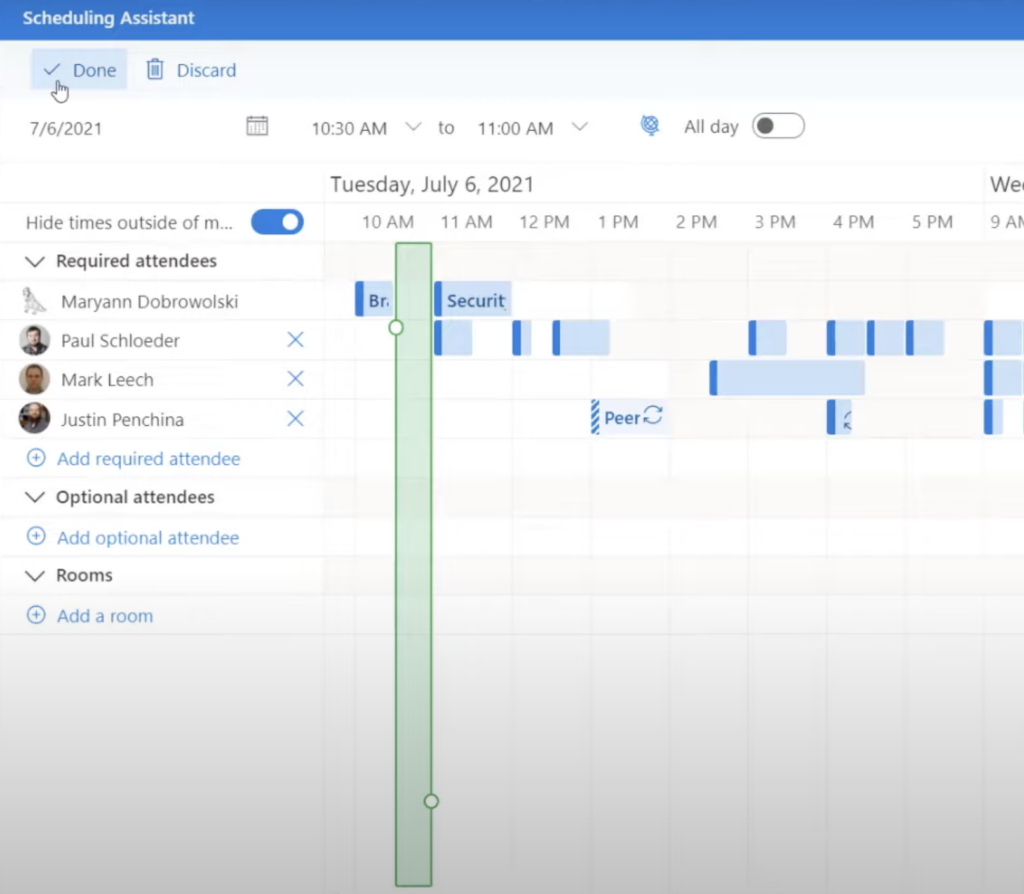
- There is a vertical slider that you can move across the calendar. A red vertical slider will indicate scheduling conflicts while a green vertical will indicate that you’re good to go.
- In case you’re still struggling to find a suitable time, use the Autopick feature (‘Suggested times’ in some versions of Outlook) and it will automatically give you a few time options that could work for everyone in the meeting.
- Once you’ve found a time that works, simply click ‘Done’ and a meeting invite will be sent to your attendees.
Remember: The Scheduling Assistant can display meeting information only for people inside your organization. It does not process scheduling for any attendees outside of your company.
What to Do If I Can’t Find the Scheduling Assistant in Outlook
Some users may not be able to find the Scheduling Assistant in their Outlook window. Here are two reasons why this could be and how you can resolve it to coordinate team meetings better.
1. Update Microsoft Outlook
The Scheduling Assistant may not be visible if you’re using an outdated version of Outlook. In this case, you will need to visit the Microsoft Store, navigate to ‘Downloads and Updates’, and click ‘Get Updates’. Go to Microsoft Outlook and start downloading the update if there’s one.
Once the update is complete, you can go back to Outlook.com/calendar and the Scheduling Assistant should be visible at the top of your window.
2. Enable the Scheduling Assistant on the Outlook ribbon
The Outlook Ribbon is the panel present at the top of your inbox window. It will display multiple options — File, Meeting, Format Text, and others. If you cannot find the ‘Scheduling Assistant’ among the options, it simply means the button has been deactivated from your Outlook Ribbon.

Here’s how you can enable it.
- Go to File at the top of your window
- Select Options >> Customize Ribbon
- From here, you will see a list of options you can enable in the Ribbon.
- Choose the checkbox next to ‘Scheduling Assistant’ to enable the button.
Additional Tips While Using the Outlook Scheduling Assistant
Here are some additional tips you can use to simplify the process of scheduling meetings on Outlook.
1. Define your working hours
Set your preferred working hours in the Calendar to prevent team members from scheduling meetings when you’re out-of-office. You can do this by going to File > Options > Calendar. This will help the Scheduling Assistant suggest your availability more accurately to someone trying to set up a meeting with you.

2. Adjust sharing permissions for your calendar
- If you do not want others to see the details of your meeting, launch your Outlook and then choose the calendar icon on the left panel.

- Under the option ‘My Calendar’ choose the calendar for which you want to change the settings.
- Select the three dots and choose ‘Sharing and Permissions’.

- A pop-up will immediately appear and you can choose ‘Can view when I’m busy’, and you’re done!

Wrapping Up
The Scheduling Assistant in Outlook provides a simple and efficient way to check the availability of the intended attendees for a meeting.
It takes the guesswork and all the back and forth out of the scheduling process and allows you to choose the best meeting times without conflicts or overlaps.
The steps outlined above are the perfect way to get started with using the Scheduling Assistant in Outlook. This feature is an excellent way to coordinate meetings so that you can focus on actually making your meetings more productive and efficient.


