Skip to content


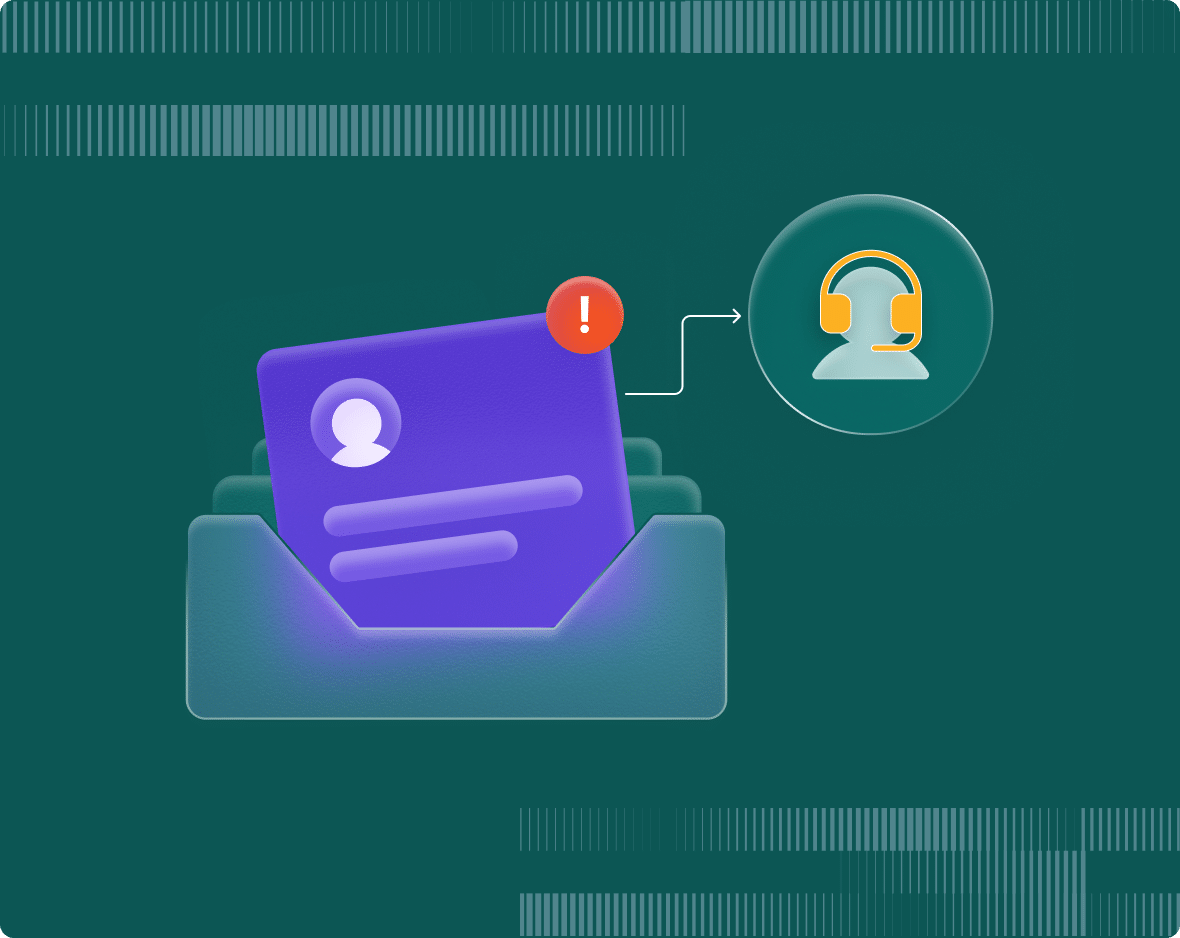
You craft the perfect email, but then the BCC field is just too long!
It takes way too much time typing out a bunch of email addresses just to send the same message to multiple people. Add, remove, double-check – sending a group email can be quite a hassle.
But guess what? There’s an easier way to do it. With distribution lists in Gmail, you can send an email to a group of people with just a few clicks. It’s super easy and will save you loads of time.
In this guide, we’ll explain how to create a distribution list in Gmail. Let’s get started.
Table of Contents
- What is a Distribution List in Gmail?
- How to Create a Distribution List in Gmail
- Drawbacks of Distribution Lists
- How to Send Emails to Your Distribution List
- How to Manage Your Distribution List
- Troubleshooting Common Issues With Distribution Lists
- Distribution Lists Are Great For Mass Communication
- Frequently Asked Questions (FAQs)
What is a Distribution List in Gmail?
A distribution list in Gmail is primarily a group of email contacts clubbed together under the same name. It is a convenient way to send emails to multiple recipients without having to enter each email address individually. This means that when you want to email everyone in the group, you just type the group’s name in the “To” field, and Gmail takes care of the rest.
For example, a distribution list could be named “Project Team” and include email addresses like of your colleagues – john@companyname.com, jane@companyname.com, and doe@companyname.com. When you email “Project Team,” Gmail sends the message to all these contacts.
So, you see, distribution lists are essentially mailing or email lists.
They are incredibly useful for businesses, project teams, or any group of people where you need to send one-to-all communication. It also ensures that everyone gets the message at the same time.
[cta_block]
How to Create a Distribution List in Gmail
Creating a distribution list in Gmail is a pretty straightforward process. Here’s a step-by-step guide on how to do it:
Step 1: Log in with your Google Workspace account. Go to “Google Apps” icon and click on the “Google Contacts” icon.

Step 2: Select the checkboxes beside the contacts you want to add to the new distribution list.

Tip: Got a huge contact list? Simply use the search bar at the top of your Contacts page to quickly narrow down the list. For example, if you want to add your colleagues’ email addresses with the company domain, simply filter by that domain to find them instantly.
Step 3: Click on the ‘Manage label’ icon, as shown below

Step 4: Click on “+ Create label”

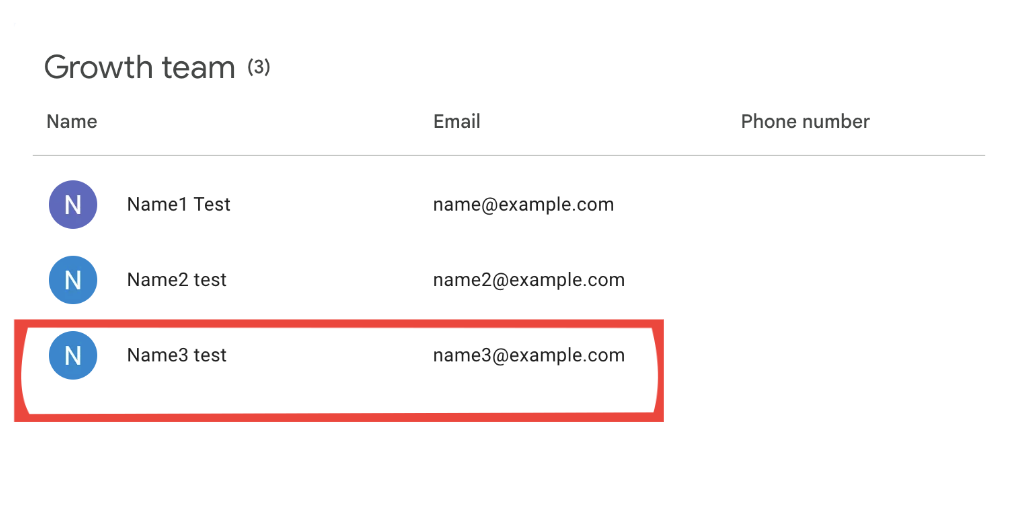
Step 5: Name your label (e.g., “Growth team”). Click “Save” to create the new contact group.

And you’re done creating your distribution list. All your selected contacts will be added to the list.

Drawbacks of Distribution Lists
Gmail’s distribution lists are great for emailing multiple people at once. But, they have some limitations that might not suit everyone.
- You can only add 500 contacts to a distribution list. This limit isn’t ideal for larger teams or a broad audience.
- Distribution lists are designed for one-to-many communication. This means that they’re perfect for sending information out, but not so great when it comes to back-and-forth communication.
- Another drawback is that distribution lists lack collaboration features. It’s difficult to track who has responded or followed up on specific emails. There’s no way to assign emails to specific team members, add notes, or track the status of the emails.
If you find these limitations a bit frustrating, Hiver can be a great alternative. It’s a tool that helps teams access and collaborate on emails that arrive in a shared inbox (info@companyname.com or help@companyname.com).

Hiver helps you overcome the limitations of using distribution lists by offering the following benefits:
- Multiple team members can access and respond to emails from a single shared inbox.
- Assign emails to specific team members, so everyone knows exactly who is handling what.
- Collaborate internally using notes and the @mention feature. This lets you add notes to email threads, making it easier to leave comments or updates for team members without cc-ing or forwarding emails.
- Track the status of emails to see if they have been replied to, are pending, or have been closed.
The platform also offers other essential features like email templates, automations, and analytics, which help streamline your email management workflow and boost team productivity.
How to Send Emails to Your Distribution List
Once your distribution list is created, sending emails becomes easy:
Step 1: Log into your Gmail inbox and click “Compose”.

Step 2: In the “To” field, start typing the name of your list. Gmail will auto-complete the name. Select the new label to which you want to send the mail.

Step 3: Gmail will populate the email addresses. Now compose the email and hit send.

And that’s all! In this way you can send a single email to multiple recipients in your Gmail group
Recommended read: A Quick Guide to Creating and Using a Group Email in Gmail
How to Manage Your Distribution List
So, you’ve set up your distribution list and it’s working great. But what happens when you need to make changes? Perhaps you might need to add a new email address to the list?
We’ll tell you how. Let’s learn how to keep your distribution lists organized, efficient, and up-to-date.
1. Add new contacts
Step 1: Log in with your Gmail account. Go to “Apps” and click on the “Google Contacts” icon.

Step 2: Select new email addresses to add to the label.

Step 3: Click on the ‘Manage labels’ icon.

Step 4: Find and click on the label (distribution list) you want to add contacts to. In this example, the label name is “Growth team.” And then click “Apply” to add them to the list.

That’s all! The new email address will be added to the distribution list (label).
2. Remove contacts from the distribution list
Step 1: Log in with your Google account. Go to “Apps” and click on the “Google Contacts” icon.
Step 2: Click on the label from where you want to remove old contacts from.

Step 3: Select the contacts you want to remove.

Step 4: Click on the three dots on the top right corner of the window and select “Remove from label.”

And that’s how you remove contacts from the distribution list.
3. Rename or delete a distribution list
To rename a distribution list, simply click on the edit icon beside the list. Change the name of the label and click on “Save”.

To delete a distribution list, click on the bin icon beside the list. Choose the appropriate option out of the two:
- Keep all contacts and delete this label – choose this if you want to retain the contact information of the members.
- Delete all contacts and delete this label – choose this if you want to delete the contact information of the members from your contact list.
Finally, click on “Delete”.

Troubleshooting Common Issues With Distribution Lists
Sometimes, things can go awry when distribution lists don’t work like how they should. But that’s okay. We have tried listing down some of the common issues with distribution lists that users have faced with their possible solutions:
1. Bounced emails
Sometimes, you might get notified that emails you send to your distribution list have bounced back.
Solution:
- Double-check if all email addresses in your distribution list are correct.
- Check if there are inactive accounts. Ensure that the email accounts are active. If someone has left the company or changed their email, update your list accordingly.
2. Emails going to the ‘Spam’ folder
At times, your emails may end up in the recipient’s spam folders.
Solution:
- Be mindful of words and phrases that could trigger spam filters, such as “free,” “urgent,” or excessive use of exclamation marks.
- Set up DKIM (DomainKeys Identified Mail) and SPF (Sender Policy Framework) for your domain. This helps email providers verify that your emails are not spam.
3. Unauthenticated Messages
Recipients in your distribution list may see a question mark next to your email, indicating it’s unauthenticated.
Solution:
- Set up DKIM and SPF for your domain. These authentication methods help ensure your emails are recognized as safe. Follow Google’s guide on setting up DKIM and SPF for your domain.
- Implement RSA keys to enhance email security and authenticity. An RSA key is a type of cryptographic key used to secure data transmission over the internet.
4. Recipients Not Receiving Emails
Even after checking all the email addresses, some recipients never receive your emails.
Solution:
- Ask your recipients to check their spam folders. If they’ve received your email in the spam folder, ask them to mark the email as ‘not spam’.
- If the problem persists, reach out to Gmail’s support team for assistance.
Also read: Troubleshooting Common Google Groups Issues
Distribution Lists Are Great For Mass Communication
So there you go! Whether you’re managing a team, organizing an event, or just staying in touch with a group, distribution lists make it easy to send emails to multiple recipients with just a few clicks.
By following this guide, you can create and manage your distribution list quite easily.
But what if you need more than just a distribution list? If you’re looking for a way to manage emails collaboratively with your team, what you’re looking for is a shared inbox. They allow multiple team members to access and respond to emails from a single account.
Hiver offers a shared inbox feature that integrates seamlessly with your inbox. It’s easy to set up and intuitive to use. With Hiver, you can assign, track, and collaborate on incoming emails directly within your Gmail interface.
Frequently Asked Questions (FAQs)
- What is the difference between a distribution list and a shared inbox?
A distribution list is a collection of email addresses grouped under a single label or name. When you send an email to this list, it goes to all the addresses in the group. A shared inbox, on the other hand, allows multiple users to access and manage the same email account. It’s ideal for teams that need to collaborate on emails, as everyone can see and respond to incoming messages. Here’s a detailed comparison between the two.
- Can I create a distribution list on the Gmail mobile app?
Currently, you can manage and email your contact groups from the Gmail mobile app. but creating a new distribution list is best done on a desktop.
- Is there a limit on the number of contacts I can add to a distribution list?
Yes, Gmail typically allows you to add up to 500 contacts to a single distribution list. For larger groups, you might consider using Google Groups or segmenting your contacts into multiple lists.
- How do I import contacts into Google Contacts?
To import contacts, go to Google Contacts, click on the “Import” button on the left sidebar, and upload a CSV file containing your contacts.
- What happens if I send an email to a distribution list and one of the addresses is incorrect?
If an email address in your distribution list is incorrect, you will receive a bounce-back notification indicating which address failed.