- The elementary of Google Docs
- The advanced functions of Google Docs
- Data security in Google Docs
Google Docs is one of the most beloved word processing apps out there. It is a free, web-based, and lets you do everything a typical word processing app should: create documents, edit text, add pictures, and more.
However, what makes it stand out is how it helps teams collaborate — you can share documents with anyone, others can add comments, you can chat inside docs, and a lot more. More so, it also has a huge library of 3rd-party add-ons.
Related post: The Definitive Guide to Google Sheets
If you’re a beginner or someone who spends much of the day working inside Google Docs, this guide will help you learn everything you need to — from basic editing and formatting options to securing your data.
Here’s a sneak peek of all the topics this guide will cover:
2. Pre-designed Google Docs templates
4. Research simplified with Explore
6. Integrating Spreadsheets with Google Docs
7. Collaboration between Google Docs and Microsoft Word
9. Google Docs – Shortcut keys
10. Work offline with Google Docs
11. The omnichannel experience
13. Data security
Google Docs – Training 101
Just like learning any other mastery, let’s start with the basic understanding of how to get around Google Docs.
1. Creating, naming, saving docs
To create a Google document, simply click on the + on your Google Docs homepage. When you create a document, it will be named as Untitled Document by default, to rename, simply:
- Click the name at the top of the file
- Type a new name
- Press Enter
Since Google Docs have an Auto-save feature, avoid the stress and effort of manually saving your work.
2. Formatting Text
Using Google Docs toolbar, you can change the text, the font style and even assign specific font style for particular sections of the text. Along with this, Google Docs provides editing options like paragraph spacing and alignment.
3. Creating table of contents
On your Google Docs click where you want the table of contents to be placed. Click Insert on the menu bar and select Table of contents. You can choose With page numbers or With blue links. In case you want to delete the table, right-click and select Delete.
4. Inserting images and tables
Choose Image from the Insert tab and select the following option – Upload, Take a snapshot, By URL, Your albums, Google Drive and Search. Make sure that the image you select must be less than 50 MB and should be one of the following file formats – .gif, .jpg or .png.
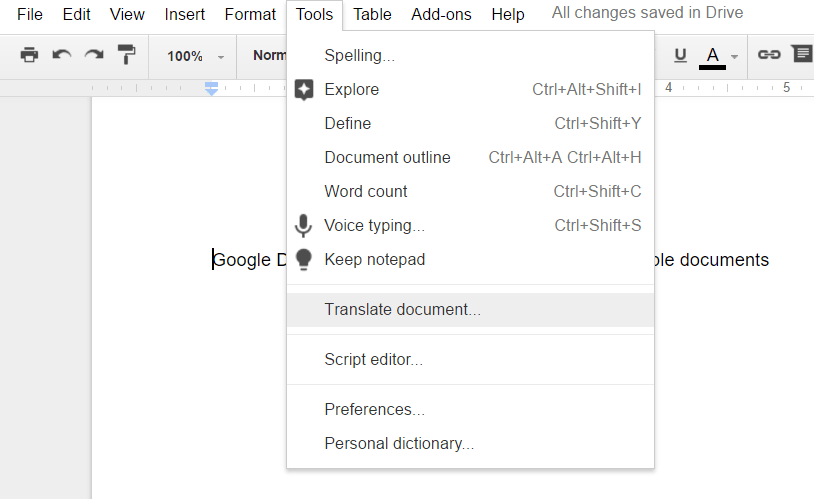
5. Translating docs
Select Tools from the menu bar and choose translate document. Enter a name for the new translated documented and select a language of your choice, a translated copy of your document will open in a new window.
If the language you selected has non-latin characters, either type the phonetic spelling of a word in latin characters, then click the best match from the options or draw characters in a panel in the bottom right of the screen and click the best match from the options. These are often used to translate documents for languages like Hindi and Mandarin.
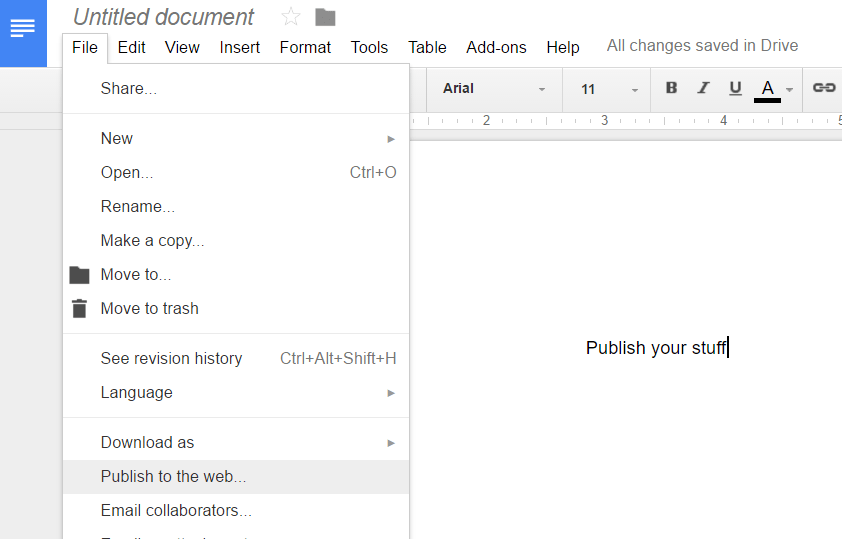
6. Publishing docs on the web
On your Google Doc’s menu bar, click File and select Publish to the web. The entire document will be published on the internet, however, files containing spreadsheet or presentation formats might have more publishing requirements. Share the file by sending in the URL or embed it in your website.
After selecting the option, publish to the web, a window will open, click Embed. Select Publish and copy the code in the text box and paste it into your site or blog.
—
After the basic crash course, let’s get down to the nitty-gritty of things. Google Docs like other G Suite applications comes with a hefty number of impressive features that help in boosting the overall productivity of businesses and individuals.
Freelancers might use it to collaborate with their clients sitting on the other side of the globe or a project manager, who can share reports with team members just by a click or a writer who comes up with a great blog by using the editing options available on Google Docs.
Google Docs is able to satisfy all communication, collaboration and content creation needs.
But why not get more from your Google Docs?
Get the best out of your Google Docs by understanding the different features and leveraging your know-how to find simple and effective solutions.
Pre-designed Google Docs templates
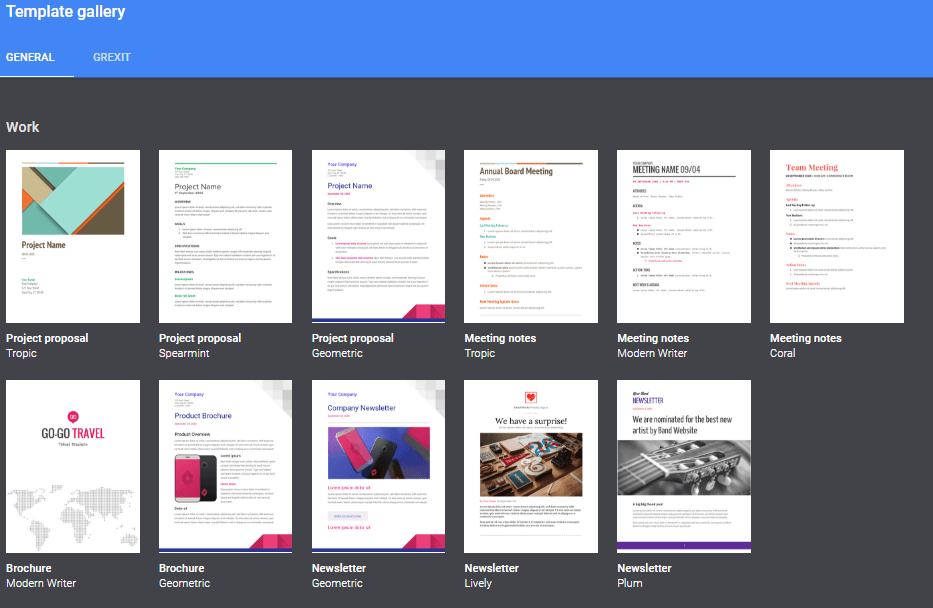
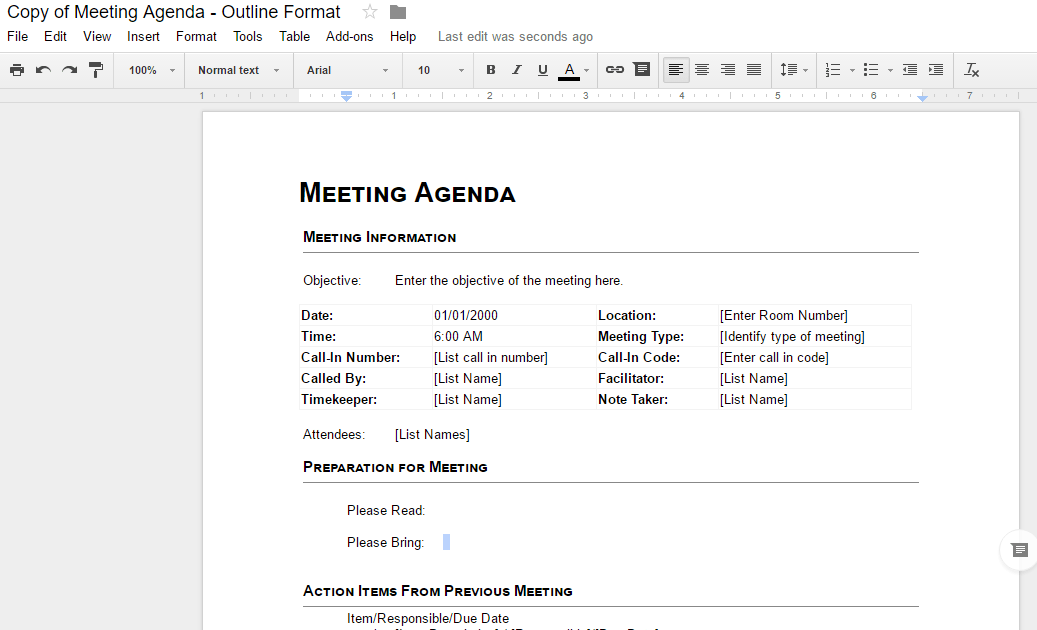
To save you from the misery of creating a template from scratch, Google Docs provides professionally made pre-designed templates. Even though Google Docs templates have sadly been underestimated by users, one just cannot overlook the potential for high productivity that can be brought about by the application of these templates.
Users can select from a wide collection of templates that span from – work to education – letters to resumes, thereby encouraging the creation of well-presented documents. With everything Google templates have to offer, the highlight is that it allows users to create and customize their own templates.
Customized templates replicate the same format across multiple documents. From task sheets to monthly expense sheets, custom templates help in creating recurring documents with ease. You can also choose whether to make these templates public or private.
How to create a public Google Docs templates
Step 1 – Create a document in Google Docs that you’d like to use as a template and you can add further modification of your own as well.
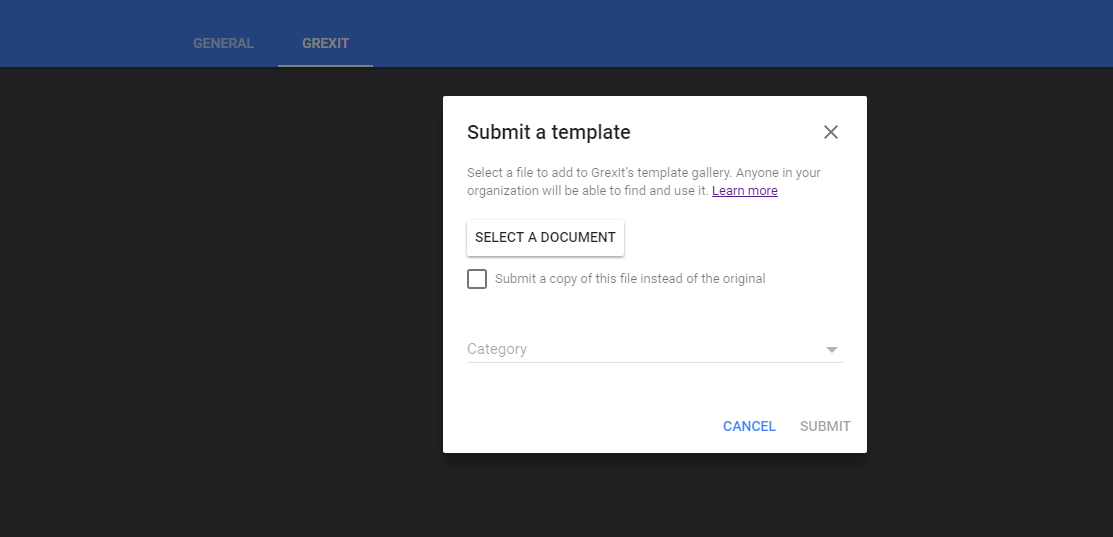
Step 2 – Open Google Docs Templates and click Submit a template.
Step 3 – Click Choose from your Google Docs
Step 4 – Select the template you had created in step 1.
Step 5 – Type in a description for the template and make sure it’s at least a sentence otherwise Google might reject the template.
Step 6 – A drop-down list of Category will be shown, choose the option which seems apt. If it’s a project meeting template, you can choose the category Business or if it’s a template for a legal contract, categorize the template under Legal.
Step 7 – Select the language the template was originally written in.
Step 8 – Click Submit template.
Step 9 – Go to your template gallery page and select your custom made template and start working.
How to create a private Google Docs template
Step 1 – After creating your template document.
Step 2 – Go to your Google Drive and right-click File.
Step 3 – Select Make a Copy.
Step 4 – Use the copy of the original template document privately.
Templates are always a great way to save time. Have you checked out Hiver’s Email Templates yet? Know more.
Instant Collaboration
Aside from giving individual users the ability to create, store and work with documents, irrespective of the geography, the real shining armor of Google Docs is its ability for instant collaboration. It empowers teams and individuals by letting them collaborate in real-time on the same document.
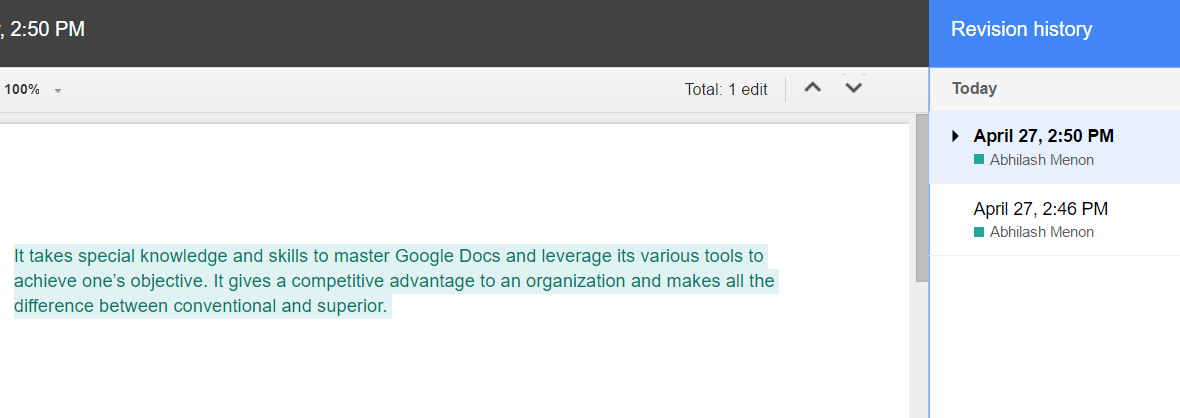
What makes collaboration on Google Docs a gratifying experience – its auto-save feature, quit worrying about saving your documents manually and use Revision history to see old edited versions of the same document which are sorted by date and by the name of the member who made the changes.
Google Docs have some impressive collaboration features for teams to do more, to do it better:
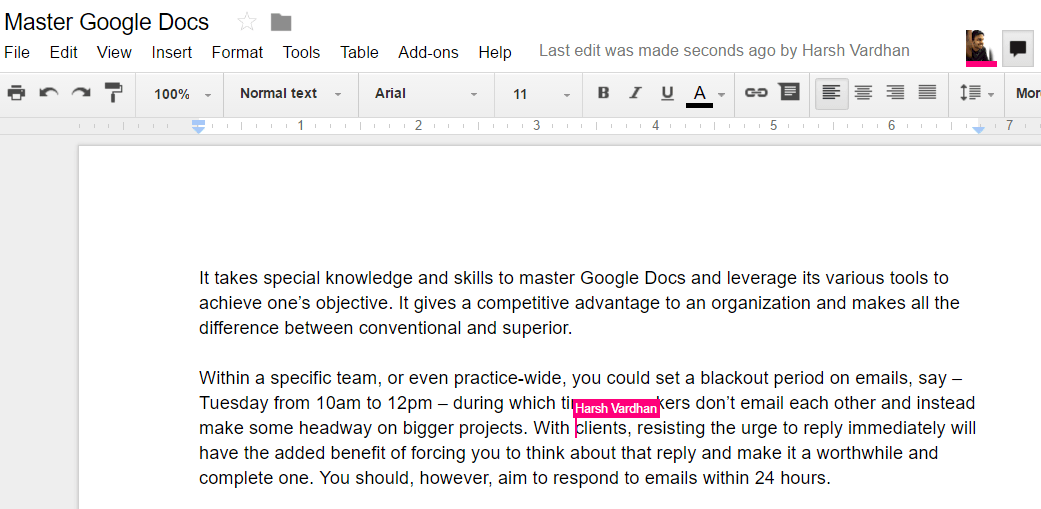
1. Edit in real time
Google Docs allows simultaneous editing, where a maximum of 50 users can edit the same document at a given time. Not only that, you can edit the same text at the same time without running over each other as Google Docs monitor timestamp of each edit to apply the same in the appropriate order.
To enhance the editing experience, Google also provides the option for chatting. By clicking on the arrow to the right of the names of the co-editor(s), you can instantly chat thereby avoiding conflicts and encouraging feedback.
2. Comment
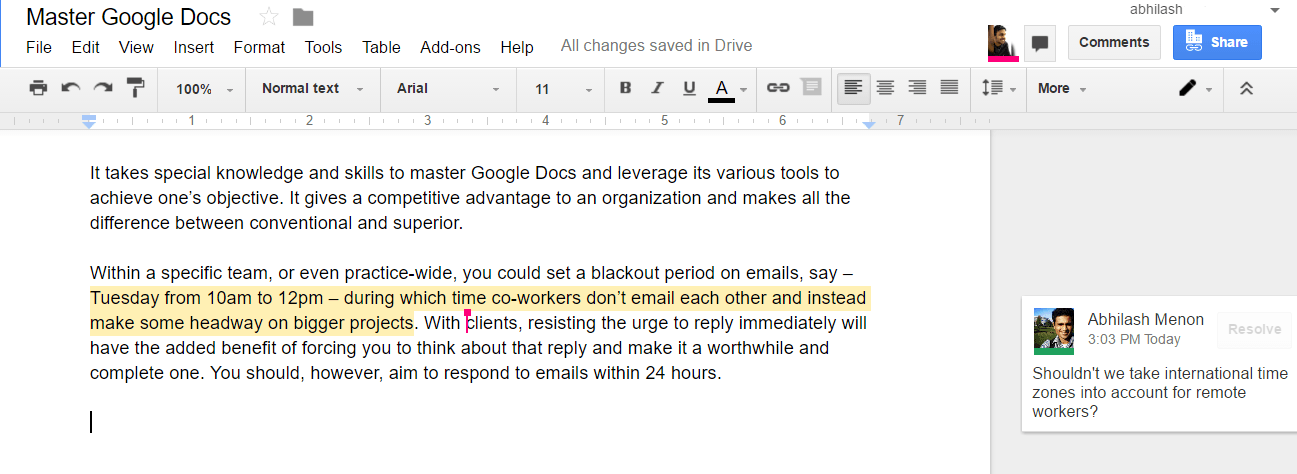
To add more depth to the collaboration experience, members are allowed to make notes relating to a specific portion of the document. These comments can be seen on the side panel, by clicking on the comment box, the specific content where an action has to be performed is highlighted. Once the comment has been addressed, users can choose Resolve to signify the comment has been duly addressed.
3. Share
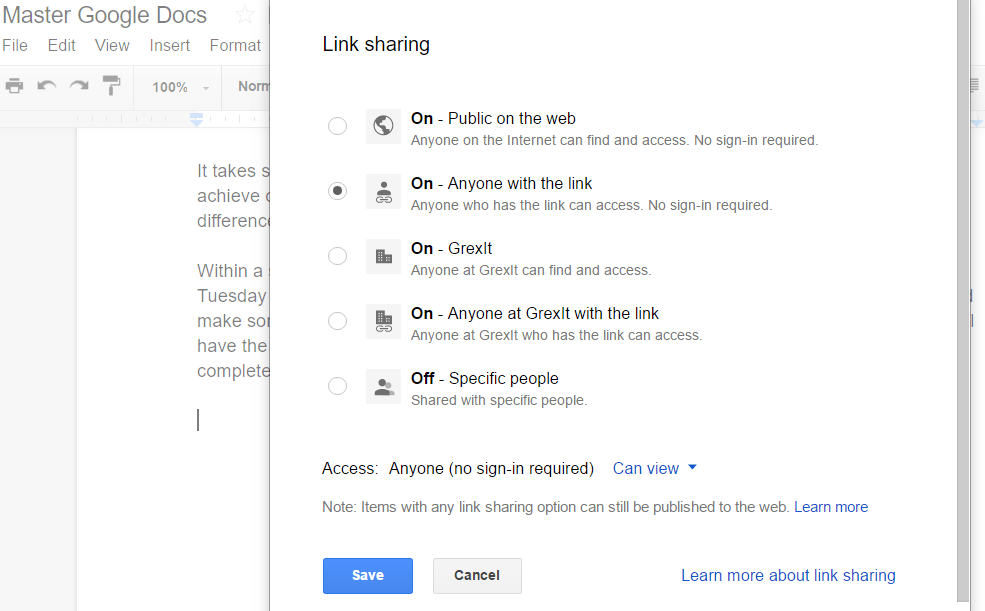
Instead of forwarding one document to multiple members and ending up with multiple edited variations of the same document – share a single document to as many as 200 members. To make sure that data is secured and there are no information leaks, customize access permissions according to your sharing needs.
Incorrect sharing practices lead to data loss. A lack of proper management of access permissions can be a serious threat to data security and content productivity – here are a few tips for managing shared files like a boss:
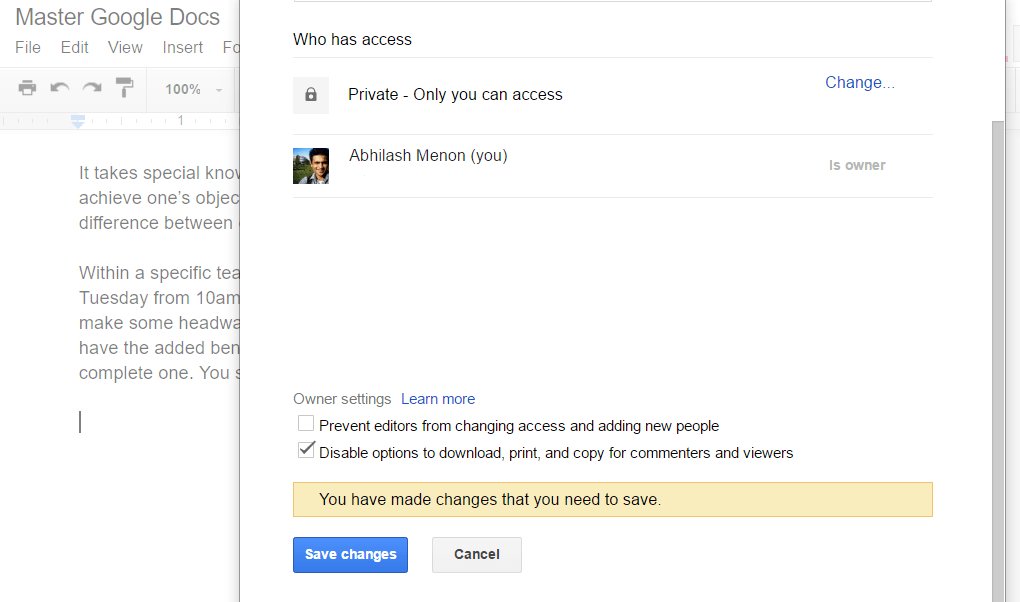
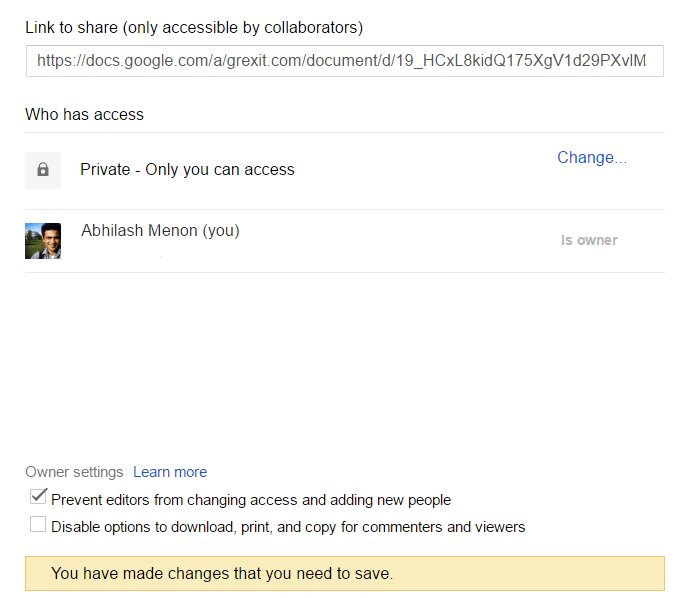
- Disallow downloading, printing, and copying of shared files by using the advanced share options, where you can choose Disable options to download, print, and copy for commenters and viewers. Viewers with whom the document is shared will see the Export options disabled notification.
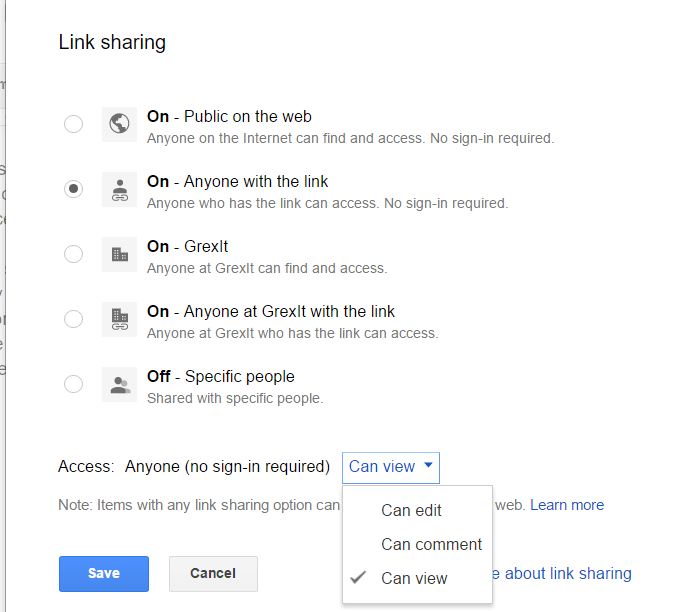
- Enable documents to be shared with non-Google Docs users by either sending share invites via email addresses or using the advanced option Anyone With the Link – to allow sharing by sending the link.
- To display what you expect members to do with the shared document, choose between – Can view or Can edit or Can comment and click Save.
- Stop other members from sharing your shared document by checking off the Prevent editors from changing access and adding new people box. This gives the owner the sole authority to make changes to the share settings.
Research simplified with Explore
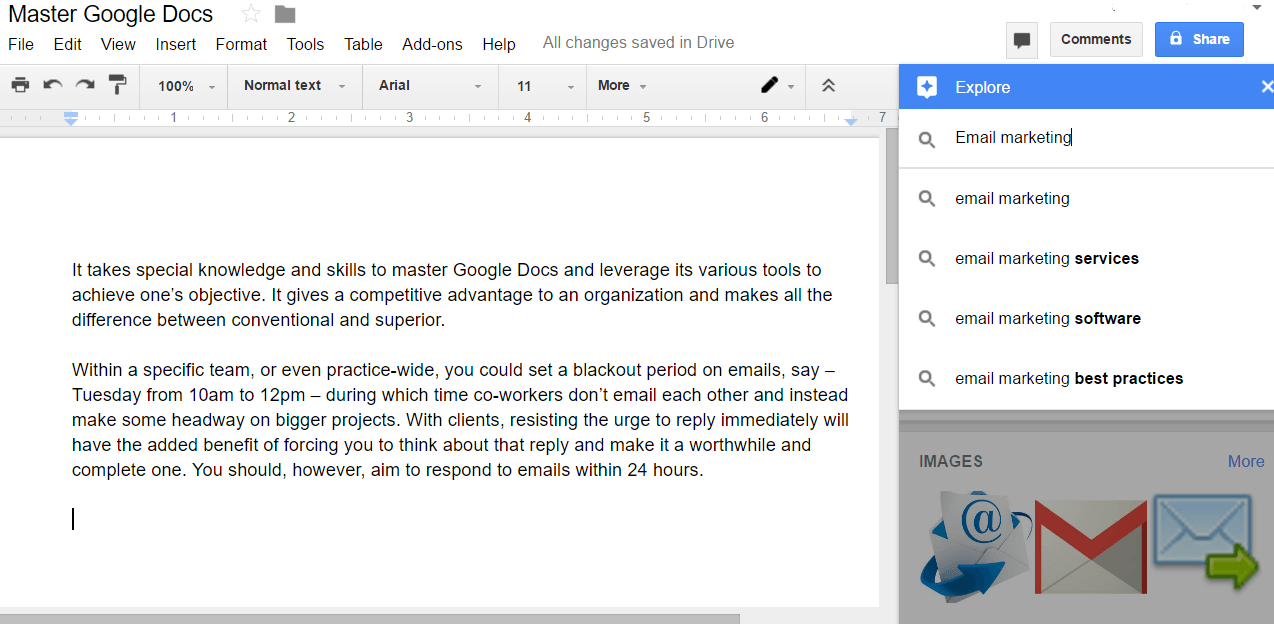
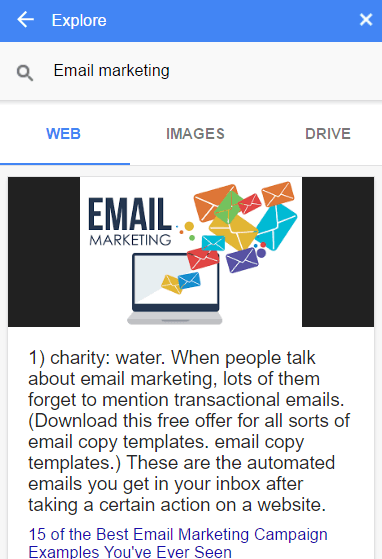
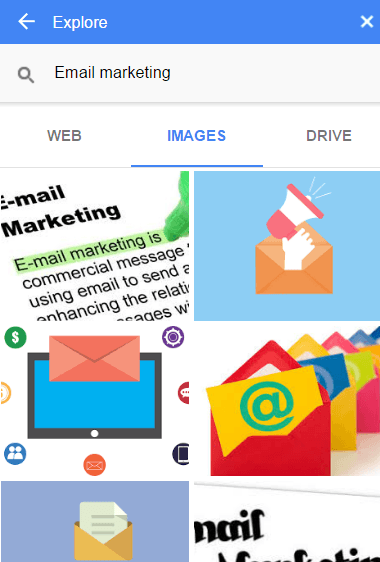
Explore is a built-in AI, it makes writing research articles with Google Docs as easy as pie. Explore generates instant suggestions of related content on the side panel of the document, making it a very handy on-demand research tool. The related content includes images, web results and content from Google Drive.
It allows you to not only research articles from the web results but also refer to your own original work through Google Drive results. Other than browsing predictive searches, users can manually type into the Explore search bar, the results are separated into three categories – Web, Images, and Drive. There is also a provision for citation in APA, MLA,and Chicago style.
Google Docs Add-ons
What gamma radiation does for Bruce Banner/ the incredible Hulk, Add-ons do that for Google Docs. Add-ons are third party applications that super-enhance the utility of Google Docs. (Learn more about Add-ons for business) Depending on your need, choose from a wide range of Add-ons – here is a list of some popular Add-ons:
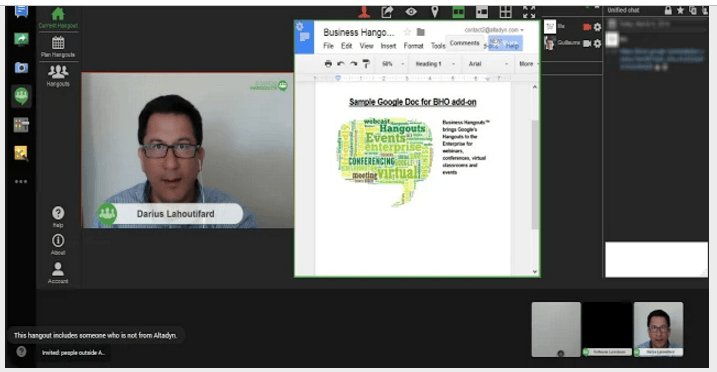
1. Omni-channel collaboration
Go beyond the traditional collaboration tools, use Google Docs Add-ons and give your collaboration efforts a little extra juice to create a sophisticated business communication model along multiple channels that inspires teams and at the same time solves problems.
Add more depth to your collaboration efforts, invite team members to communicate via audio and video, with multiscreen setups – review content instantly in-depth. Conduct webinars and virtual tours to enrich your team’s collaboration experience.
2. Visual enhancers
Not really the best when it comes to designing, huh!
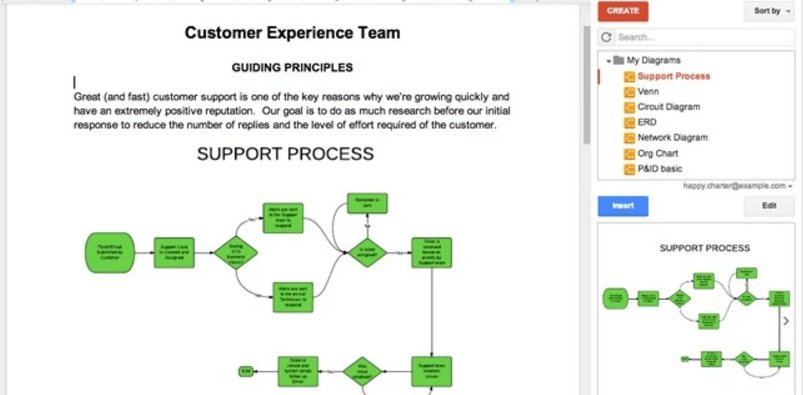
Google Docs reduces your dependency on designers for getting your visual content in place. Use these Add-ons to create, share and edit visual elements of your Google document.
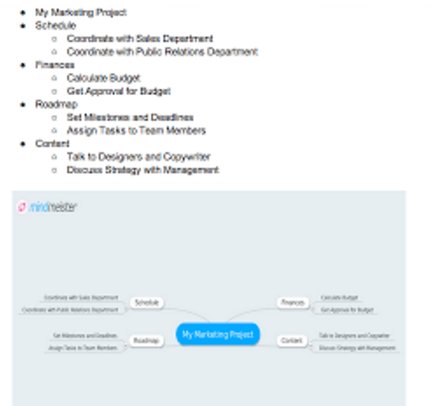
It lets you possess design skills by assisting with creating flowcharts, UML, wireframe, mind maps and more diagrams and designs into the document.
Convert your bullet points into beautiful visual mind maps and make the documents more structured and understandable.
3. Original Content
Plagiarism can kill the integrity of your content!
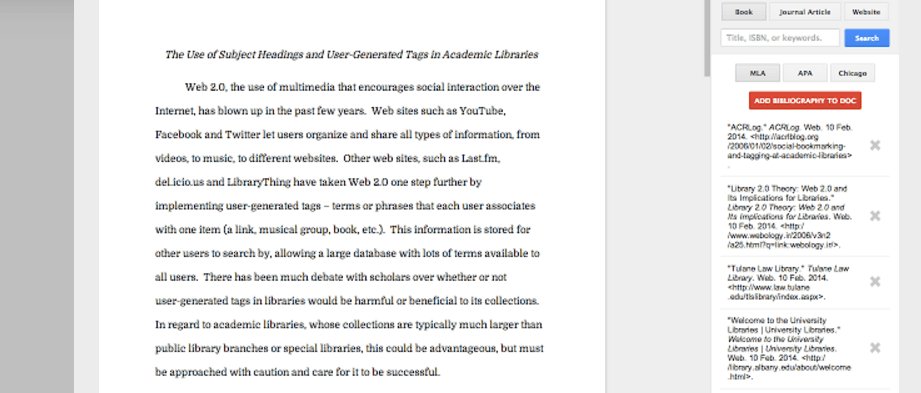
Google Docs allows you to create proper bibliography which helps you list all your sources in various formats and allows you to research and take reference from another author’s work without having to – Steal. You can also use a plagiarism checker to ensure that your content is original
Make sure you are able to maintain the authenticity of your document by having proper citations in place. Get your citations right in whichever style you want – MLA, APA or Chicago, without having to leave your Google document.
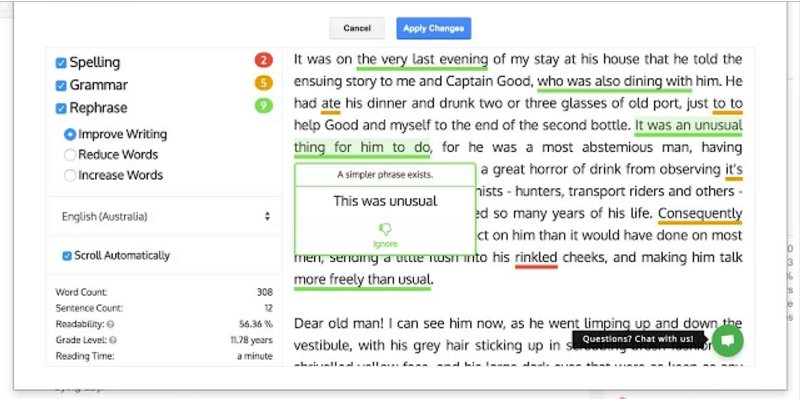
To attain a high rate of originality, an AI is built into the system which helps you to re-word and paraphrase sentences and quotes through relevant suggestions. that way you can refer to the same idea but with a different sentence structure.
4. Digital reporting
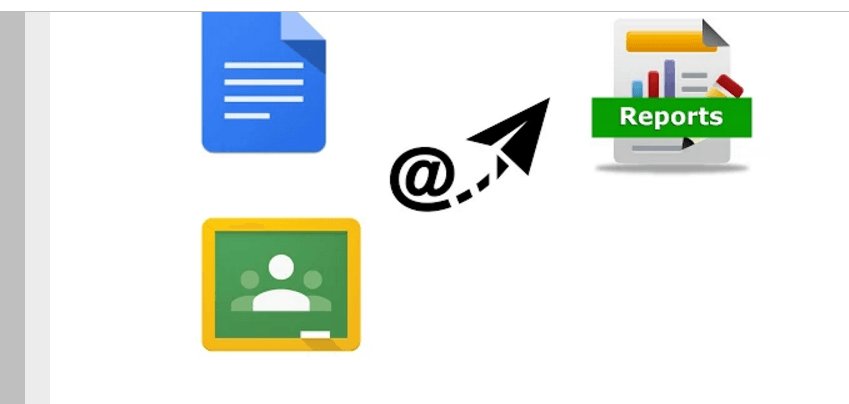
Google Docs Add-ons empowers businesses and individuals in decision making by creating beautiful and up to date consolidated reports. Reporting information on a regular basis helps you to organize and accordingly plan for future.
Get real-time updates on how your students are performing by instantly getting reports and analytics based on your Google classroom activities. Assess trends by studying automated generated charts and graphs, which highlight student performance.
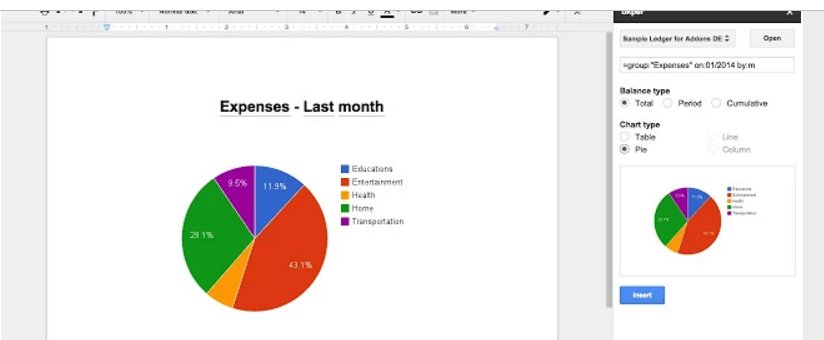
- Bkper
Create bookkeeping reports and financial statements and add data from your books to your documents, without breaking a sweat.
5. Digital signatures
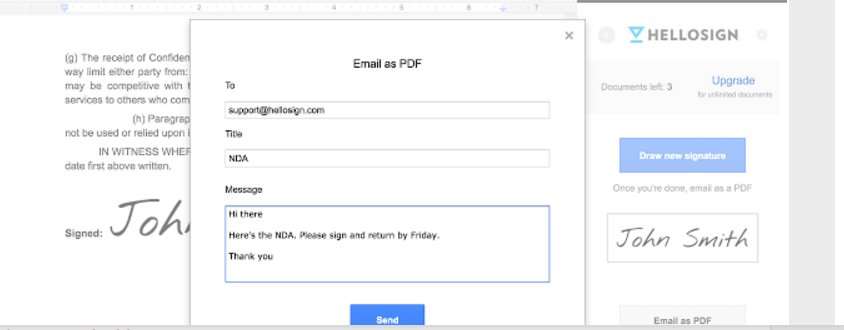
Google Docs increases the momentum of getting done with your business transactions and formalities by providing industry standards digital signatures. It removes the traditional obstacles related with acquiring official signatures.
Secure electronic signatures for your documents without having to go to the trouble of printouts and scans. And if you are worried about the legality of these signatures, then DON’T – all signatures are legally binding and are of the highest business caliber.
Still waiting for your sales manager’s signature to get the deal rolling – kill the wait, get your documents signed right from your Google Docs and save money and time. These electronic signatures are of the highest standards and are in accordance with the European Union and the United States regulations.
6. Content Curation
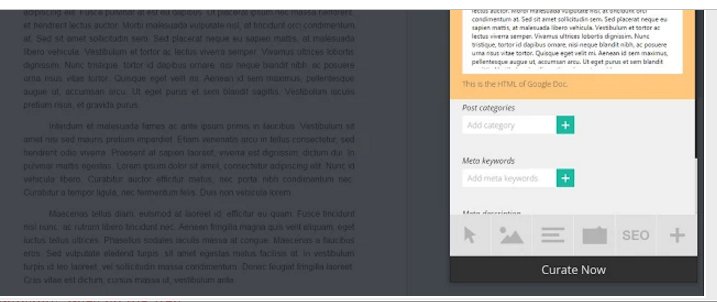
Google Docs helps you not only speed up your ability to sort, arrange and publish content but it also simplifies the entire process of curating content. Get the best results from your content by distributing your work at the right place at the right time.
Use Google Docs to create content for your WordPress blog at the same time make it SEO-friendly and publish it right from your Google document. Also, if you’re using WordPress as a CMS, make sure to integrate good web hosting for WordPress for more website visibility and security.
Search, filter and curate tweets straight from Google Docs – save tweets around an important event or collect relevant tweet mentions, curate tweets around trending hashtags – do all of it, without having to open another unnecessary tab.
7. Polished articulation
Complement your content with rich use of words and phrases to better articulate your message. The best part about polishing your content using Google Docs is that it’s not just limited to English – it allows a prolific use of vocabulary in multiple languages and dialects.
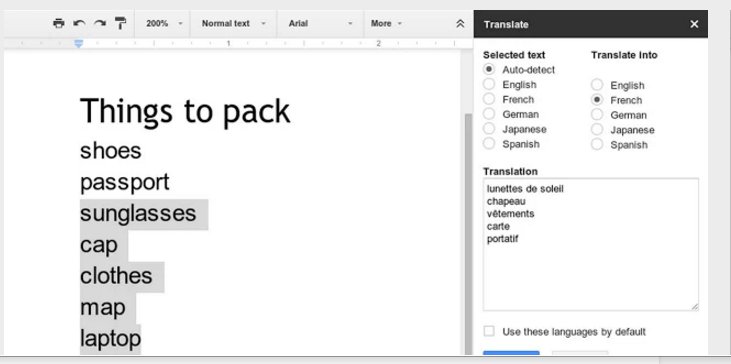
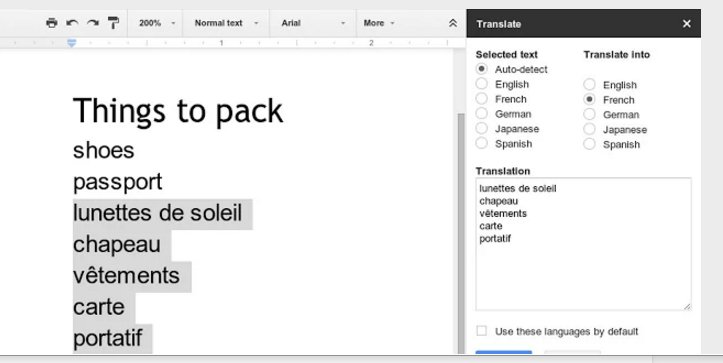
Translate selected text in different languages and reinsert the edited text back into the document.
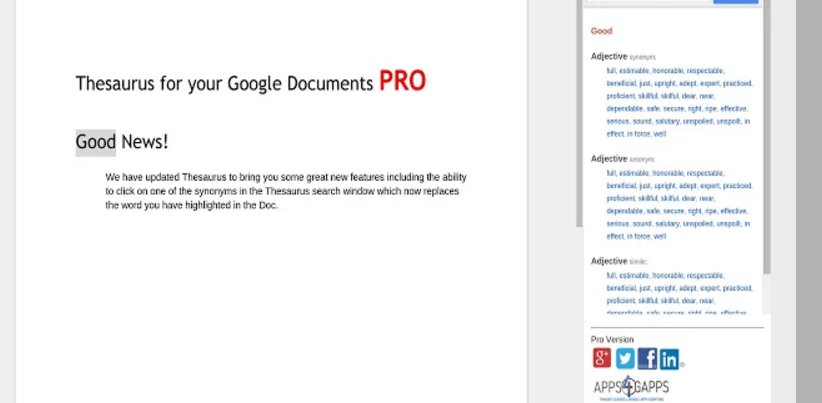
Display your vocabulary strength in Google documents by exploring synonyms, antonyms, meanings and much more. With the Pro version, you can replace a selected word plus not to mention the multi-language support that is offered for you to brush up your multilingual lexicon.
8. Neat presentation
‘Good looking’ content is good content! Keep it easy on the eyes of the reader by creating content which has a well organized and a beautiful layout, at its core.
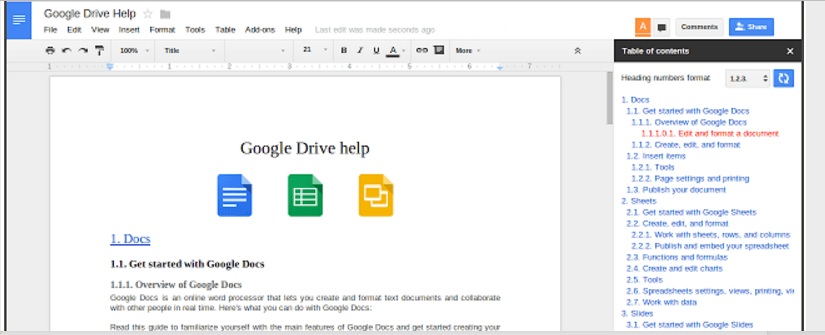
No more wasting time to scroll to a particular section of the document, create an outline in the sidebar for easy navigation.
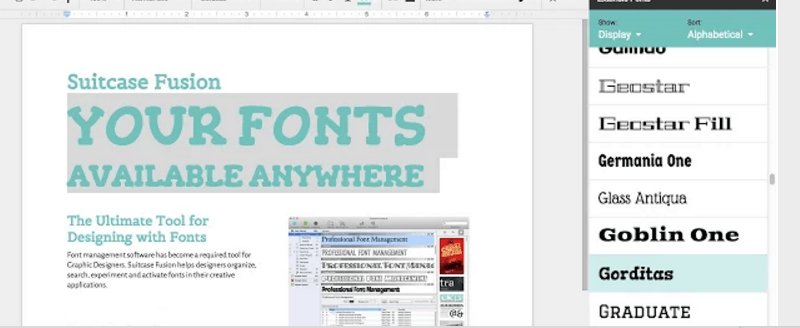
With more than thousand of font collection, it’s time to take your font style a notch up. Easily inspect font previews, get to know the latest trending font styles and apply these fonts with just one click.
Take your template game to the next level by choosing from a large gallery of professionally designed templates, calendars, schedules, invoices, budgeting tools, financial calculators and much more.
9. Data security
Collaborate and share even the most sensitive of information without hesitation as you can keep your data secured within and outside of your organization.
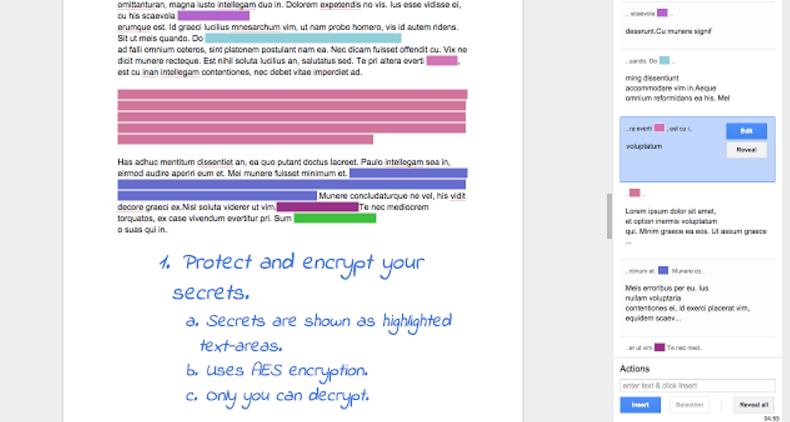
Keep the contents of your Google documents safe by blanketing text with highlighting colors and for someone to decipher the hidden text – the correct passphrase is needed.
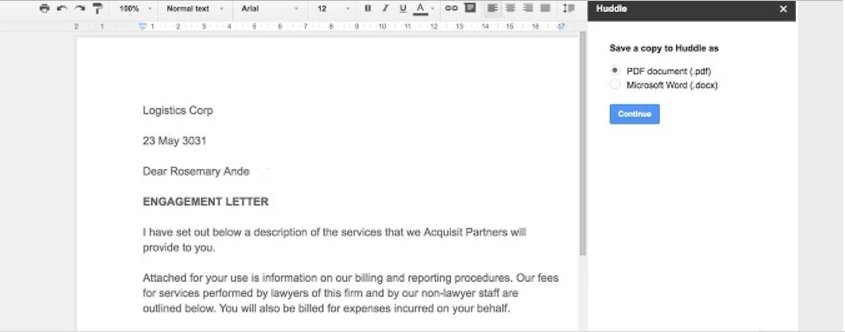
Keep a backup of your data by securely saving a copy of your Google document directly to Huddle. Along with storing data, you can publish new versions of the same document without having to go back to Google Docs.
Integrating Spreadsheets with Google Docs
The same spreadsheet can be used across multiple documents.
Google had anticipated that problems might occur when constant changes are made to the spreadsheet, which will lead users to go back and forth between Google Docs and Google Sheets. To avoid any interruptions, Google provides a seamless integration between Google Spreadsheets and Google Docs.
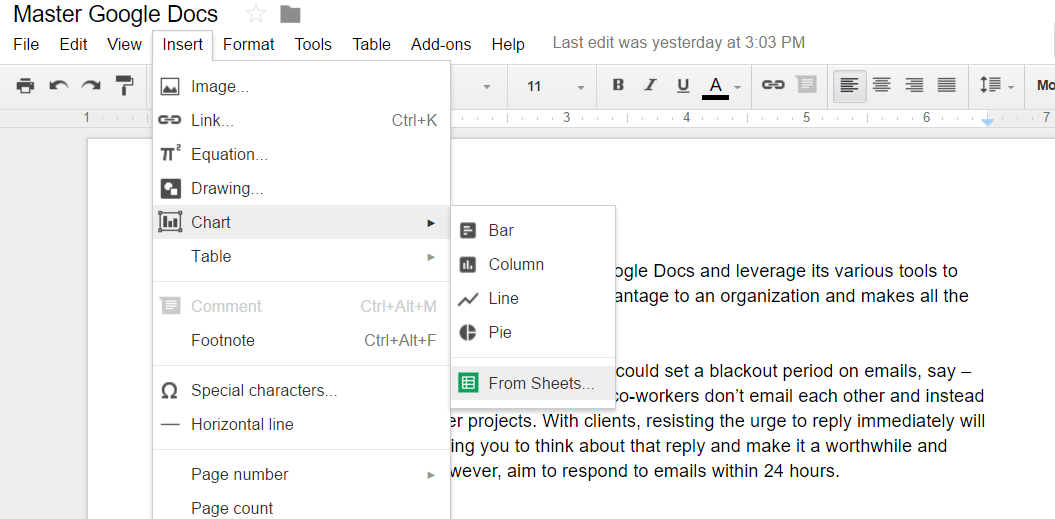
Users can now embed charts from Google sheets in Google Docs and update any changes on the sheet by just a single click. Save time and reduce your workload by following these steps: Step 1 – On your Google Docs menu, go to Insert > Chart > From Sheets.
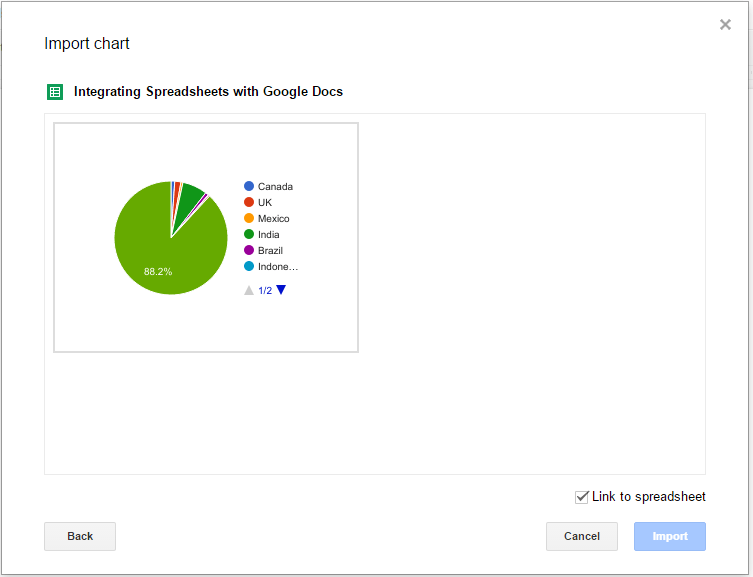
Step 2 – Select the chart you would like to embed and make sure the Link to Spreadsheet box is ticked off. A dynamic link will be created between the chart in your document and the data in the spreadsheet.
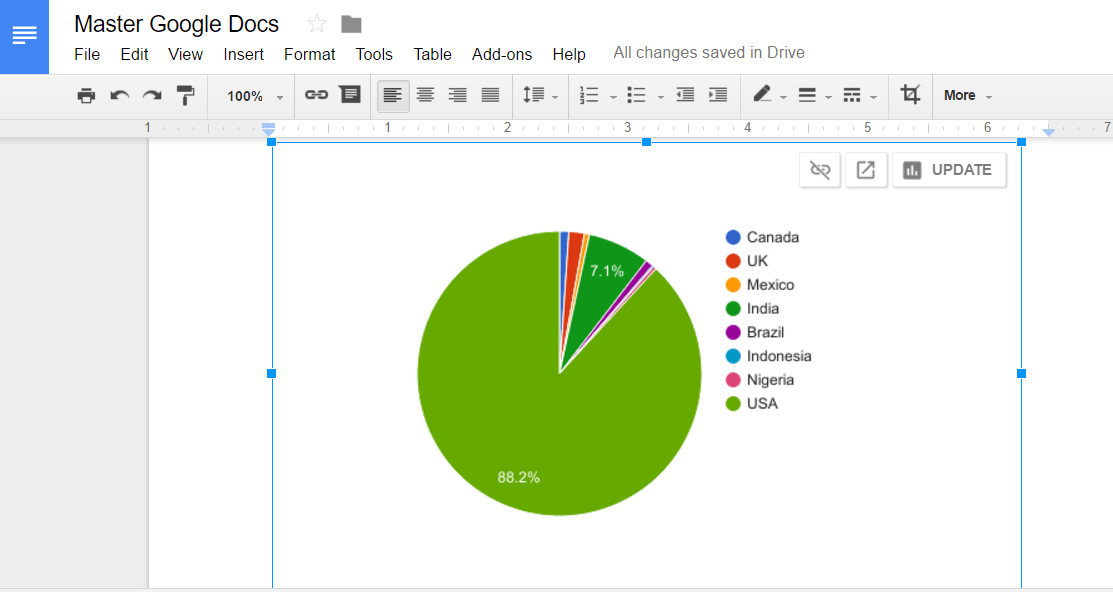
Step 3 – If any changes have been made to the original sheet, on your Google Docs, click Update and the chart will automatically be updated with the changes.
Moreover, only those who have access to the Google document can import or update linked charts, this makes sure that the data on sheets and documents are simultaneously safeguarded.
Charts, a Google Docs Add-on enables users to create charts from data in the spreadsheet and insert it into the document. This chart builder application has a wide collection of various types of charts, users can select the chart type and load the data from the spreadsheet by clicking or by dragging the data in the chart type.
Collaboration between Google Docs and Microsoft Word
Over the past few years, efforts have been made to continuously improve collaboration between Microsoft Word and Google Docs. Traditionally Google Drive has allowed uploading and storing of Microsoft Word documents.
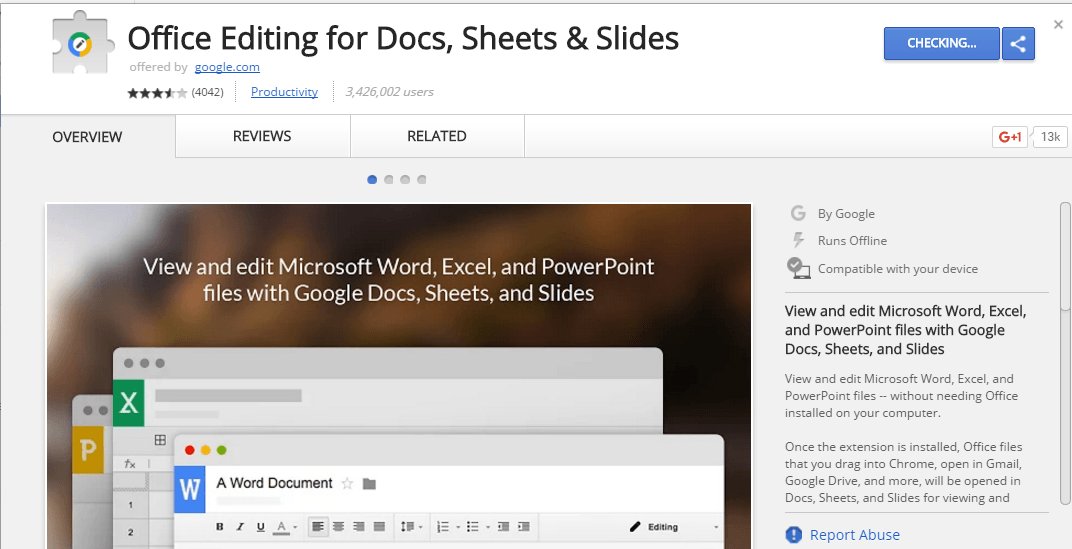
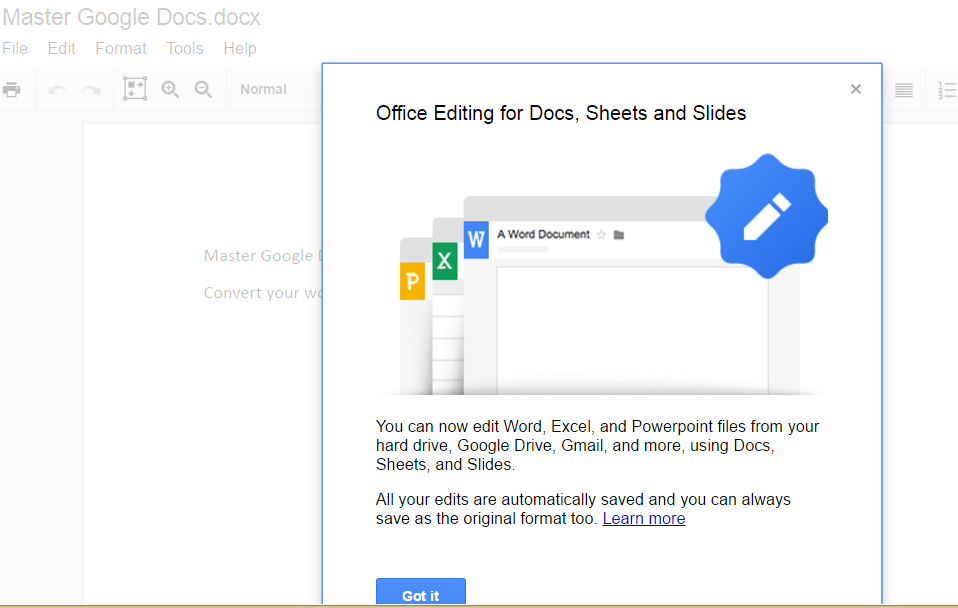
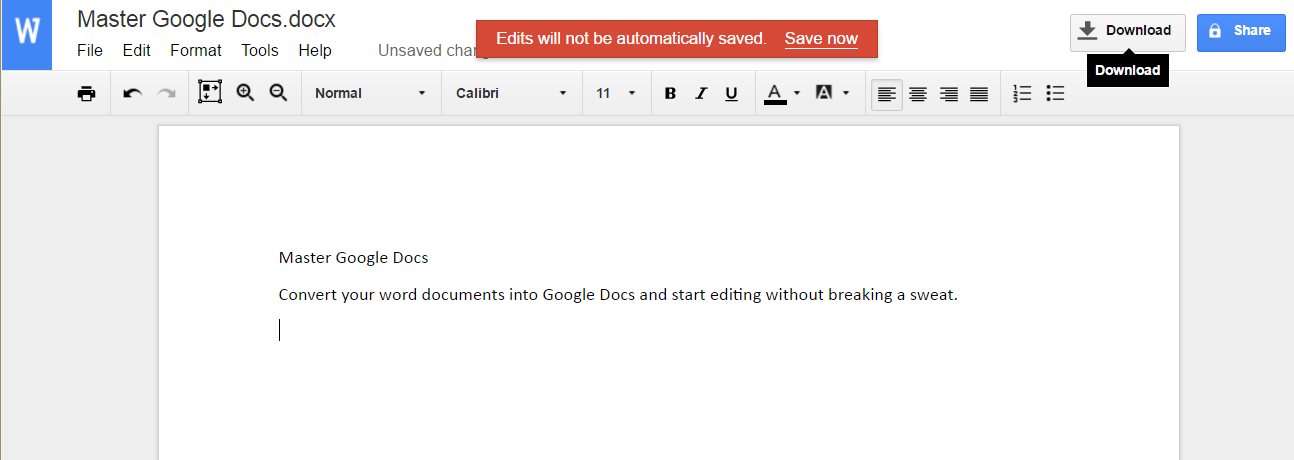
To encourage a high-grade level of collaboration, users can use the Google Chrome extension – Google Drive Office Compatibility (OCM). After installing the extension, you can see Google Drive in the Office menu bar, edit word documents or convert them into Google Docs formats and further enhance the utility of your documents by using Add-ons.
These converted documents enjoy the same sharing and concurrent editing options, just like any other Google document. This way, even non-Google Docs users are able to collaborate in real-time. Don’t worry if you require the document in the original format, Google Docs lets you re-download the document in the original word format.
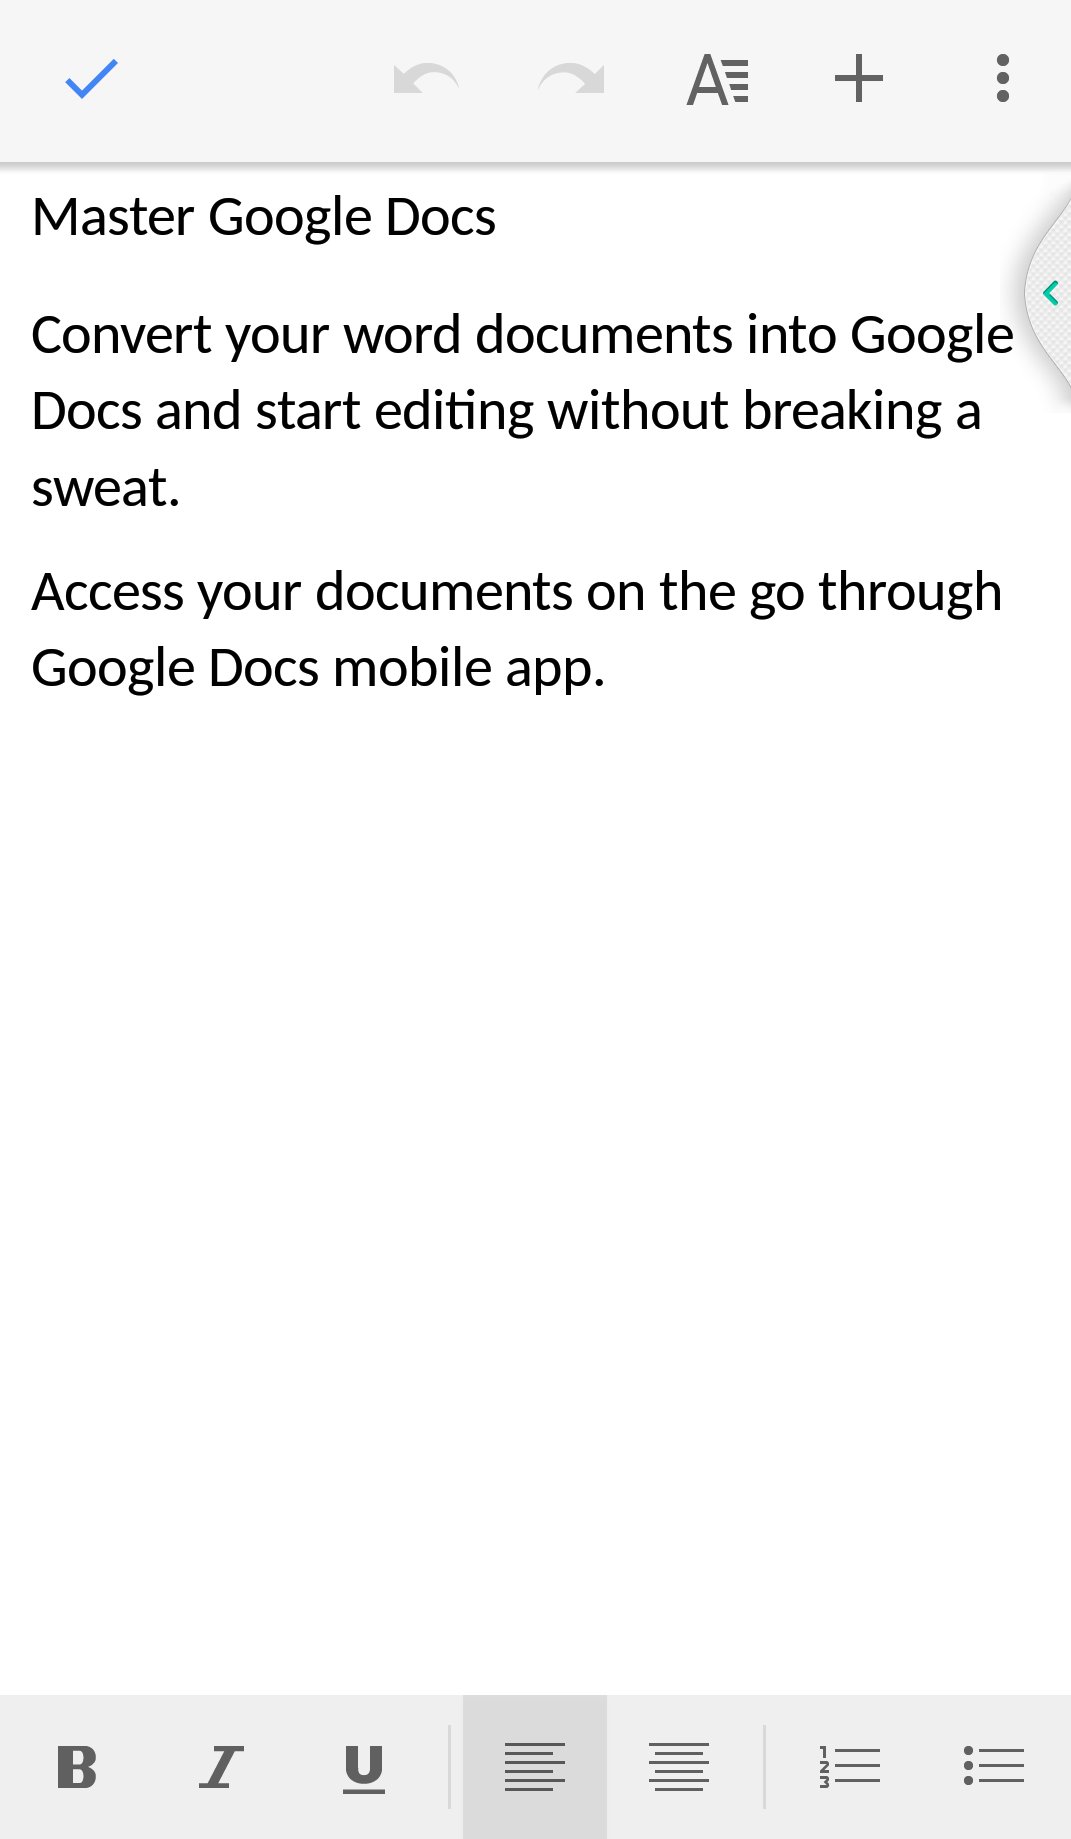
Collaborate when you are on the go through your mobile. For storing, converting and editing word documents, mobile users have to download the Google Docs app for iOS or Android as well as Google Drive app. The word document stored in the drive, when selected, automatically opens in the Google document app.
Type as you speak
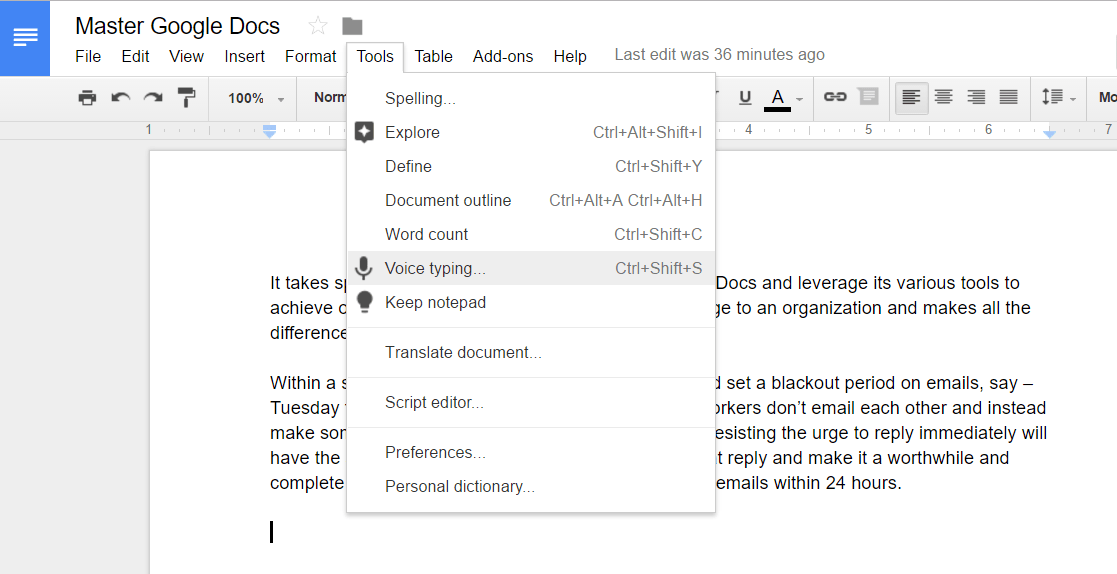
Google has been pumping a lot of resources for improving the efficiency of its voice recognition systems. Being a frontrunner in voice-based applications (Google Voice), it was evident that Google had to upgrade its voice recognition features for one of its most popular G Suite products – Google Docs.
Voice Typing feature serves a wide range of purposes like – highlighting specific text, embedding links, specifying text colors, switching to a column layout and being able to add comments. The voice commands that carry out these actions have been created with the utmost simplification:
- To highlight a specific text in red, say ‘Highlight red’
- To establish a particular text color, say ‘Text color red’, and the text color will become red.
- To embed a link in your document, say ‘ Insert link xyz.com’, and the link xyz.com will be added.
- Say ‘Insert comment’, the comment box will open, speak into the box to add your comments.
Adding punctuation marks in a sentence has become easier with improved voice capturing ability, use punctuation marks by calling out the type of the punctuation. Take a look at this excerpt from a prose:
I more heartily despise than your eccentric fools who prate about method without understanding it; attending strictly to its letter, and violating its spirit.
Now, if you are voice typing, this is how you need to speak:
I more heartily despise than your eccentric fools who prate about method without understanding it semicolon attending strictly to its letter comma and violating its spirit full stop
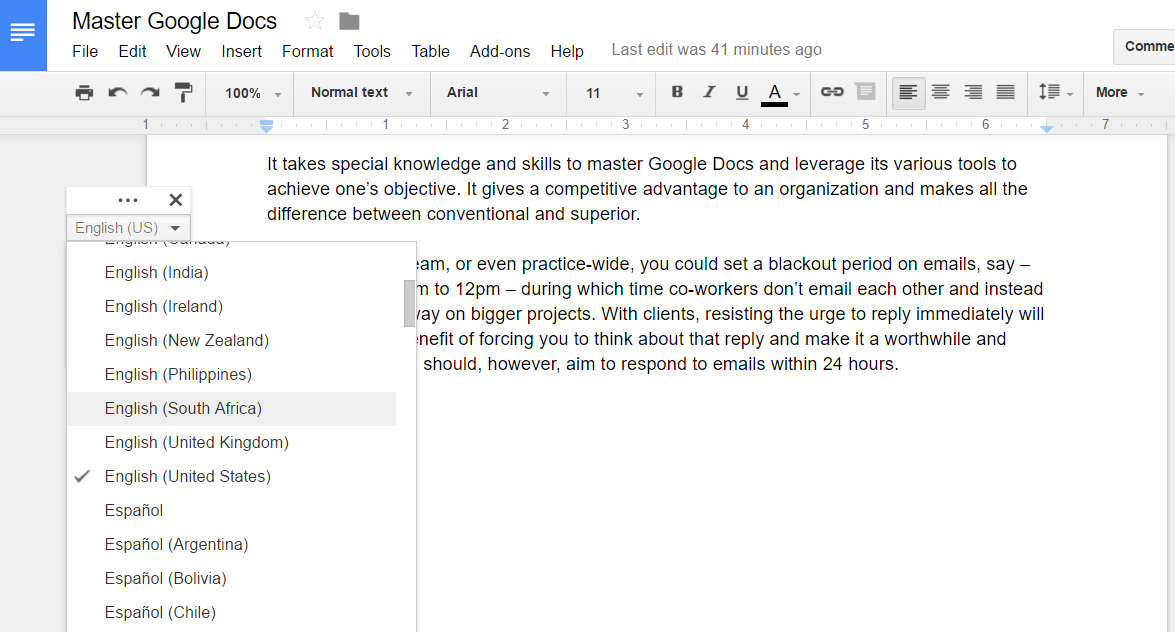
This feature also includes multiple language voice recognitions. This means you can speak in your local or native language, furthermore, it also takes accents and dialects into consideration – English alone supports the New Zealand, South African, American, Indian and British accents.
A quick tip for a better Voice Typing on Google Docs – use an external microphone. Dependency on your gadget’s internal microphone might make it difficult for voice capturing this is due to either excessive external noise pollution or poor manufacturing. Users are forced to subsequently repeat words and phrases which lead to constant to and fro while editing
Google Docs – Shortcut keys
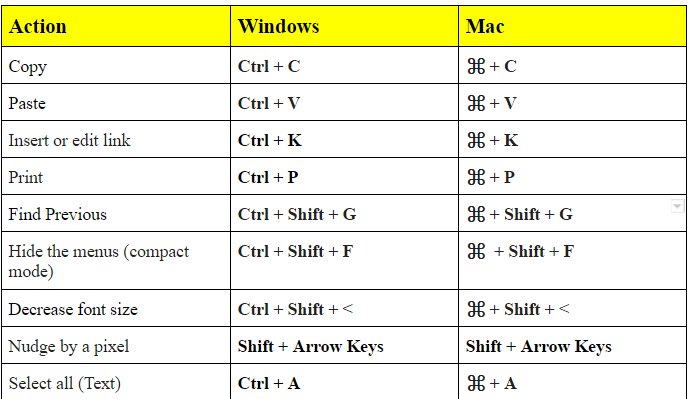
While some are toying with the idea of typing with their voice, there are others who are just plain old school and can’t imagine typing ideas into their Google document without a keyboard. Since you are at the keyboard typing voraciously, saving a considerable amount of time by using keyboard shortcuts might be a good option to consider. On your menu bar, go to Help > Keyboard shortcuts.
Different platforms – Windows and Mac, have mostly common shortcut keys, like the ones illustrated in the table:
However, there are some actions which have distinct shortcut keys:
- If you are accessing Mozilla Firefox from a Mac enabled device, then use Ctrl + ~ to Search Menu
- To access Table menu on Google Chrome: Alt + B, other browsers: Alt + Shift + B
- Alt + I (in Google Chrome) or Alt + Shift + I (in other browsers) = Open the Insert menu.
- In Google Chrome: Alt + O, other browsers: Alt + Shift + O
- Accessibility menu (present when screen reader support is enabled), in Google Chrome: Alt + A, other browsers: Alt + Shift + A
To get the entire list of shortcut keys – Click Here
Work offline with Google Docs
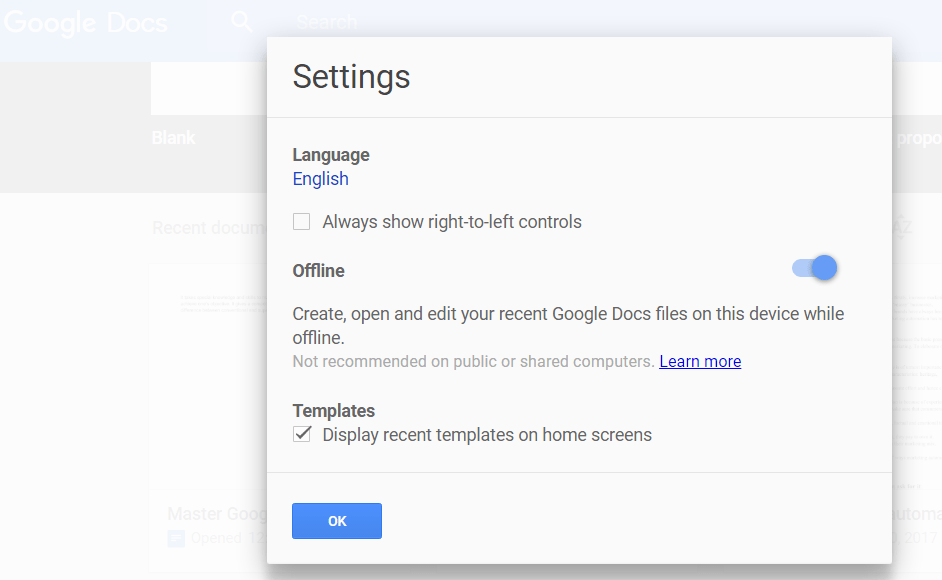
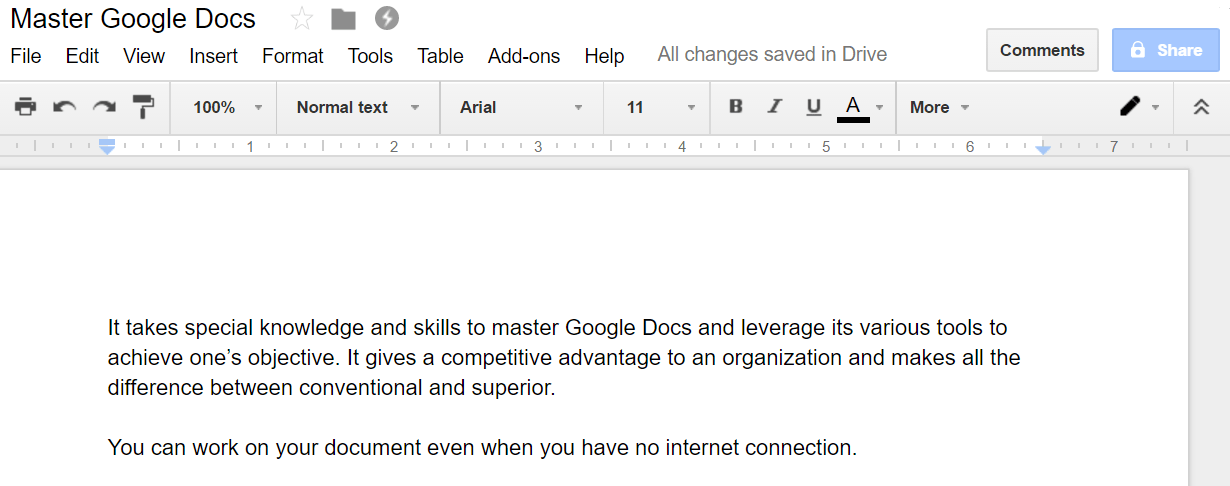
Many users, even the die-hard fans of Google consider the biggest flaw for a cloud-based platform like Google Docs – the necessity of an internet connection. It makes you think – is keeping your work on Google Docs a smart option? Well, think again! A few quick steps and you can manage your entire workflow on Google Docs without an internet connection:
1. Enable offline settings
Step 1 – on your Google Docs Homepage, click Menu> Settings> Offline.
Step 2 – Switch on the offline sync capability.
Step 3 – A dialogue box opens up, Which requests permission to activate Google Docs offline – click the Enable Offline button.
Step 4 – Google will also notify that an extension is also required to be installed, click the Add Extension to complete the process.
2. Editing offline
Once you have synced your Google document to offline mode, then it’s the same procedure for editing as it is in the online mode. Though, there are some minor differences:
- Some features which will be deactivated like – Add-ons, Explore, Help (Except Keyboard Shortcuts)
- Next to the document name, at the top left of the screen, a small gray offline icon will appear.
3. New documents
You can create new documents the usual way through Google Drive. Go to your Google Drive homepage: New>Google Docs.
4. Auto-sync offline documents
All the documents and edits are stored in the local server, the next time you switch to online mode, Google Docs will automatically sync the changes made to offline files to cloud.
The omnichannel experience
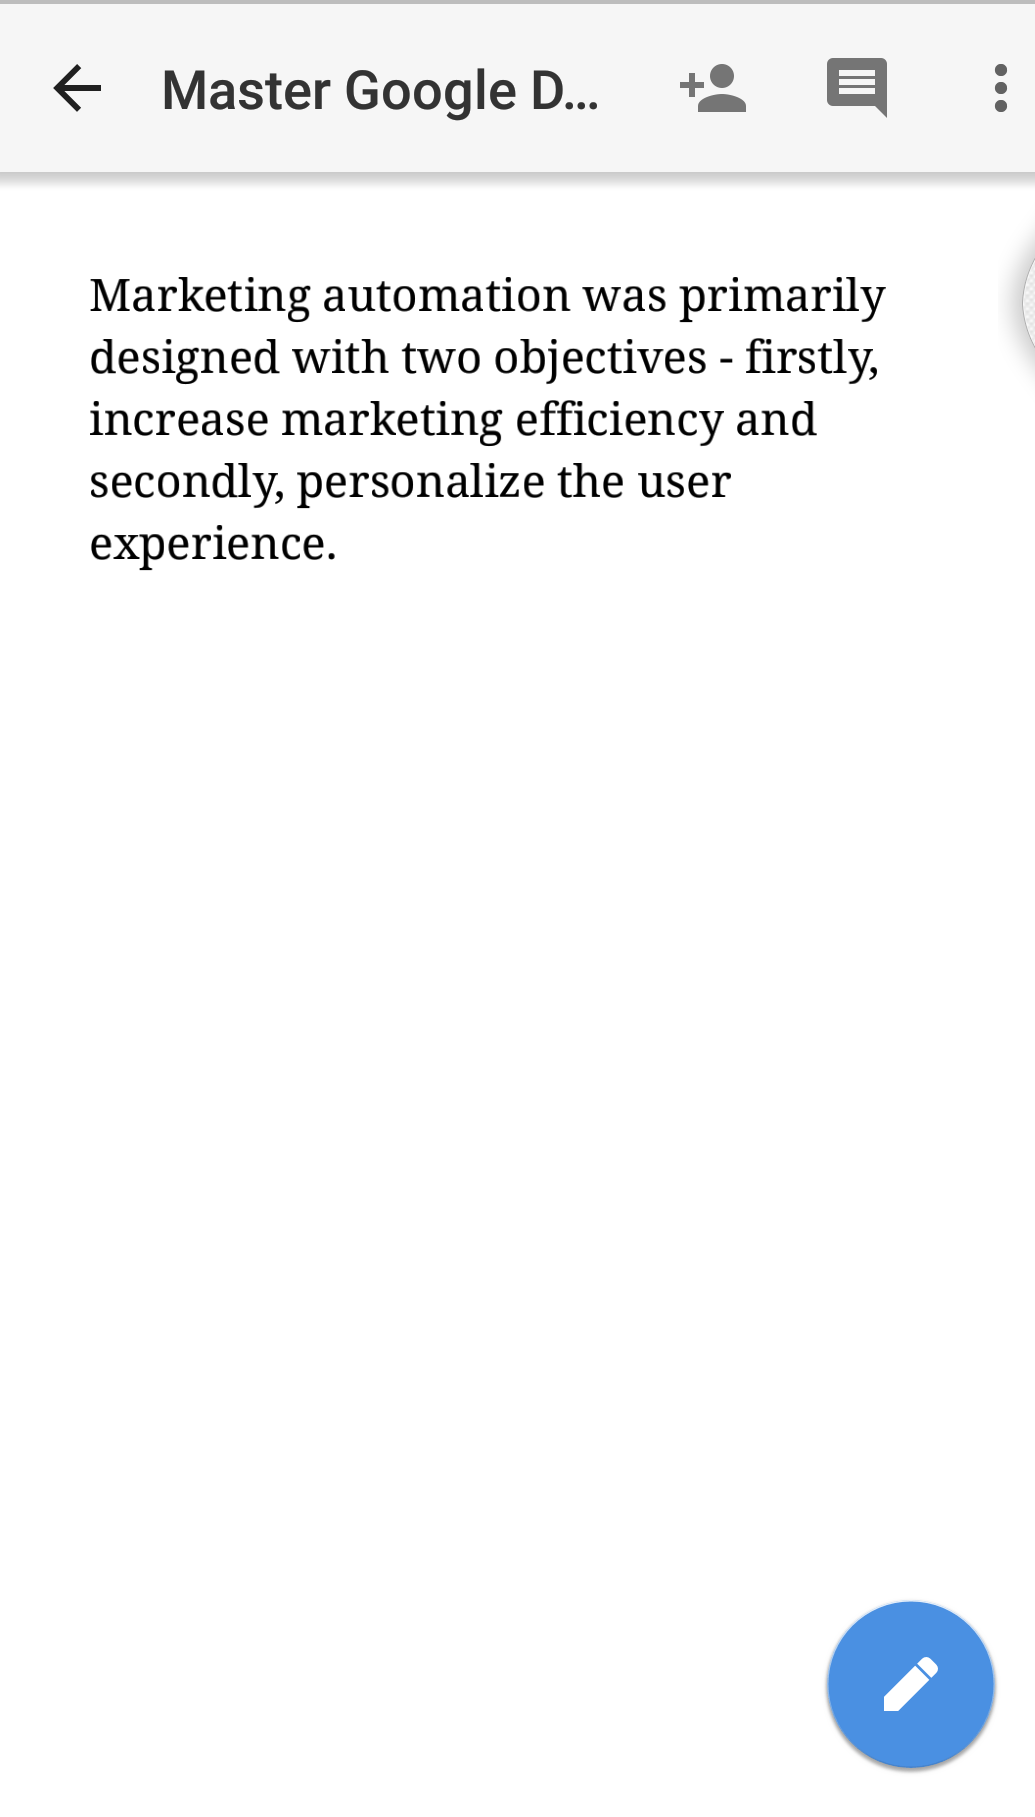
A chunk of Google’s R&D is invested in finding ways to create an impeccable omnichannel experience throughout all G Suite products. One such effort where Google has started seeing immense success is with – Google Docs app for Android and iOS. Here are some of the key features that have bolstered the mobile app to integrate the user experience over multiple channels:
1. Editing tools
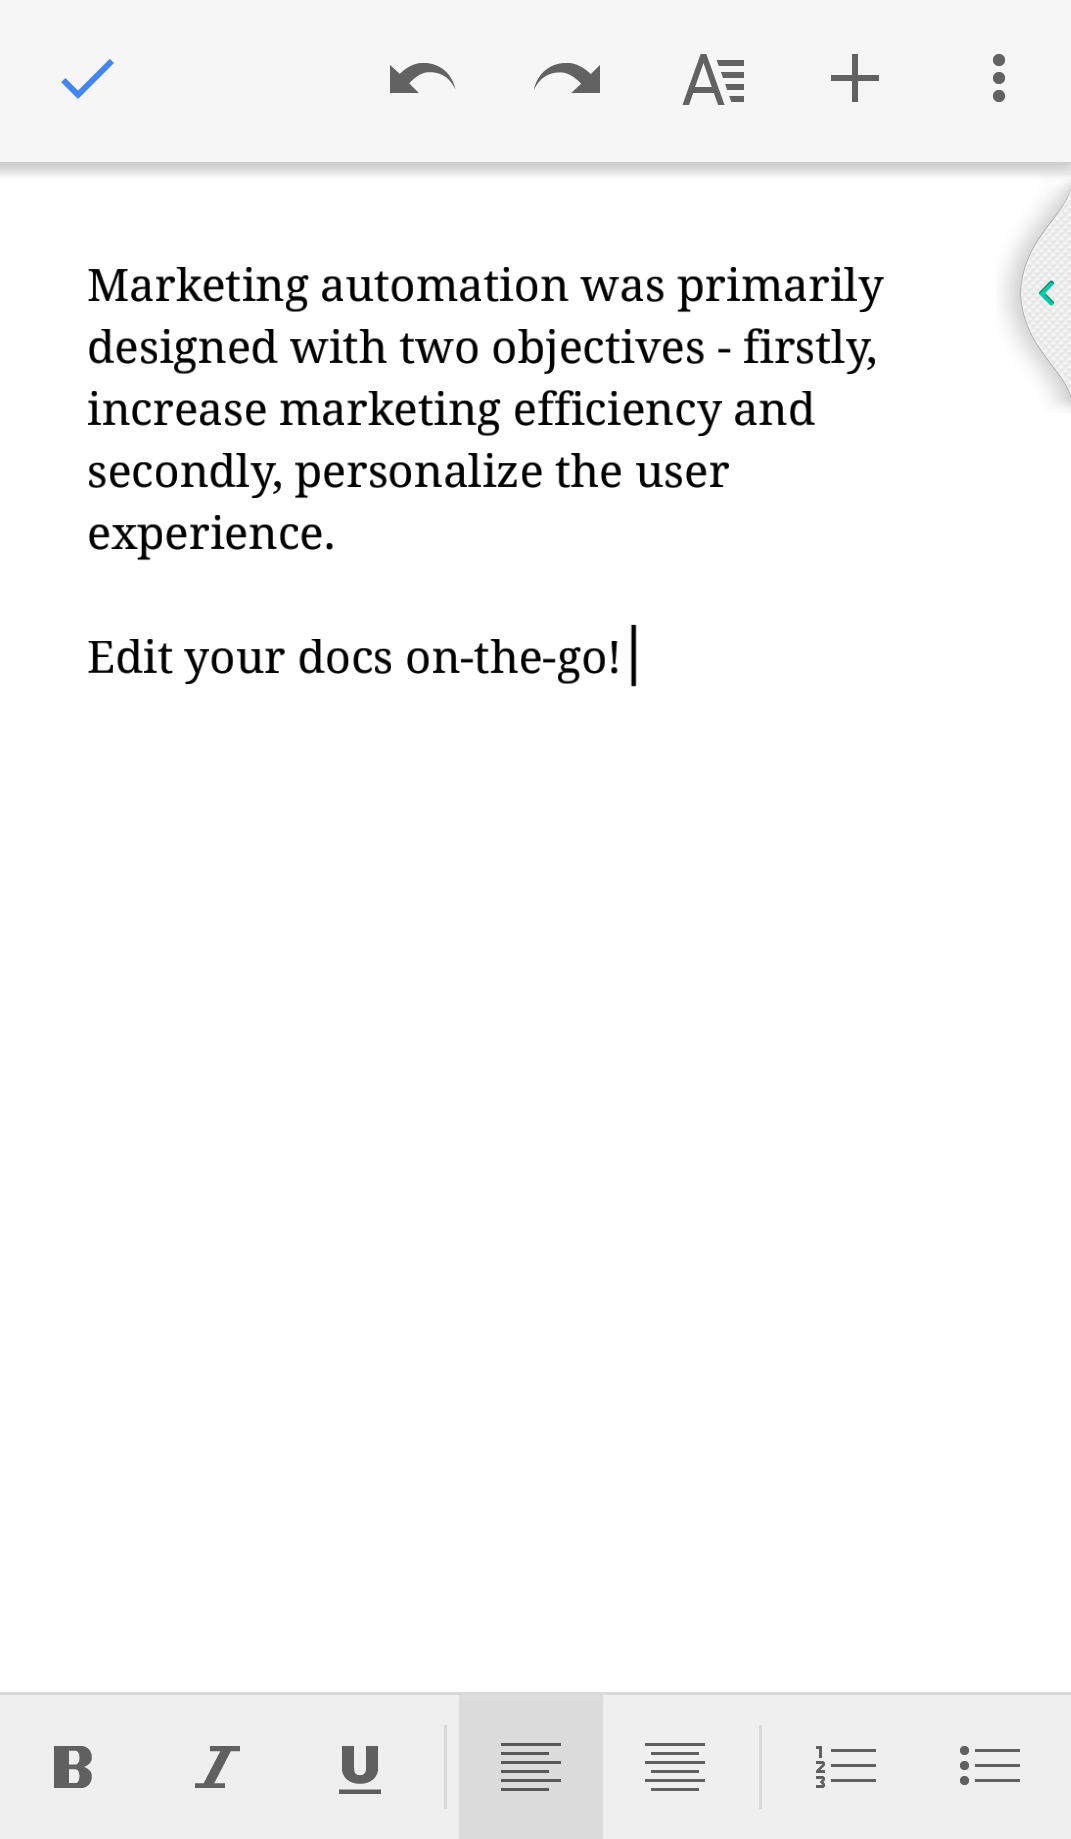
Google Docs provide a compact display of a number of editing options for suitable use on smaller screens. To edit, tap the blue button in the bottom corner, your document will shrink down and only the essential elements will be there:
- Keypad
- Editing options – bold, italic, underline, Justification settings and two list buttons.
- On the top of the screen, a range of editing options will be available from Undo and Redo buttons, adding graphics and the formatting button (A)
Google Docs allows you to drag and drop text, making it easy on your fingers and your keypad. Android and iOS users can insert and edit headers and footers and at the same time add page numbers, customize page size, orientation, and color.
2. Add and resize images
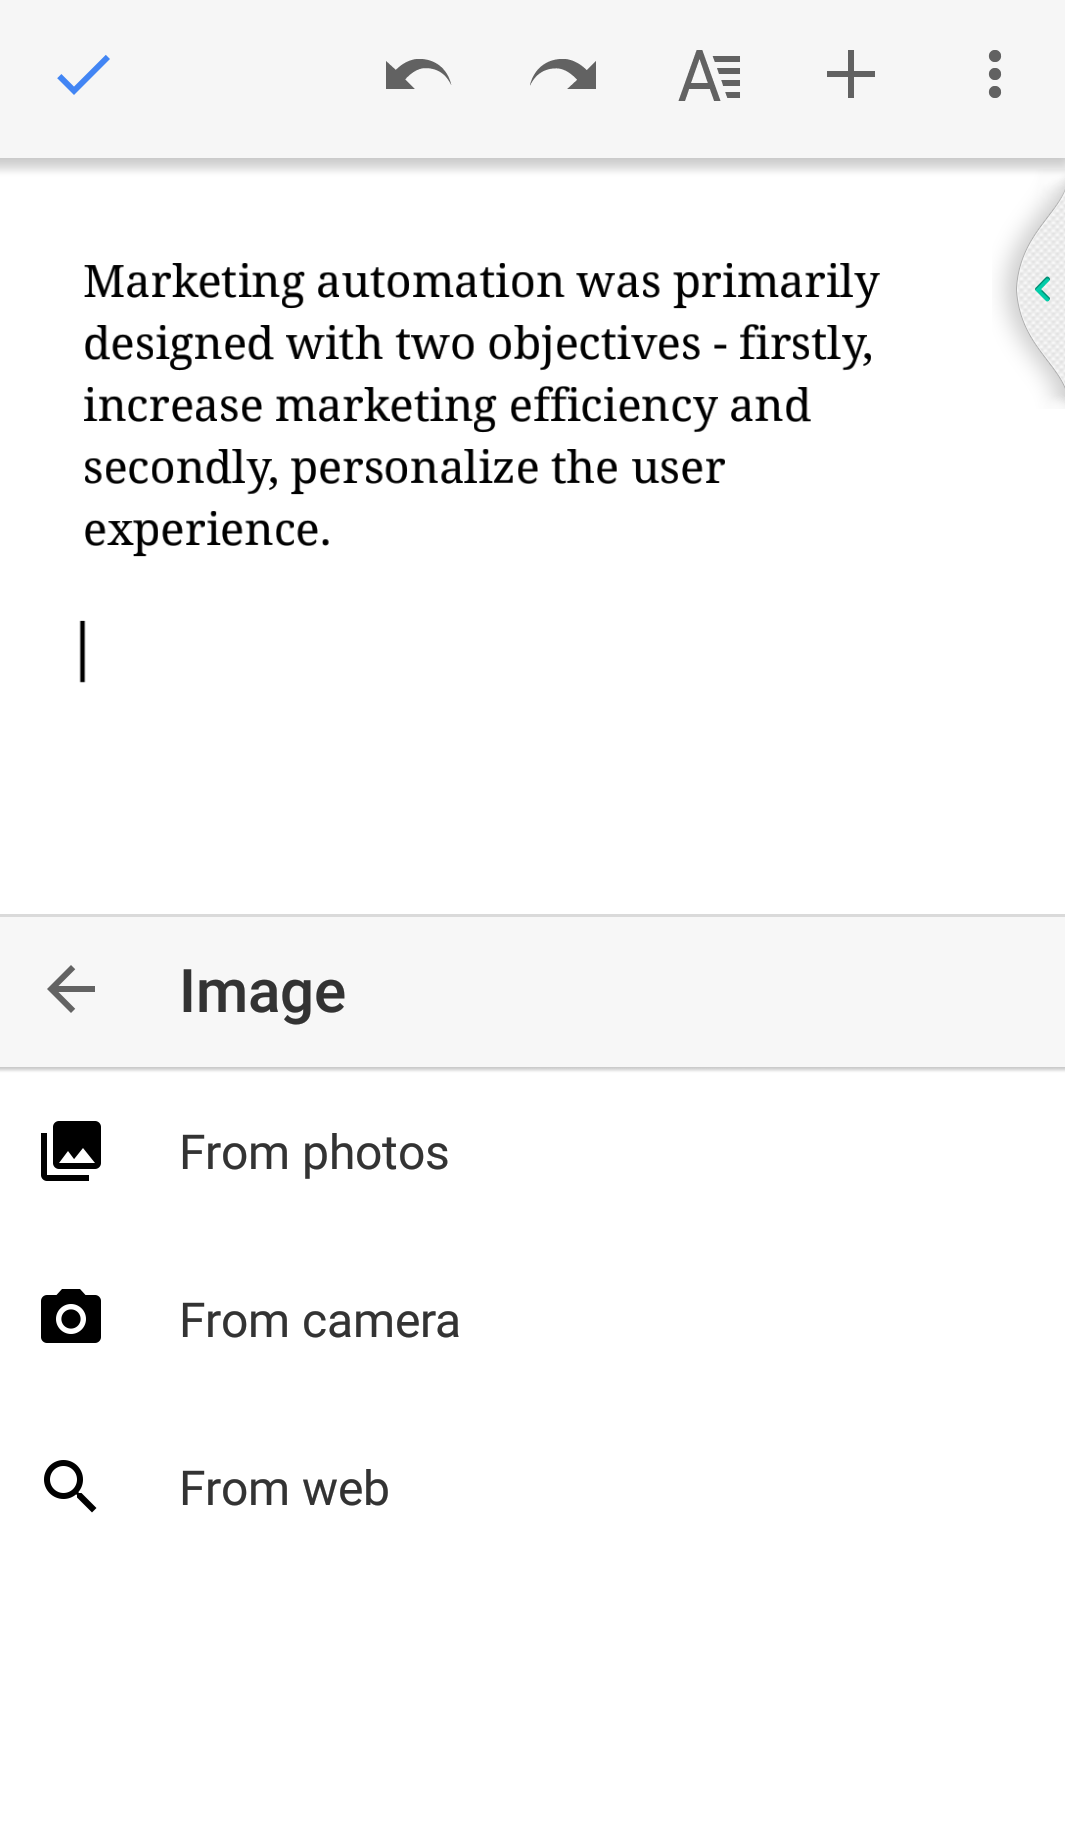
Easily add images to Google documents by selecting Images from the compact display option of editing tools, search from a personal gallery of images or the web and without leaving your document, click on the image you wish to insert.
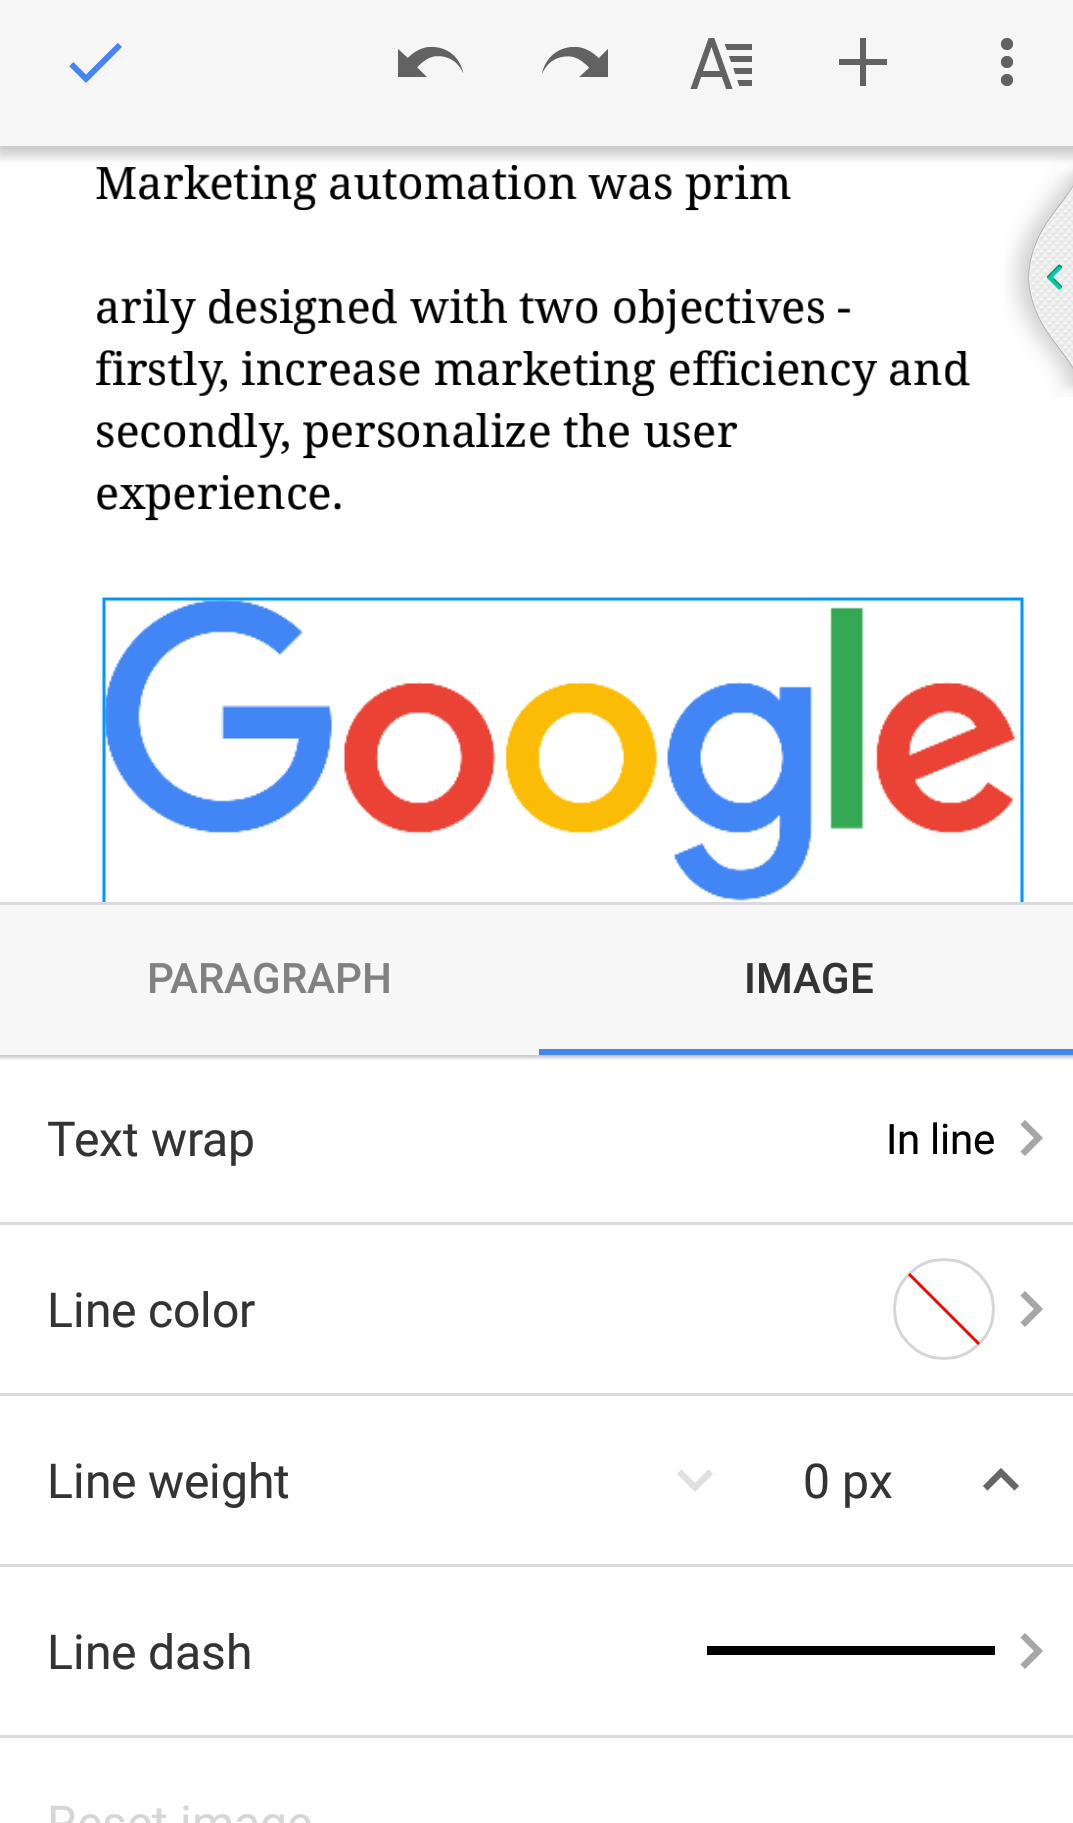
Using Google Docs mobile app, resize, move and rotate images as well as change their text wrapping and border styles, this feature is available on both Android and iOS platforms.
3. Add-ons
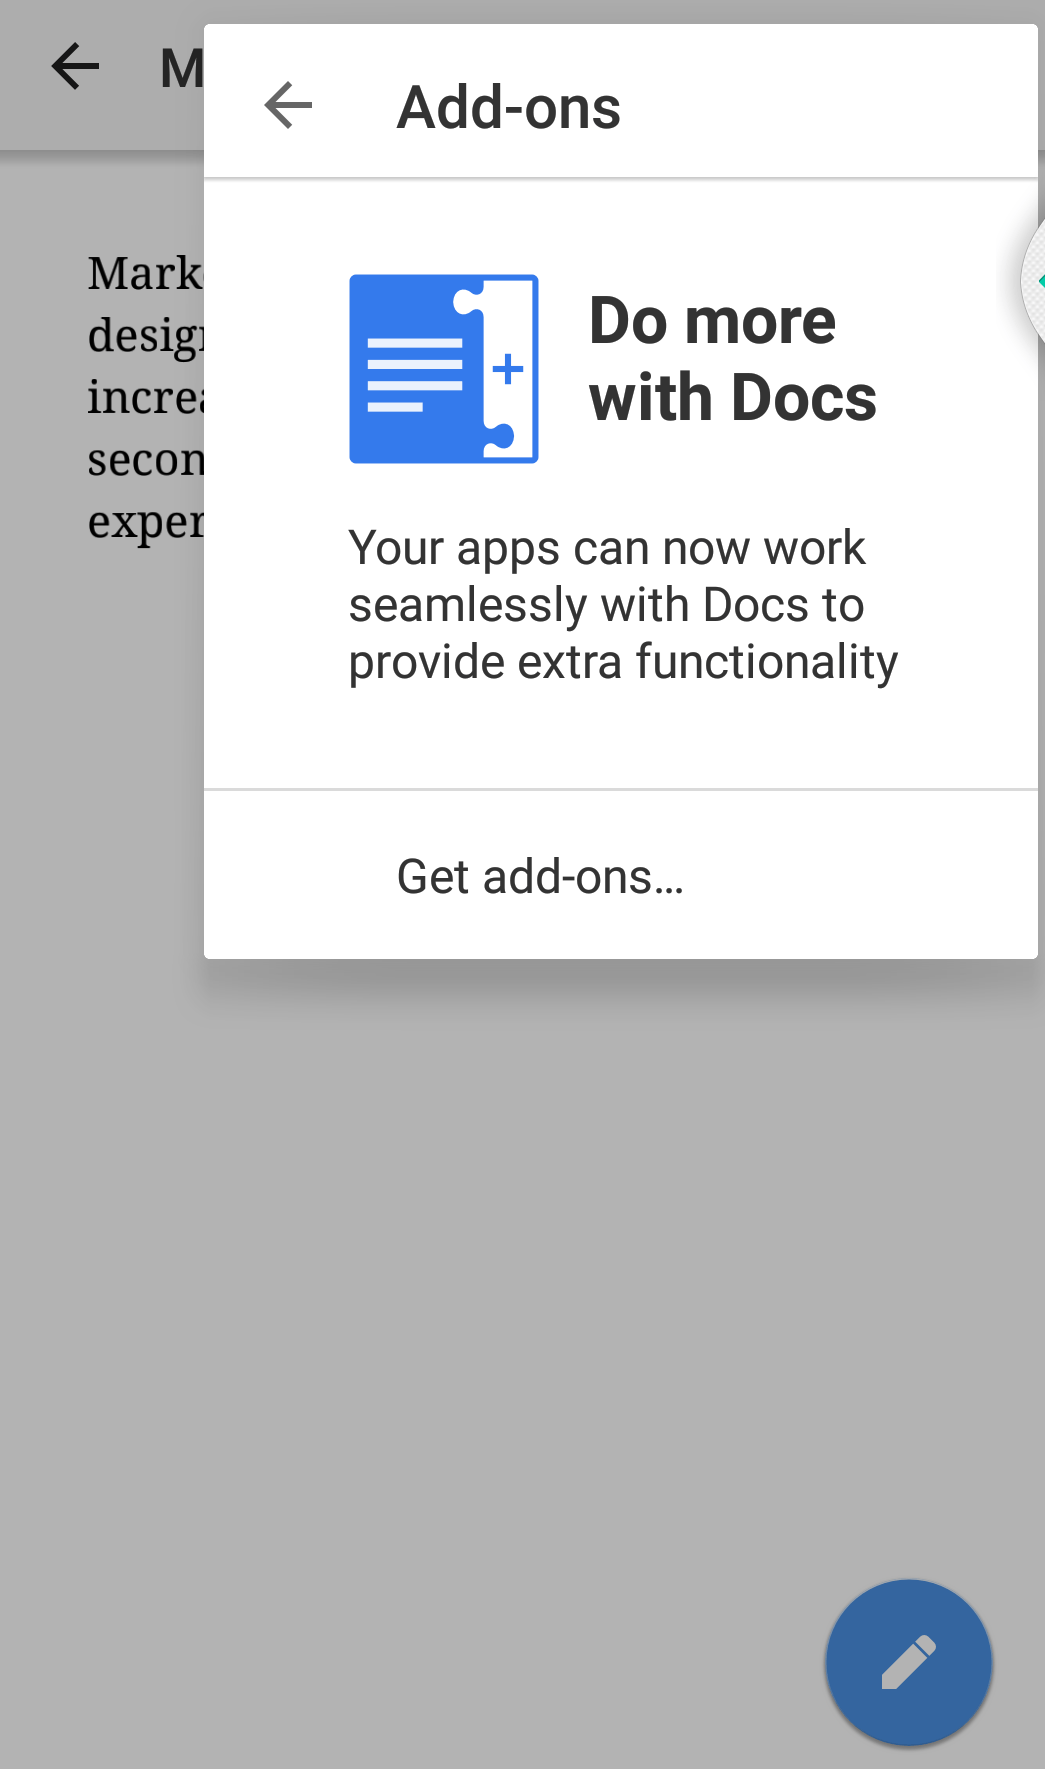
To enhance the omnichannel experience and at the same time increase productivity between multiple channels, Google provides Add-ons for Google Docs mobile app (Android). Here are some of the third party applications which can expand the utility of your Google mobile documents:
- Scanbot – If you need to edit a hard copy document, scan the documents to not only insert the contents but edit the text as well.
- DocuSign – By enabling electronic signature, send signed document(s) through your mobile with just a click. Save the signed documents on your mobile for your reference.
- PandaDoc – Need to get a proposal signed so as to send it to the client at the earliest, Now with just your fingertips, send a Google document for signature instantly from your mobile phone.
4. Voice Typing
One of the major drawback perceived that traditionally was a sore grape among mobile users was the difficulty in typing on a smaller keypad as compared to a spacious keyboard on a desktop. Voice typing feature solves this grievance by enabling to type text through speaking.
By tapping on the microphone icon as seen on the left side of the space bar on your Android keypad, activate voice typing and turn your speech into text. For iOS, use Dictation, it is an app when integrated with Google Docs mobile app provides voice recognition facilities.
5. Offline Mode
Google lets you work on documents from your mobile when there is no internet connectivity, by enabling offline mode on the Google Docs mobile app, for both Android and iOS.
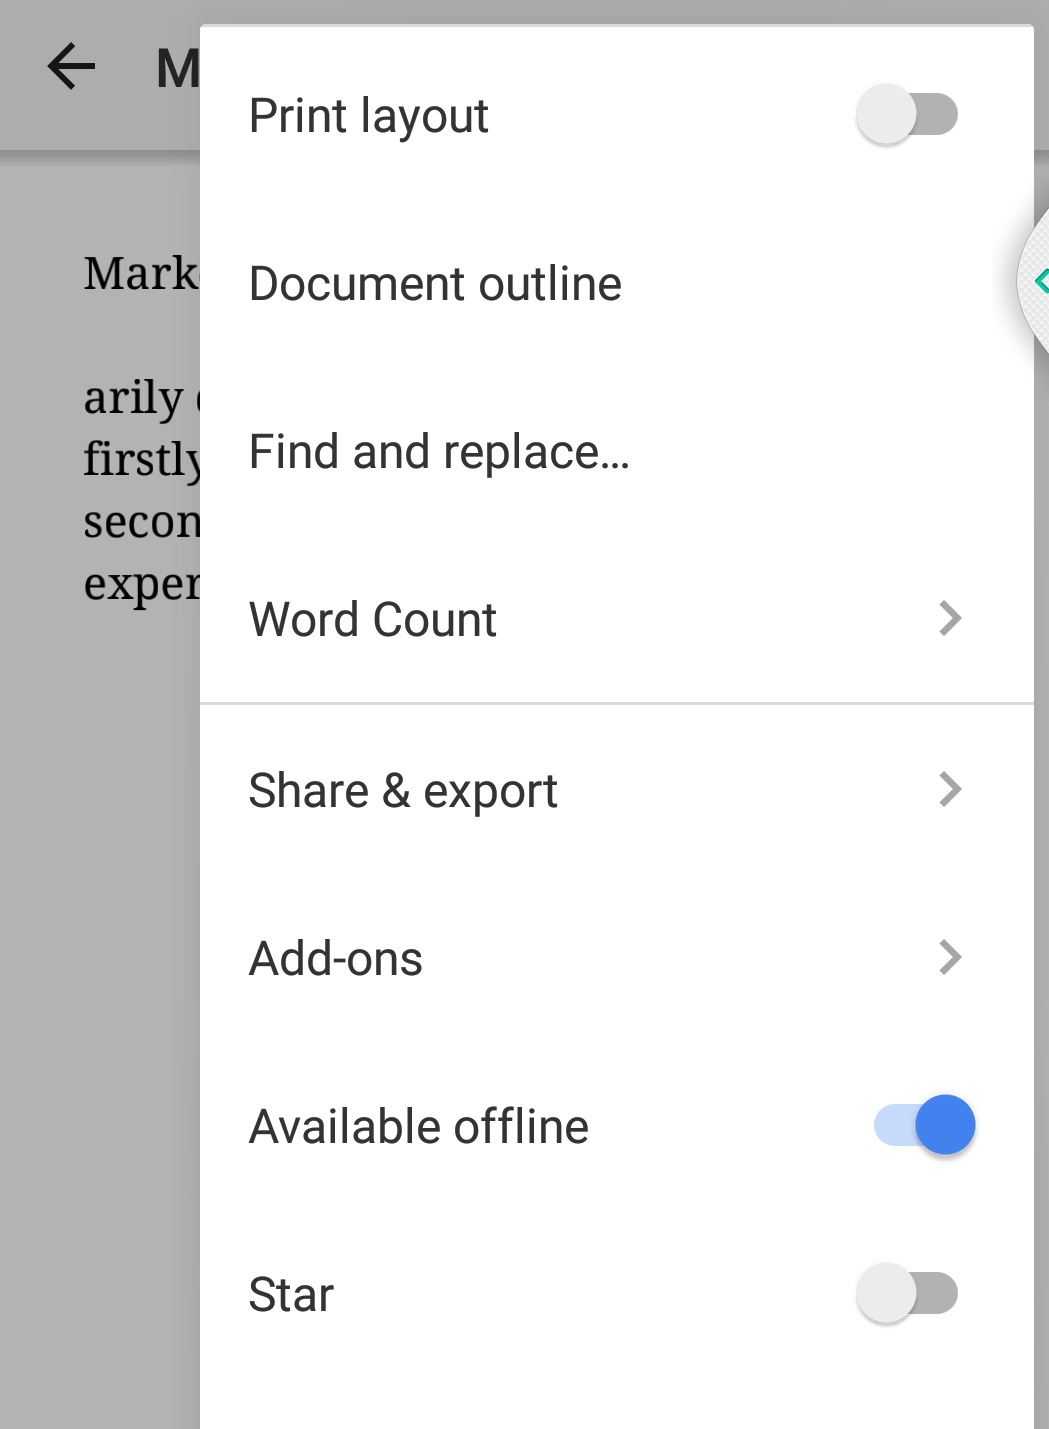
Google Docs mobile app does allow you to work offline but unlike desktop where you can sync offline capabilities for the entire Google Docs, here you can apply offline mode on file to file basis. T0 enable offline mode, on the main screen of the app, go to the three dots (menu) and select Available offline.
Once you have selected a particular file to be offline enabled, that file will be downloaded and the offline version of the file will be stored in your mobile/memory card. To see all the offline files, just swipe on the left edge of the screen and choose Offline. Similar to its desktop version, the next time the mobile device gets internet access, all edits made in offline mode will be auto-synced.
Google Docs for Slack
Shuffling between platforms is a painstaking process, one which can downplay the productivity of any team. To ease the burden of moving haphazardly between different applications, Slack has provided integration with Google Docs, enabling a seamless communication between the two platforms.
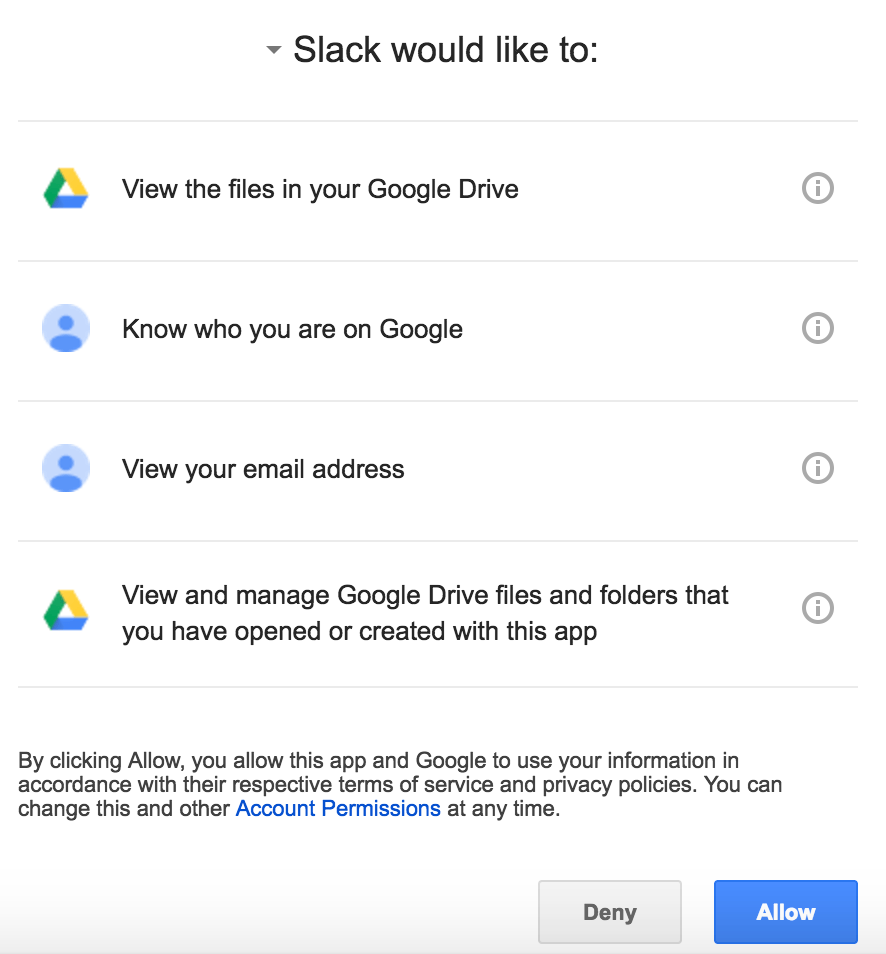
Once Google Drive is integrated with Slack, users can create and share Google documents indigenously within Slack, this makes team communication economical. To set up a Google Drive for your team, follow the steps:
Step 1 – Go to the Google Drive App Directory page.
Step 2 – Click Install, next to the team name.
Step 3 – Select Authenticate your Google Drive account
Step 4 – On your Google Drive, click Allow to authenticate with Slack.
Once Google Drive app is installed in Slack, follow these steps to create Google documents straight from Slack.
Step 1 – Click the + icon, left to the message box.
Step 2 – Select Google Docs file and choose a file type, give a title for the document.
Step 3 – Tick Share in the checkbox, choose the location for where the file needs to be shared.
Step 4 – Click Create and a new document will open up.
Go a step further in amplifying integration capabilities between Slack and Google Docs by using Zapier. Get notifications on Slack, whenever a new Google document is created or shared with a team’s folder. Manage your entire workflow by taking instant action, without having to switch to Google Docs.
To get more out of your Slack, couple efficiency with the consistency of communication by adopting a robust Slack etiquette, which will act as a clear guideline of what to do and what not to do on Slack.
Data security
Let’s be honest what good are all these features if your data is not safe in Google Docs?
Data security is a legitimate concern but thankfully Google Docs enjoys a sophisticated level of G Suite security, that means your Google documents enjoy the same safety privileges as all other Google products do. With a strong blanket of security features and continuous upgrades, Google Docs have become one of the most secured cloud platforms for storing, creating and sharing data.
1. 2-step authentication process
It’s a login security procedure for your Google Drive, it requires users to prove their identity in two different ways to access documents in the drive. This creates a strong wall between your data and unauthorized users by initiating security through a security key and a mobile phone. This way, imposters who might be privy to your Gmail password and mobile phone, will still not be able to access, since they would require a security key as well.
2. Encryption
Using leading encryption technologies like HTTPS and Transport Layer Security, your Google documents are protected by a higher level of security. The advance security monitors and adds multiple layers of data protection measures while your document moves between devices like – desktop, mobile, and tablets.
3. No backdoor access
Many of you might fear that governments and its various entities might get direct access to your documents. But, Google does not allow any backdoor access to anybody for accessing your Google Docs.
There might be cases where law enforcement agencies require access to data, in that scenario, Google’s legal team reviews the request and if they don’t see it as a legitimate concern – the request is annulled.
Moreover, Google has created built-in capabilities for safeguarding Android users from being infected by government-run-malware, this has been a move in accordance with safeguarding the right to privacy of citizens.
4. Invisible CAPTCHA
Google is not only making the security infrastructure of your Google documents complex and impossible to break but from a user interface point of view, it is making security configurations easier. In an effort to reduce human effort in setting up security parameters at the same time maintaining high data security standards, Google has created the invisible CAPTCHA.
CAPTCHA forces you to stop in order to confirm that you are a human and not a robot. Google has built an AI – Advanced risk analysis engine, which does not require you to fill up quizzes or puzzles, rather it automatically determines whether you are a human or an internet bot. This sophisticated security software does not allow internet bots to gain loopholes since the AI has the ability to self-learn machines.
5. Security is in the hands of the user
Google Docs has a wide range of security elements that keep your data highly secured, yet there are data leaks, the reason for that is – human error. Since the sharing decisions are in the hands of the user, allowing access to wrong people can compromise your data security. To avoid data losses and manage access privileges, a series of checks need to be kept in identifying and reporting personals who have access to your data.
While managing your workflow via Google Docs, mismanagement of data through human efforts has to be taken into consideration i.e. always have a plan ‘B’ to prevent any loss of data. In case any mistaken or malicious omission is caused by human error, users should always keep a backup for their Google documents from where they are able to retain records and migrate data to different platforms.
Since prevention is better than cure, equip yourself and your teams to gain more insights on how to reduce human error. One such way is by bringing everybody on the same page when managing your shared files. When everyone knows the protocols of providing access permission, the chances of human errors take a backseat.
Conclusion
Hopefully, this guide was helpful and covered every aspect of what Google Docs can offer, nonetheless, if you still think we missed out on any important feature then let us know, we would love to hear from you.
 Skip to content


