
Table of contents


Turn Gmail into a collaborative hub

If you are a G Suite user, Google Docs is probably one of the most used apps on your list. We at Hiver are also big fans of Google Docs.
In fact, this very post was written on Google Docs, along with all our other blog posts. We love Google Docs so much that we wrote a comprehensive guide explaining a lot of Google Doc’s features.
But Google moves fast, and they have added a lot of new tricks up their sleeve that we couldn’t help write another post. Here are 15 more ways you can make Google Docs work better for you.
Table of Contents
- Easily find images (that you are allowed to use)
- Add some cool new fonts
- Copy formatting
- Suggesting mode
- Create your own shortcuts
- Use the Compact Mode
- Bookmark your locations in the doc to make scrolling easier
- Google Docs spelling and grammar checker
- Check version history in a jiffy
- Set expiration dates
- Assign people action item through comments
- Help new Google Docs users create a copy or preview a document
- Move your document to a new folder with ease
- Instantly create a new Google Doc
- Copy document style across the document
Easily find images (that you are allowed to use)
If you are in the business of writing for the web, you know how important images are for your blog post or website.
But finding images that are licensed for reuse is a major roadblock, and we usually spend a lot of time scouring through the internet to find that perfect image that will not get us into trouble.

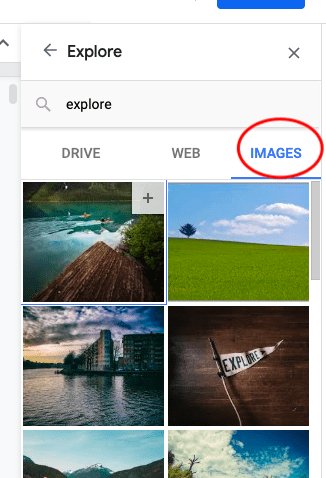
Google saw this problem, and as they usually do, went ahead and solved it in a very creative way. You may all be familiar with the Explore button which is neatly tucked away at the bottom right side of the screen.
Open the Explore tab and you see a Search bar which you can use just like a regular Google search bar. Now go to Images and search the category of images you want to see and voila, you get a series of images that are all licensed for commercial reuse.
Add some cool new fonts
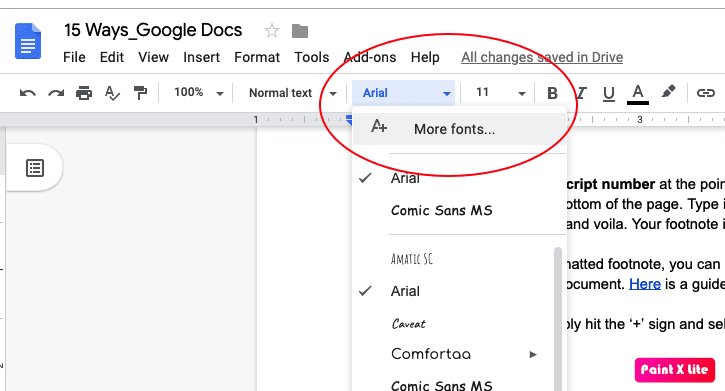
Arial is the default font that Google Docs uses, and although fonts was an issue with earlier versions of Google Docs, Google has significantly increased the number of fonts that you can use.
To access all the fonts that are available, go to the font dropdown menu on the Google Docs toolbar (It most probably says ‘Arial’, since that is the default font for Google Docs).
You get a big set of fonts that are available by default for Google Docs.
Click on the Show > All fonts to display all the available fonts. You can now sort through categories that make navigation easier.
If you want even more fonts, you can always use an add-on like Extensis.
Copy formatting
Google Docs lets you copy the formatting from one part of your document and apply it to any other part of the document or another document altogether. Neat isn’t it?
It’s not as complicated as it sounds. To begin, select the part of the text where you have proper formatting and you wish to copy formatting from.
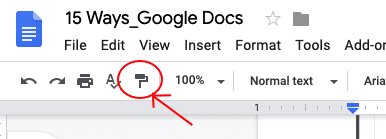
Next, go to the Paint Format button located on the top left portion of your doc, as shown here:

Once this is done, highlight the portion of the text where you want the formatting to be applied and bam, you are done.
If you double click the paint button, you can change the formatting in multiple places within the document. This feature comes in handy when you have a large document and need to apply the format at multiple places.
Suggesting mode
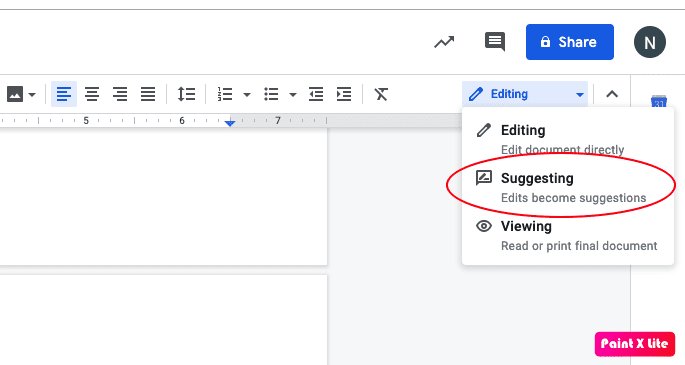
Suggesting mode, as the name suggests, is a feature available in Google Docs when you don’t want to edit the actual document, but would like to leave your suggestions which the document owner can either accept or reject.
To start suggesting mode, simply head on to the editing tab on the top right corner of your document, and select ‘Suggesting’ from the dropdown menu, like this:
The Suggesting mode comes in really handy when you have multiple people working on the same document.
For instance, if you have a new member of your team reading a blog post ready to go on your website, you can have him ‘suggest’ changes instead of actually editing them in the document, making it easier to keep track of the changes.
The document owner can either ‘Accept’ the suggestions, with a simple tick on the document, or ‘Reject’ the suggestion.
Create your own shortcuts
Do you have a particular phrase that you use repeatedly in your document or a phone number that features prominently?
If you don’t want to type out the entire text, Google Docs allows you to create custom keyboard shortcuts that you can apply to make things move faster!!
It’s simple enough to use. Head over to Tools > Preferences as shown:
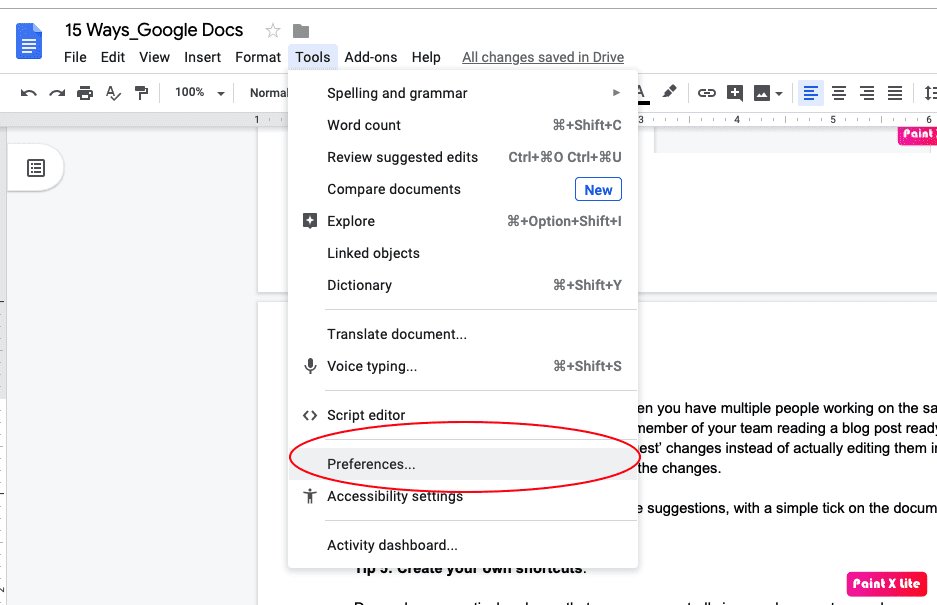
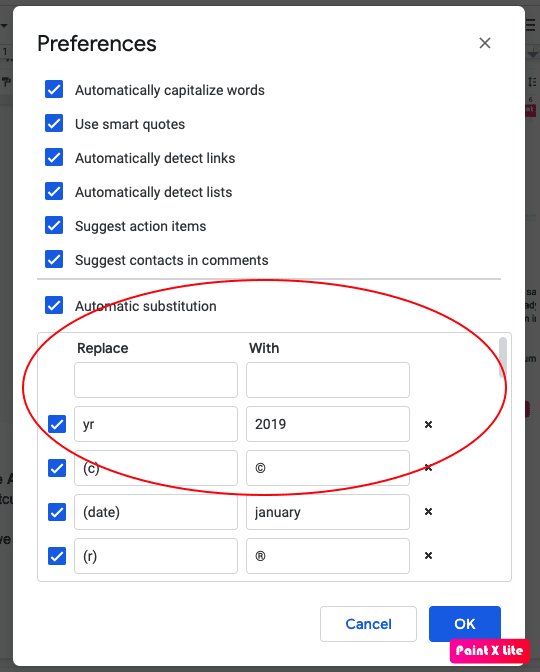
Make sure the Automatic Substitutions is checked, and now type in the text that you want to use as a shortcut.
In this case, we are using the word ‘yr’ as a shortcut, replacing every instance of ‘yr’ with ‘2019’ as shown :
So the next time you are typing something fast, remember you can use a Google Docs shortcut to speed things up.
Use the Compact Mode
If you are running low on Screen space, Docs lets you hide the Menu bar with a simple keyboard shortcut. Simply hit “Ctrl + Shift + F” and the menu bar disappears.
This feature is especially useful if you want to type on your laptop when you are on the move and don’t want the document title or the Menu bar on the screen, giving you more breathing space.
Bookmark your locations in the doc to make scrolling easier
Bookmarks are a great way to navigate your lengthy Google Docs quickly. Google makes it super easy to insert a bookmark, and you can then link it to a section of your document like you would do any other weblink.
To use a bookmark, go to the section of the text that you want to insert the bookmark into.
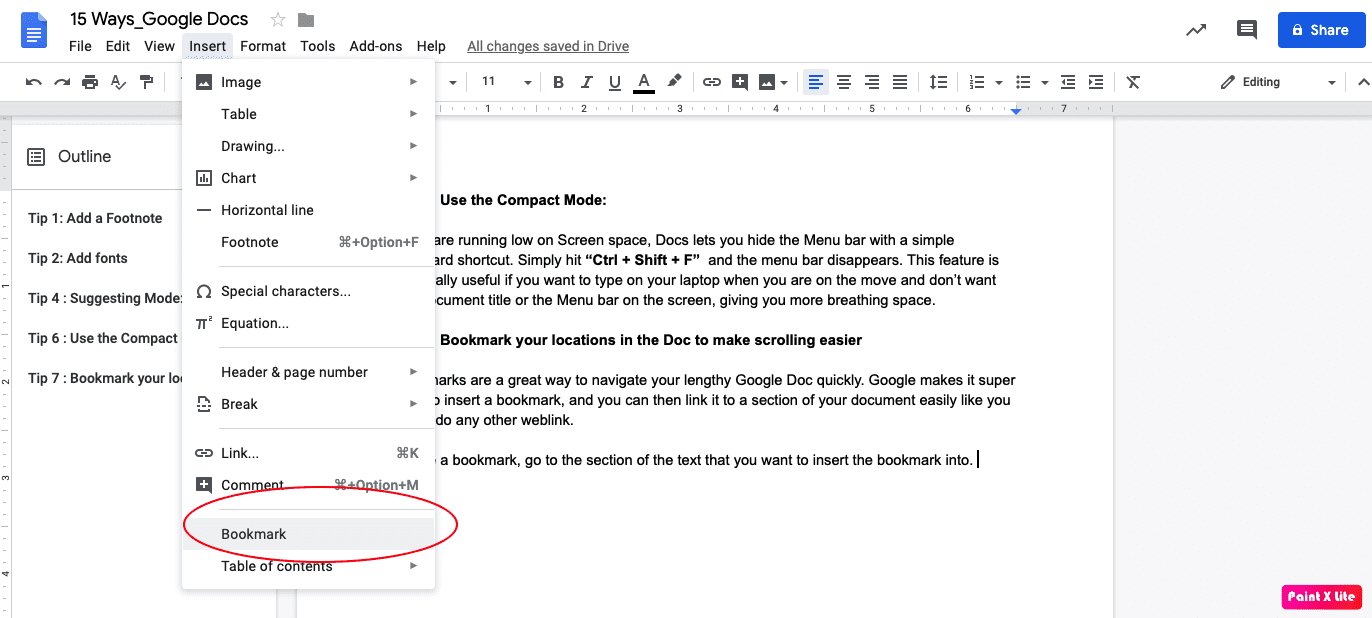
Click Insert> Bookmark, a small icon appears next to the portion of the text that you have just highlighted with the option of adding a Link.
Select Link and now navigate to the portion of the document which you want the link to redirect to.
Highlight the text you want to redirect your link to and select Insert > Link, just like you would insert a hyperlink to another website. Now, in the dropdown menu, select Bookmark and choose the Bookmark that you have just created, and you are done.
Use Bookmarks if you want to create a table of contents in your document, or to help others who are working on the same document as you are to navigate easily.
Google Docs spelling and grammar checker
Google rolled out a Spelling and Grammar check feature earlier last year that is powered by machine-learning algorithms that can catch those pesky grammar mistakes which invariably slip in every now and then.
If not comfortable using an add-on extension such as Grammarly, Google’s spell checker will come in really handy when you want to make sure your document is error-free.
To enable Spelling and Grammar check, go to Tools > Spelling and Grammar as shown.
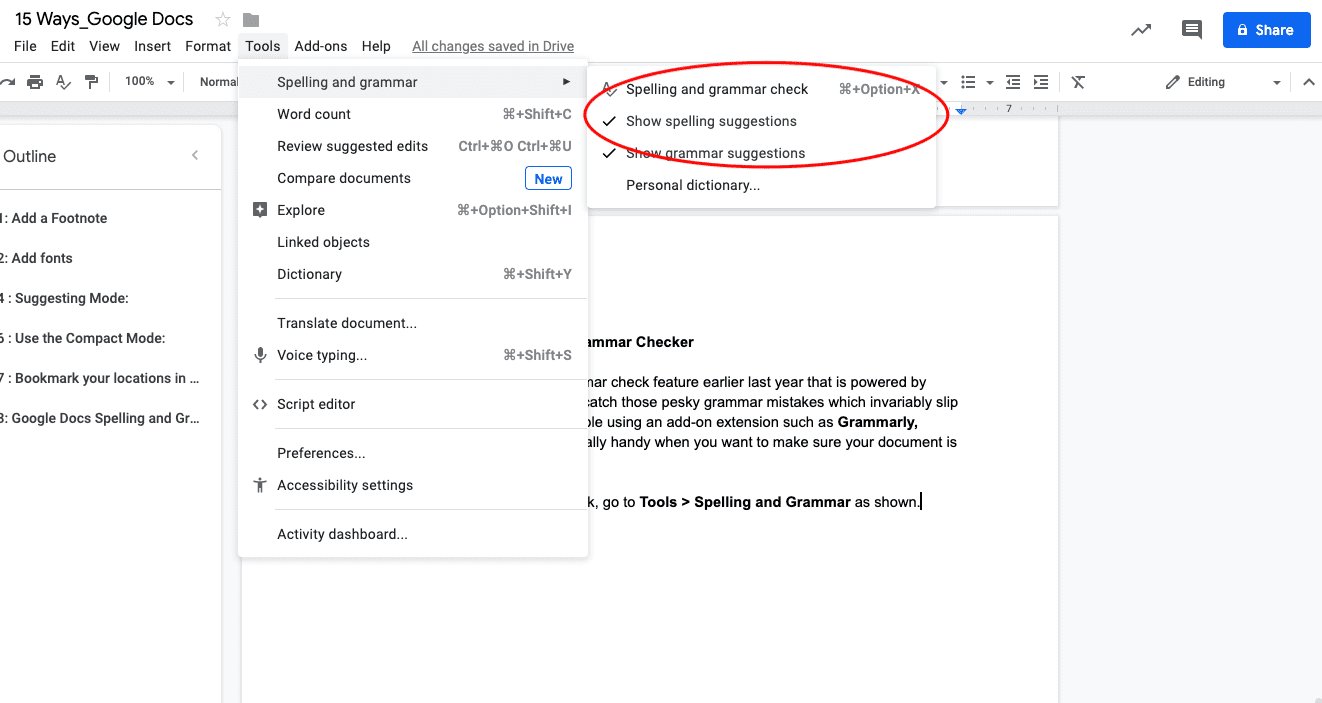
Check the “Show Spelling suggestions” and “Show Grammar suggestions” and you are good to go. You can also do a manual Spelling and Grammar check to see if your document is spick-and-span.
Check version history in a jiffy
Google Docs is great for collaboration, but one of the most powerful and underrated features of Docs is Version history.
Version history not only helps you restore a document to an earlier version of the document that you felt is better but also lets you see who among your teammates have made changes to the document.
To access a document’s history, go to File > Version history. You can also use the shortcut ⌘ + Option + Shift + H on a Mac to go to version history.

On the right-hand portion of the screen, there is a list of people who have worked on the document, with the date and time that they have made the edits.
Clicking on the version history lets you instantly see what are the changes that have been made, highlighted right on the document.
You can even name the various versions of the document by clicking on the three vertical dots next to the version and selecting ‘Name this Version.’
Not happy with the current version of the document? Simply select a version that you like from the version history and Google lets you “Restore this version.” Great isn’t it?
Set expiration dates
When you are working on tight timelines, it comes in handy to limit each person’s access to a document for a pre-defined period of time.
Google Docs lets you select expiration date so that the person you are sharing the document with has access to it only within the timeframe you have set.
To set up an Expiration date for a document, go to Share and click the Advanced tab in the window to see a list of people you have shared with.
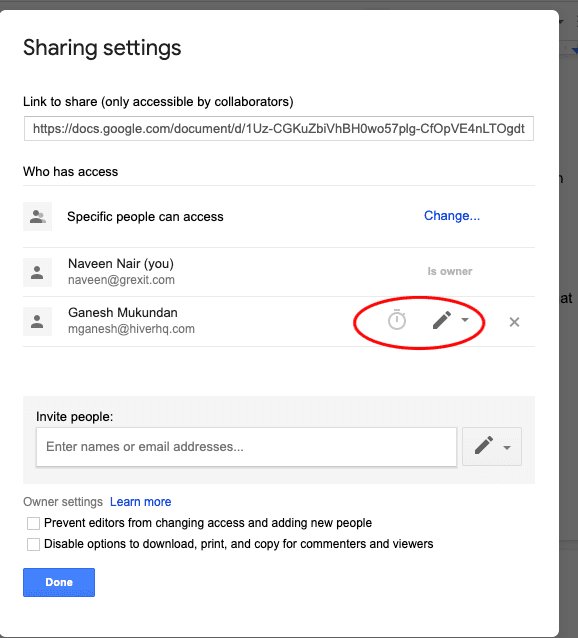
Click on the time symbol and Google lets you dictate how long the person you have shared the document with has access to this document.
You can set a custom range for the time you want the document to be shared with the person, or can select from Google’s range of 7 days or 30 days.
Note that when you set an Expiration date, he can only make comments or suggestions and cannot edit the document.
Assign people action item through comments
When collaborating with teammates over a document, there will be times when you want someone from your team to work on a particular part of the document.
Instead of sending that person an email or chat, Google lets youassign the person an action item right within the Comments window.
Open the Comments window and hit the ‘+’ sign before beginning to type and you will see a list of people you can assign the action item to. Click on their name and select Assign as shown:
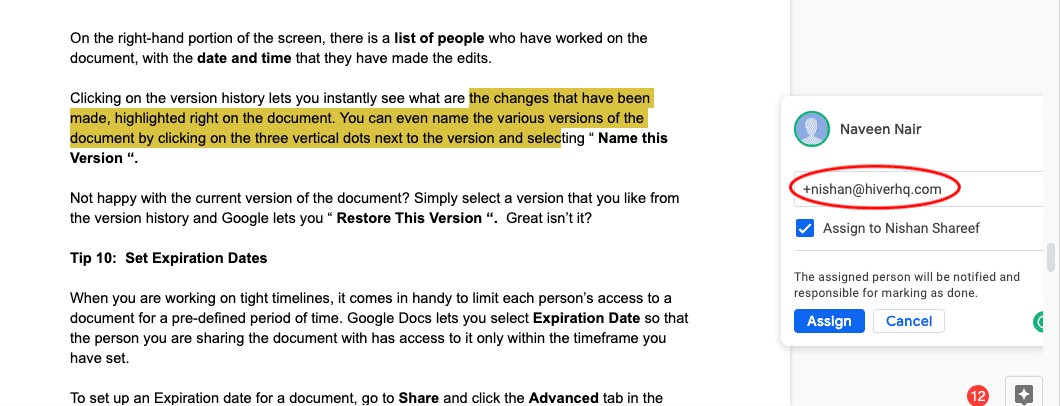
The person who you assign the item to gets a separate notification and he will have to mark it as done once he completes his action.
This is a great feature for distributed teams who are working on the same document but are in different time zones and cannot collaborate real-time.
Help new Google Docs users create a copy or preview a document
When you are sharing a document with a person who is new to the entire G Suite ecosystem, he may not be familiar with how to make a copy of the document. You can help out this newbie with this simple tip.
Select the URL of the document you want to share, and in the last portion of the URL, replace ‘edit’ with ‘copy.’
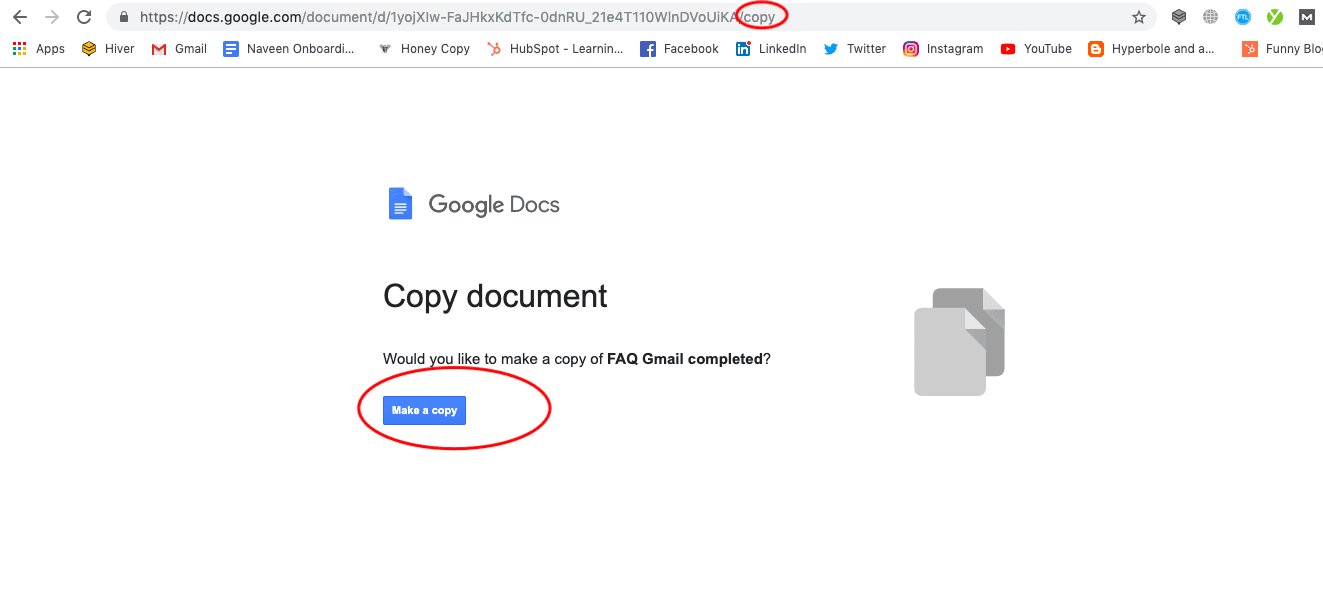
When you share this link with anyone, Google prompts the person to ‘Make a Copy’ of the document, leaving the original document intact.
If you want the receiver of the document to only have a preview, replace the last part of the URL with ‘preview.’
Move your document to a new folder with ease
Often times, a new document that we have started working on exists in the shared folder and the process of moving it to a separate folder involves navigating through all the documents and selecting our document of interest.
Google foresaw this problem and, as usual, came up with an innovative approach to address this. Right next to the name of the document, there is a Folder option that allows you to move your document.
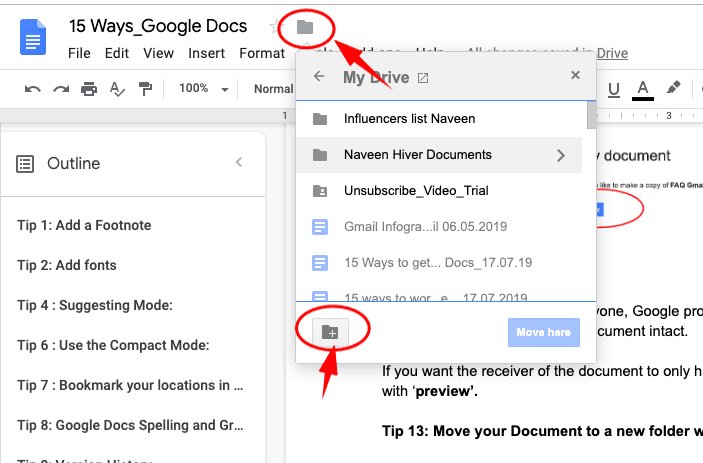
You can now move the document to an existing folder or even create a new folder where you want the document to be moved. A time saver if ever there was one!
Instantly create a new Google Doc
Google lets you create a new document instantly without even having to go to your Google Drive. This little tip helps save a lot of time when you are in a hurry to start a fresh document.
Just hit http://doc.new in your new tab in the browser window and you are taken to a brand new document. Quick as a bullet.
Copy document style across the document
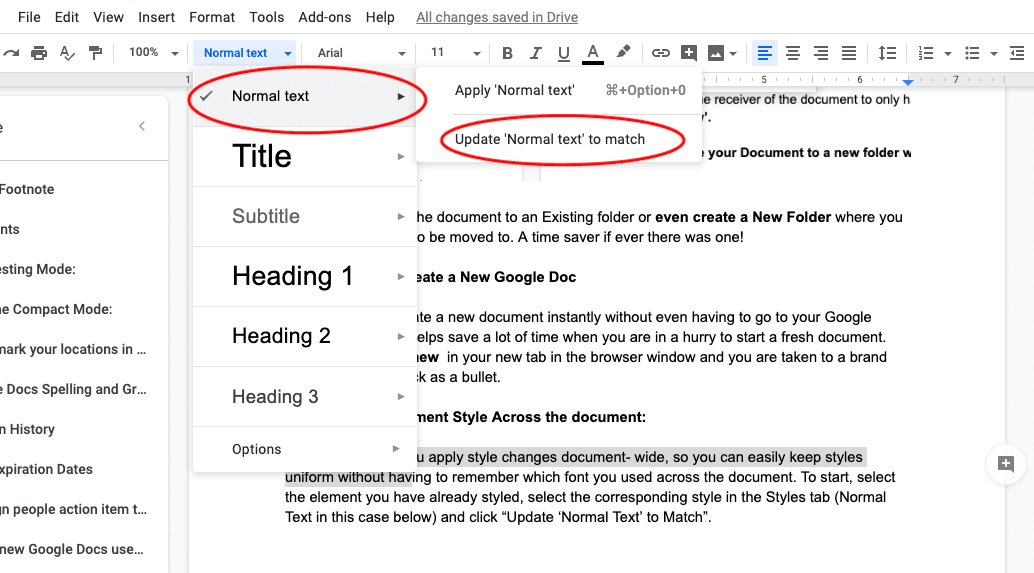
Google Docs lets you apply style changes document-wide, so you can easily keep styles uniform without having to remember which font you used across the document.
To start, select the element you have already styled, select the corresponding style in the Styles tab (‘Normal Text’ in this case below) and click “Update Normal Text to Match.”
If you complete a document in the style that you want and want to apply that style across another document, Google makes your life even easier.
Just click the Styles tab and in Options, select “Save as my Default Style”, and Google will replicate your document style to all the new documents that you create.
Recommended Reading
Cover image copyright